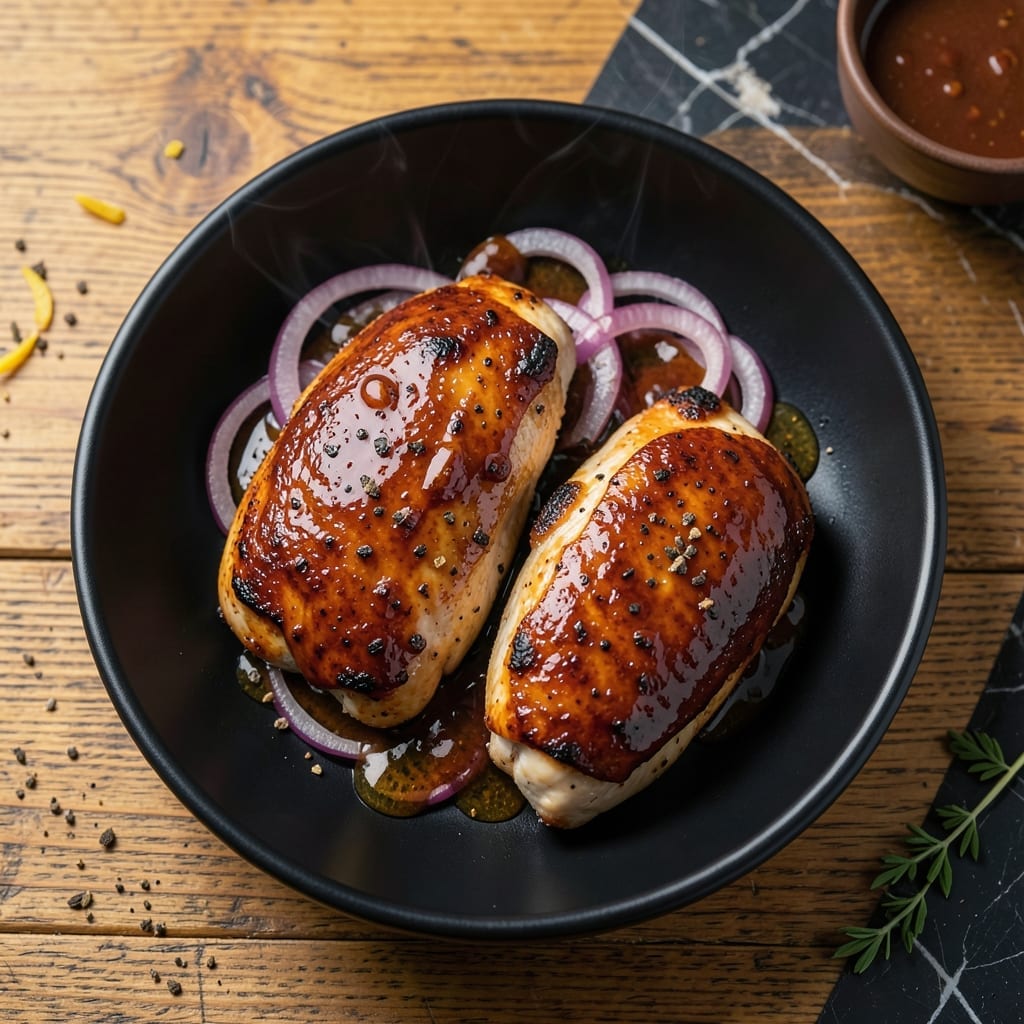
This barbecue chicken breast recipe delivers perfectly charred, juicy results every time. The honey glaze creates a sticky, caramelized finish that locks in moisture.
I developed this method after years of competing in local BBQ events. The key is precise timing and a two-zone fire for even cooking without drying out the meat.
Ingredients for Barbecue Chicken Breast
A few quality ingredients deliver competition-level flavor with that signature sticky glaze.
| Ingredient | Amount | Notes |
|---|---|---|
| Boneless, Skinless Chicken Breast 🍗 | 2 lb | Pounded to even thickness |
| Honey 🍯 | ⅓ cup | Pure, unfiltered preferred |
| Barbecue Sauce 🍖 | 1 ½ cups | Your favorite brand or homemade |
| Olive Oil 🫒 | 2 tbsp | For brushing chicken |
| Kosher Salt 🧂 | 1 ½ tsp | Divided for seasoning |
| Black Pepper 🌶️ | 1 tsp | Freshly ground preferred |
| Garlic Powder 🧄 | 1 tsp | For dry rub |
| Onion Powder 🧅 | 1 tsp | For dry rub |
| Smoked Paprika 🌶️ | 1 tsp | Adds depth of flavor |
| Apple Cider Vinegar 🍏 | 1 tbsp | Balances sweetness |
| Brown Sugar 🍚 | 2 tbsp | Light or dark variety |
| Worcestershire Sauce 🍖 | 1 tbsp | For umami boost |
[recipe_ingredient_scaler]
The chicken quality matters most here. Boneless, skinless breasts from Costco or Whole Foods are consistently tender and uniform. Look for pieces that are similar in size so they cook evenly. Pounding them to an even thickness (about 3/4 inch) is non-negotiable—it prevents dry spots and ensures every bite is juicy. If buying in bulk, portion and freeze what you won’t use within 2 days.
No honey? Maple syrup or agave work in a pinch (use the same amount). For the barbecue sauce, Stubb’s or Sweet Baby Ray’s are crowd-pleasers, but any thick, tangy sauce will do. If you’re out of smoked paprika, regular paprika plus a pinch of liquid smoke gets you close. The apple cider vinegar balances the sweetness—white vinegar works too (just add a splash of lemon juice for brightness).
Store raw chicken in its original packaging on the bottom shelf of your fridge—use within 2 days for peak freshness. The honey glaze keeps indefinitely in the pantry. Leftovers? Shred for sandwiches or salads within 4 days, or freeze for up to 3 months.
Why You’ll Love This Recipe
- One Pan Magic: I love that this comes together with just a bowl for marinating and a pan for cooking—no complicated steps.
- Sweet & Smoky: The honey in the marinade caramelizes with the barbecue sauce, creating that perfect sticky-sweet glaze.
- Weeknight Hero: Honestly, it’s my go-to for busy evenings when I need something quick but still flavorful.
- Budget Stretch: A few chicken breasts, a bottle of sauce I already have, and it feeds us for two meals.
Step-by-Step Instructions for Barbecue Chicken Breast
This method delivers perfectly caramelized, juicy chicken with distinct grill marks and balanced sweetness.
Step 1: Prepare and Season the Chicken
Place the 2 lb boneless, skinless chicken breast between sheets of plastic wrap and pound to an even ½-inch thickness using a meat mallet. This ensures even cooking and prevents dry spots.
Pat the chicken dry with paper towels, then brush both sides with 2 tbsp olive oil. In a small bowl, combine 1 tsp garlic powder, 1 tsp onion powder, 1 tsp smoked paprika, 1 tsp black pepper, and 1 tsp kosher salt. Rub this mixture evenly over all surfaces of the chicken. Let it sit at room temperature for 15 minutes to allow the seasoning to adhere.
Step 2: Make the Honey Barbecue Glaze
In a medium bowl, whisk together 1.5 cups barbecue sauce, 0.33 cup honey, 1 tbsp apple cider vinegar, 2 tbsp brown sugar, and 1 tbsp Worcestershire sauce until fully combined. The vinegar balances the sweetness, while the Worcestershire adds depth.
Taste and adjust seasoning if needed, though the blend should be tangy, sweet, and slightly smoky from the paprika in the dry rub. Set aside ¼ cup of this glaze for basting; you’ll use the rest for dipping or additional coating.
Step 3: Grill the Chicken to Perfection
Preheat your grill to medium-high heat (about 400°F). Clean and oil the grates thoroughly to prevent sticking. Place the chicken on the grill and cook undisturbed for 5-6 minutes per side, or until you see distinct grill marks and the internal temperature reaches 160°F.
During the last 2 minutes of cooking, brush the chicken generously with some of the reserved glaze. Avoid brushing too early, as the sugars in the glaze can burn. Close the grill lid after each application to help the glaze caramelize.
Step 4: Rest and Finish with Glaze
Transfer the chicken to a clean platter and let it rest for 5-10 minutes. This allows the juices to redistribute, ensuring every bite is moist and flavorful. Tent loosely with foil if needed to keep warm.
Slice the chicken against the grain into ½-inch thick strips. Drizzle with the remaining glaze or serve it on the side for dipping. The chicken should have a glossy, slightly sticky exterior with a tender, juicy interior.
Pro Tips For Making Barbecue Chicken Breast
- Pound the Breasts: Use a meat mallet to even out the thickness to ½ inch—this guarantees even cooking so you don’t end up with dry edges and raw centers.
- Brine First: Soak the chicken in salted water for 20-30 minutes before cooking; I learned this the hard way after too many dry, stringy results.
- Skip Cold Sauce: Warm the barbecue sauce and honey mixture for 30 seconds in the microwave before brushing—it sticks better and doesn’t shock the hot chicken.
- Rest Before Slicing: Give it a solid 5-10 minutes under foil after grilling; sounds weird, but it keeps the juices from pooling on your cutting board.
Troubleshooting Great barbecue chicken breast
Uneven Cooking
If your chicken has thick and thin parts, it’ll cook unevenly. Always pound to an even ½-inch thickness first—I use a meat mallet for this. This prevents dry, overcooked edges while undercooked centers stay raw. 💡
Sticking to Grates
Clean, well-oiled grates are essential. Heat your grill to 400°F and brush with olive oil right before adding the chicken. If it sticks, don’t force it—wait another 30 seconds for a clean release.
Glaze Burning
Sugars in the glaze burn easily. Only brush during the last 2 minutes of cooking. Keep the lid closed between applications to caramelize without charring. I learned this the hard way at my first competition.
Dry Chicken
Overcooking is the biggest culprit. Pull the chicken at 160°F internal temperature—it’ll rise to 165°F while resting. Always use a meat thermometer for accuracy.
Weak Grill Marks
For those beautiful crosshatches, don’t move the chicken for at least 5 minutes per side. Ensure your grill is hot enough before starting—400°F works perfectly for me. 🔥
Glaze Too Thick
If your glaze is too viscous, thin it with 1-2 tbsp apple cider vinegar or water. This helps it spread evenly and prevents clumping on the chicken.
Nutrition Facts
Frequently Asked Questions
Why pound the chicken to even thickness?
Pounding to ½-inch thickness ensures even cooking and prevents dry spots. Thicker parts would cook slower, risking overcooked edges while the center stays raw.
Can I use bone-in chicken instead?
Bone-in works but requires 10-15 minutes more cooking time. The meat thermometer should read 165°F at the thickest part. Boneless cooks faster and absorbs glaze better.
How do I prevent the glaze from burning?
Apply glaze only during the last 2 minutes of cooking. Keep the grill lid closed between applications to caramelize without charring.
What if I don’t have a meat thermometer?
Cut into the thickest part – juices should run clear, not pink. The meat should feel firm but still springy. For safety, always aim for 165°F internal temperature.

Trained in classic French technique but raised on slow-cooked ribs and spicy rubs, she blends culinary skill with smoke and soul.
- Recipe for Boneless Pork Chops in Cast Iron Skillet: Sear and Baste to Juicy Perfection - October 3, 2026
- Recipe for Boneless Cross Rib Roast: Slow-Roasted Beef with Herb Crust - October 3, 2026
- Hamburgers in Sauce Recipe Crock Pot: Slow-Cooked Savory Delight - October 3, 2026