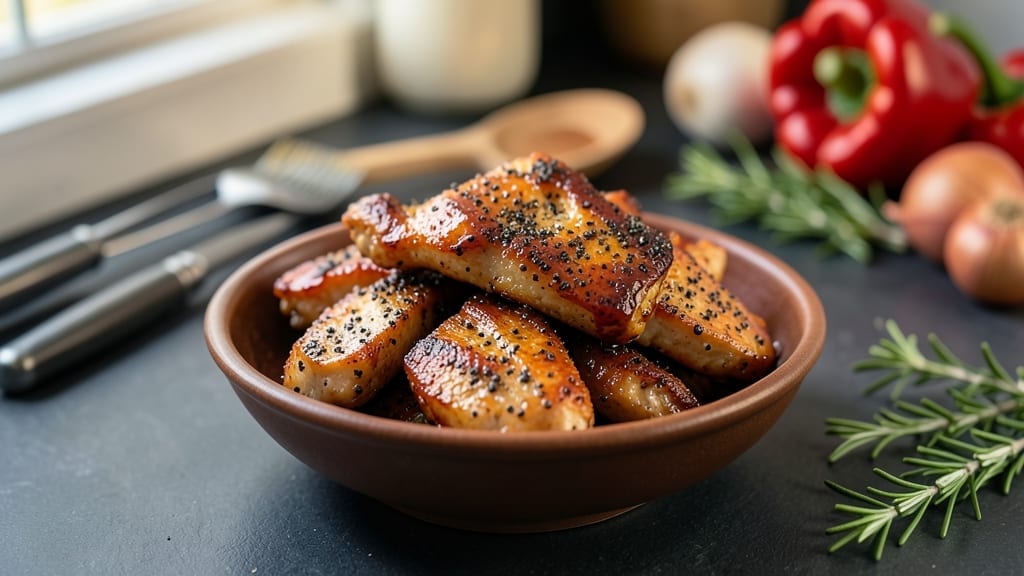
Mastering barbecue chicken strips with juicy cores and smoky crispy edges is all about precision—something I perfected after years of testing techniques at backyard cookouts. The key lies in how you prep the chicken and balance that first crisp with tender centers, ensuring every bite delivers both texture and flavor.
My method guarantees results that rival your favorite BBQ joint without requiring special equipment.
Start with bone-in chicken thighs cut into even strips—they stay juicier than breasts while developing that coveted bark. A dry rub of smoked paprika, brown sugar, and garlic powder forms a flavorful crust before hitting the heat, whether that’s a grill, oven, or air fryer.
The real secret? Cooking the strips low and slow at first, then cranking up the heat to seal in moisture while creating crispy edges.
What you’ll end up with is golden, caramelized strips that crackle with each bite while staying juicy inside—a perfect balance that makes these ideal for game day, kids’ meals, or a quick weeknight dinner.
The smoky-sweet flavor pairs beautifully with classic sides like coleslaw or baked beans, or serve them as-is for a satisfying snack.
This recipe works equally well on a grill, in the oven, or an air fryer, giving you flexibility for any cooking setup. Once you try this method, you’ll never settle for store-bought again. Let’s get started on making these restaurant-quality chicken strips at home.
Ingredients for barbecue chicken strips
Bone-in thighs and a dry rub of smoky spices—just what you need for perfect barbecue chicken strips.
| Ingredient | Amount | Notes |
|---|---|---|
| Bone-In Chicken Thighs 🍗 | 1 ½ lb | Cut into 1-inch strips |
| Smoked Paprika 🌶️ | 2 tbsp | For deep smoky flavor |
| Brown Sugar 🍚 | 2 tbsp | Light or dark preferred |
| Garlic Powder 🧄 | 1 tbsp | Freshly ground preferred |
| Salt 🧂 | 1 tsp | Kosher or sea salt |
| Black Pepper 🌶️ | ½ tsp | Freshly ground preferred |
| Olive Oil 🫒 | 1 tbsp | For coating chicken |
| Yellow Onion 🧅 | 1 whole | Thinly sliced for garnish |
| Fresh Parsley 🌿 | ¼ cup | Chopped for garnish |
| Lemon Juice 🍋 | 1 tbsp | Freshly squeezed |
| Honey 🍯 | 1 tbsp | For glaze finish |
| Hot Sauce 🔥 | 1 tbsp | Optional for heat |
| Butter 🧈 | 2 tbsp | For oven method |
[recipe_ingredient_scaler]
Bone-in chicken thighs are non-negotiable here—they stay juicier than breasts while developing that coveted bark. Look for fresh, plump thighs at Whole Foods or your local butcher shop. I always grab mine from Costco when I’m doing a big batch, but the regular supermarket stuff works fine. Cut them into even 1-inch strips for consistent cooking. The smoked paprika is where the magic happens—Penzeys or the bulk bins at natural food stores have the best quality. If you’re using pre-cut strips, pat them dry with paper towels before seasoning—this helps the rub stick better and creates a better crust.
No smoked paprika? Regular paprika plus a pinch of liquid smoke works in a pinch. The brown sugar can be swapped for white sugar plus a dash of cinnamon if you’re avoiding caramelization. Fresh parsley is ideal for garnish, but dried parsley at one-third the amount gets you close. The honey glaze is optional but adds a nice finish—Trader Joe’s has a great local honey that works perfectly. For extra crispiness, toss the cooked strips in 2 tbsp melted butter before serving. The onion should be thinly sliced—mandoline or food processor makes this quick work. If you’re short on time, skip the garnish entirely and focus on that perfect rub.
These strips reheat beautifully—350°F oven for 5-7 minutes is all it takes. Store leftovers in an airtight container for up to 3 days in the fridge. For longer storage, freeze cooked strips for up to 3 months. I like to portion them into single-serving bags so they’re ready for quick lunches. The dry rub keeps well in a jar for up to 6 months, so make extra if you’re planning to use it again. Serve with classic sides like coleslaw or baked beans to complete the meal.
Why You’ll Love This Recipe
- One-Pan Magic: Honestly, this is the kind of recipe where I can throw everything on a sheet pan and forget about it—except for flipping it once. The bone-in thighs stay juicy while the edges crisp up thanks to that 2 tbsp brown sugar and smoked paprika mix. No last-minute scrubbing pans either; foil makes cleanup a breeze.
- Smoky-Sweet Addiction: Between the deep, smoky kick from the paprika and the caramelized honey glaze, these strips hit that perfect balance of sweet, tangy, and spicy. I’ll be real: the first bite always makes me pause, like, “Did I just eat that?”—because it’s that good.
- Weeknight Crowd-Pleaser: I serve these for game nights, potlucks, or even when my kids beg for “something fun” for lunch. The strips reheat beautifully (within 3 days, no soggy glaze here), and the hot sauce lets everyone crank up the heat to their liking. My daughter picks out the fresh parsley garnish, but still asks for seconds.
- Budget-Friendly Feast: Using bone-in thighs keeps costs low, and the ingredients are pantry staples—no fancy groceries required. Plus, a 1.5 lb batch feeds four with leftovers, so you’re not wasting a single strip. Freeze extras for up to 3 months, and boom: instant weeknight dinner without the stress.
Step-by-step instructions for barbecue chicken strips
Here’s how to get that perfect balance of smoky crispy edges and juicy cores every time.
Prepare the Dry Rub and Coat the Chicken
In a small bowl, combine the 2 tablespoons smoked paprika, 2 tablespoons brown sugar, 1 tablespoon garlic powder, 1 teaspoon salt, and ½ teaspoon black pepper. Mix well until the spices are evenly distributed and the sugar is fully incorporated. This dry rub is what gives your chicken that signature smoky-sweet flavor.
Cut the 1½ pounds bone-in chicken thighs into 1-inch strips, removing any large pieces of fat or bone. Place the chicken strips in a large bowl and pour the dry rub mixture over them. Toss gently but thoroughly to coat every piece evenly. Let the seasoned chicken sit at room temperature for 15 minutes while you prepare the oven. This resting time helps the rub adhere better and ensures even cooking.
Create the Glaze and Preheat the Oven
While the chicken seasons, mix the 1 tablespoon lemon juice, 1 tablespoon honey, and 1 tablespoon hot sauce in a small bowl. Stir well until the honey and hot sauce are fully combined. This glaze will add a tangy sweetness and a kick of heat to balance the smoky flavors. Set it aside for now—it’ll be used later to finish the chicken.
Preheat your oven to 425°F. Line a large baking sheet with aluminum foil and lightly grease it with the 1 tablespoon olive oil. Melt the 2 tablespoons butter in a small microwave-safe bowl for about 20 seconds—just until it’s soft and spreadable. This butter will help create a crispy crust on the chicken.
Bake the Chicken for Crispy Edges
Arrange the seasoned chicken strips in a single layer on the prepared baking sheet, leaving about ½ inch of space between each piece. This ensures they cook evenly and develop that crispy texture. Drizzle the melted butter evenly over the chicken, then spread it around with a silicone spatula to coat all sides. Place the baking sheet in the preheated oven and bake for 15 minutes.
After 15 minutes, flip each chicken strip carefully with tongs and bake for another 10-12 minutes, until the edges are deep golden brown and the internal temperature reaches 165°F when checked with a meat thermometer. The chicken should be crispy on the outside while remaining juicy inside. If the strips aren’t brown enough, return them to the oven for an additional 2-3 minutes.
Glaze and Garnish for Finishing Touches
Remove the chicken from the oven and transfer it to a serving platter. Immediately drizzle the lemon-honey glaze evenly over the top, letting it pool slightly in the crevices. The residual heat from the chicken will help the glaze set and caramelize, adding a glossy finish. Return the chicken to the oven for 1-2 minutes to let the glaze slightly thicken and stick.
While the chicken finishes, thinly slice the 1 yellow onion and chop the ¼ cup fresh parsley. Sprinkle the onions and parsley over the glazed chicken strips just before serving. The onions add a touch of sharpness, while the parsley brightens the dish with freshness. Serve immediately while the edges are still crispy and the glaze is warm.
Pro Tips For Making Barbecue Chicken Strips
- Skip the Crowding: I learned this the hard way—when chicken strips are packed too close, they steam instead of crisp. Space them at least ½ inch apart on the baking sheet. The butter and heat need room to work their magic, or you’ll end up with soggy edges instead of that golden crust you’re after.
- Butter It Up: Don’t just drizzle the melted butter—spread it around with a spatula so every strip gets that crispy, caramelized coating. I used to be lazy and just pour it on, but taking that extra 10 seconds makes a real difference in texture.
- Don’t Rush the Rest: Those 15 minutes at room temperature aren’t optional. Cold chicken releases juices unevenly, and the rub won’t stick properly. Let it sit while you preheat the oven—your future self will thank you when the seasoning clings perfectly.
- Glaze Fast, Glaze Hot: The moment the chicken comes out of the oven is the only time to glaze—any longer and the edges lose their crispness. Drizzle it on, pop it back in for just 1-2 minutes, and serve immediately. Trust the process, even if it feels weird.
Serving suggestions for this dish
Plating with Freshness
After baking, arrange the chicken strips on a wooden board or slate platter for rustic appeal. I like to fan them slightly so each piece is visible—this makes the dish look more inviting.
The thinly sliced yellow onion and chopped parsley add vibrant pops of color that balance the rich, smoky flavors. A sprinkle of flaky sea salt right before serving enhances the glaze’s tanginess without overpowering.
Dipping Sauce Pairings
These strips are perfect with a cool, creamy dip to cut through the smoky sweetness. I recommend a cool ranch or spicy mayo made with 1 tbsp hot sauce mixed into ½ cup Greek yogurt.
For a tangy twist, try a honey mustard by whisking 2 tbsp honey with 2 tbsp Dijon mustard and 1 tbsp apple cider vinegar. Serve dips in small bowls for easy access.
Game Day Spread
Transform these strips into a full spread by pairing them with classic sides like creamy coleslaw and baked beans. I also add a cornbread muffin for texture contrast—its buttery crumb soaks up any extra glaze.
For extra flair, arrange everything on a large platter with a wooden serving board and a sprinkle of smoked paprika over the top.
Quick Meal Upgrade
Want to make this a complete meal? Add a simple side salad with mixed greens, cherry tomatoes, and a balsamic vinaigrette. The acidity cuts through the richness beautifully.
For a heartier option, toss in some roasted sweet potatoes or a cornbread salad—both add satisfying texture and balance the dish.
Make-Ahead Presentation
For parties or meal prep, keep the chicken warm in a slow cooker set to 170°F until serving. Garnish just before guests arrive so the parsley stays fresh and vibrant. If serving cold, drizzle the glaze right before eating to keep it from drying out.
I always keep a small bowl of extra glaze on hand for those who want more sweetness.
Nutrition facts
Frequently asked questions
Why use bone-in chicken thighs instead of boneless breasts?
Bone-in thighs stay juicier than breasts because the bone acts as a natural moisture reservoir. They also develop that coveted crispy bark better while keeping tender centers. The fat content in thighs adds flavor depth that’s harder to replicate with leaner cuts. For perfect barbecue strips, this balance of texture and moisture is key!
How do I prevent the chicken from drying out while baking?
Keep the oven temperature consistent at 425°F and avoid opening the door too often. The 15-minute rest after coating with the dry rub helps the seasoning adhere, while the butter coating creates a protective crust. Flip carefully at the halfway point to ensure even cooking without overhandling. This method locks in moisture while building crispy edges.
Can I make these chicken strips ahead of time?
Yes! Cooked strips reheat beautifully in a 350°F oven for 5-7 minutes or on the stovetop with a splash of water. Store leftovers in an airtight container for up to 3 days, or freeze for 3 months. For parties, keep them warm in a slow cooker at 170°F until serving—just garnish right before guests arrive. This keeps everything fresh and vibrant!
What if my oven isn’t hot enough to get crispy edges?
If your oven runs cooler, increase the temperature by 25°F and reduce baking time by 2-3 minutes. For extra crispiness, broil for 1-2 minutes at the end—just watch closely to avoid burning. Alternatively, finish in a hot skillet for 1-2 minutes per side after baking. This dual-cooking approach guarantees that perfect crunch!

Trained in classic French technique but raised on slow-cooked ribs and spicy rubs, she blends culinary skill with smoke and soul.
- Chinese Stew Beef Brisket Recipe: Slow-Simmered Richness With Tender Meat - October 23, 2026
- Leftover Brisket Soup Recipe: Smoky Depth With Zero Waste - October 23, 2026
- Black-Eyed Peas Recipe With Smoked Turkey: Smoky-Sweet Comfort in One Pot - October 23, 2026