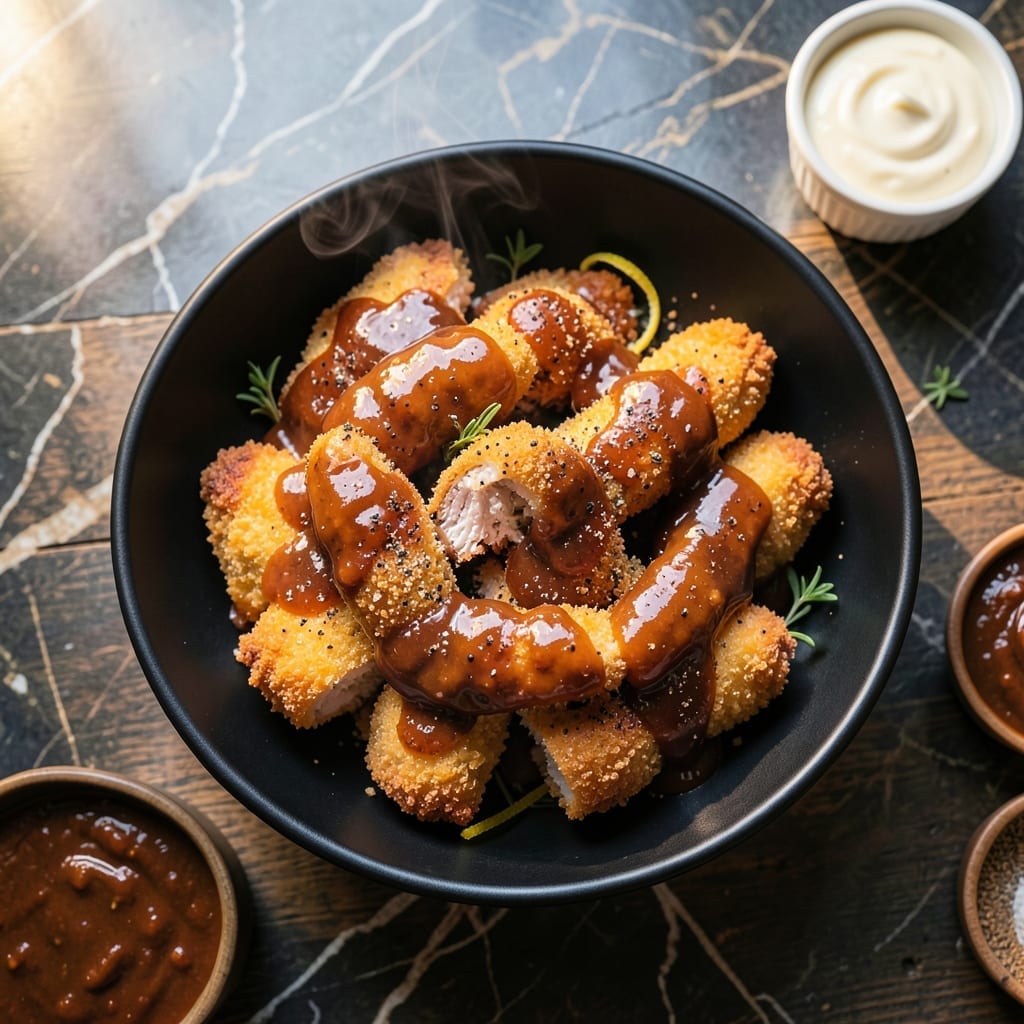
Achieve crispy chicken tenders with a smoky barbecue glaze that delivers tender results every time. This method combines simple ingredients with precise technique for restaurant-quality flavor at home.
Marinate the chicken, then bake or grill until golden and caramelized. The glaze locks in moisture while creating an irresistible sticky coating that satisfies with each bite.
Ingredients for Barbecue Chicken Tenders
Simple pantry staples and fresh chicken combine for restaurant-quality flavor at home.
| Ingredient | Amount | Notes |
|---|---|---|
| Chicken Tenders 🍗 | 1 ½ lb | Boneless, skinless, evenly sized |
| Buttermilk 🥛 | 1 cup | For marinating chicken |
| All-Purpose Flour 🌾 | 1 cup | For dredging chicken |
| Cornstarch 🌾 | ¼ cup | For extra crispiness |
| Barbecue Sauce 🍯 | 1 ½ cups | Smoky variety preferred |
| Olive Oil 🫒 | ¼ cup | For frying chicken |
| Honey 🍯 | 2 tbsp | For balancing glaze sweetness |
| Apple Cider Vinegar 🍏 | 1 tbsp | For glaze acidity |
| Worcestershire Sauce 🍶 | 1 tbsp | For umami depth in glaze |
| Garlic Powder 🧄 | 1 tsp | For seasoning chicken |
| Onion Powder 🧅 | 1 tsp | For seasoning chicken |
| Paprika 🌶️ | 1 tsp | Smoked paprika preferred |
| Salt 🧂 | 1 tsp | Diamond Crystal kosher salt |
| Black Pepper 🌶️ | ½ tsp | Freshly ground preferred |
[recipe_ingredient_scaler]
The chicken tenders should be uniformly sized for even cooking—look for 1.5 lb packages at Whole Foods or your local butcher. For the buttermilk marinade, full-fat versions yield the most tender results (the acidity breaks down proteins beautifully). The barbecue sauce is key: Stubb’s Original or Sweet Baby Ray’s offer consistent smoky depth without added sweetness overwhelm.
No buttermilk? Whole milk with 1 tbsp lemon juice works as a substitute. For a gluten-free version, cornstarch plus almond flour replaces all-purpose flour. Want extra heat? Add cayenne to the dry mix. The Worcestershire can be swapped for coconut aminos if needed. All substitutions maintain the crispy-tender balance promised.
Marinated chicken keeps 2 days in the fridge (don’t exceed this—textural degradation occurs). Baked tenders stay crispy for 1 day when stored in a single layer. The glaze can be made 3 days ahead and reheated gently before tossing with cooked chicken.
Why You’ll Love This Recipe
- Minimal Effort: I just toss the tenders in buttermilk, dredge, and bake—no fancy steps or hard-to-find ingredients.
- Crave-Worthy Crunch: That cornstarch in the coating gives them this crispy bite that pairs perfectly with the smoky-sweet barbecue sauce.
- Feeds a Hungry Crowd: I made these for a last-minute game night and everyone cleaned their plates, kids included.
- Leftovers? No Problem: Honestly, they reheat surprisingly well—still tender and saucy the next day for lunch.
Step-by-Step Instructions for Barbecue Chicken Tenders
Master the technique for achieving tender chicken with a crisp coating and smoky-sweet finish.
Step 1: Marinate the Chicken Tenders
Combine the 1.5 lb Chicken Tenders with 1 cup Buttermilk in a bowl. The buttermilk’s acidity tenderizes the meat while the proteins help the coating adhere. Ensure each piece is fully submerged for even marinating.
Cover and refrigerate for at least 30 minutes, or up to 4 hours for deeper flavor penetration. This step is critical—don’t skip it, or the coating won’t cling properly during frying.
Step 2: Dredge and Season the Chicken
In a shallow dish, whisk together the 1 cup All-Purpose Flour, 0.25 cup Cornstarch, 1 tsp Garlic Powder, 1 tsp Onion Powder, 1 tsp Paprika, 1 tsp Salt, and 0.5 tsp Black Pepper. The cornstarch is key for extra crispiness.
Remove the chicken from the buttermilk, letting excess drip off, then dredge each piece in the flour mixture. Press gently to ensure full coverage. The flour should look slightly clumpy—that’s how you know it’ll stick during frying.
Step 3: Pan-Fry to Golden Perfection
Heat the 0.25 cup Olive Oil in a large skillet over medium-high heat until it shimmers. Working in batches to avoid crowding, add the dredged chicken and cook for 4-5 minutes per side until golden brown and crispy.
Transfer the fried chicken to a paper towel-lined plate to drain excess oil. The internal temperature should reach 165°F—use a meat thermometer to confirm doneness. Maintain the oil temperature between batches; if it smokes, reduce the heat slightly.
Step 4: Prepare the Smoky Glaze
In a saucepan, combine the 1.5 cups Barbecue Sauce, 2 tbsp Honey, 1 tbsp Apple Cider Vinegar, and 1 tbsp Worcestershire Sauce. Simmer over low heat for 5 minutes, stirring occasionally.
The vinegar balances the sweetness, while the Worcestershire adds umami depth. The glaze should thicken slightly but remain pourable. Taste and adjust seasoning if needed, though the sauce should already be well-balanced.
Step 5: Coat and Serve Immediately
Toss the crispy chicken tenders in the warm glaze until fully coated. The contrast of the sticky, smoky glaze with the crunchy exterior is what makes this dish irresistible. Serve immediately while the coating is still crisp.
For best results, plate the tenders on a wire rack for a minute to let excess glaze drip off, preventing sogginess. Garnish with extra paprika if desired, and serve with pickles or coleslaw to cut through the richness.
Pro Tips For Making Barbecue Chicken Tenders
- Double Dredge: Dip the buttermilk-soaked tenders in flour once, shake off the excess, then dredge again for a thicker, crunchier crust that holds up to the barbecue sauce.
- Rest Before Frying: Let the dredged tenders sit for 10 minutes before cooking—this helps the coating adhere and prevents it from sliding off in the oil.
- Skip Cold Buttermilk: I learned this the hard way: take the buttermilk out of the fridge 30 minutes early, or the coating won’t stick as well to the chilled tenders.
- Sauce Last: Toss the cooked tenders in barbecue sauce right before serving, not during cooking, or the sugar in the sauce will burn and turn bitter.
Dietary Considerations for This barbecue chicken tenders
Gluten-Free Adaptation
Swap the 1 cup All-Purpose Flour for a blend of ¾ cup almond flour and ¼ cup cornstarch. This maintains crispiness while keeping it gluten-free. I source my almond flour from Bob’s Red Mill for consistent texture. 💪
Dairy-Free Version
Replace 1 cup Buttermilk with 1 cup unsweetened almond milk plus 1 tbsp lemon juice. Let it sit for 5 minutes to curdle slightly. The acidity still tenderizes the chicken beautifully.
Lower-Carb Option
Use 1 cup crushed pork rinds instead of flour for the dredge. The result is ultra-crispy with zero carbs. I find Epic Provisions pork rinds work best for this.
Nut Allergy Consideration
For nut-free crispiness, use 1 cup crushed cornflakes plus ¼ cup cornstarch in place of flour. This gives a light, crunchy coating without any nut risk.
Sugar-Reduced Glaze
Cut the 2 tbsp Honey in half and add 1 tbsp sugar-free maple syrup. The vinegar and Worcestershire keep the depth of flavor while reducing sugar content.
Egg-Free Dredge
Skip the buttermilk entirely and use 1 beaten egg white plus 2 tbsp water for dipping. The egg white helps the coating adhere just as well. 🔥
Nutrition Facts
Frequently Asked Questions
Can I bake these instead of frying?
Yes! Bake at 400°F for 20-25 minutes, flipping halfway. Use a wire rack on a baking sheet for crispiness. The texture will be slightly different but still delicious.
How do I keep the coating crispy?
Drain fried tenders on a wire rack, not paper towels. This prevents steam from making them soggy. Coat with glaze just before serving for maximum crunch.
Can I make these ahead of time?
Fry and glaze up to 1 day ahead. Reheat in a 375°F oven for 10 minutes to restore crispiness. Avoid microwaving as it makes the coating soft.
What if my glaze is too thick?
Thin it with 1-2 tbsp water or apple cider vinegar. Simmer for 1-2 minutes to blend flavors. The glaze should coat the back of a spoon but still drip easily.

Trained in classic French technique but raised on slow-cooked ribs and spicy rubs, she blends culinary skill with smoke and soul.
- Recipe for Boneless Pork Chops in Cast Iron Skillet: Sear and Baste to Juicy Perfection - October 3, 2026
- Recipe for Boneless Cross Rib Roast: Slow-Roasted Beef with Herb Crust - October 3, 2026
- Hamburgers in Sauce Recipe Crock Pot: Slow-Cooked Savory Delight - October 3, 2026