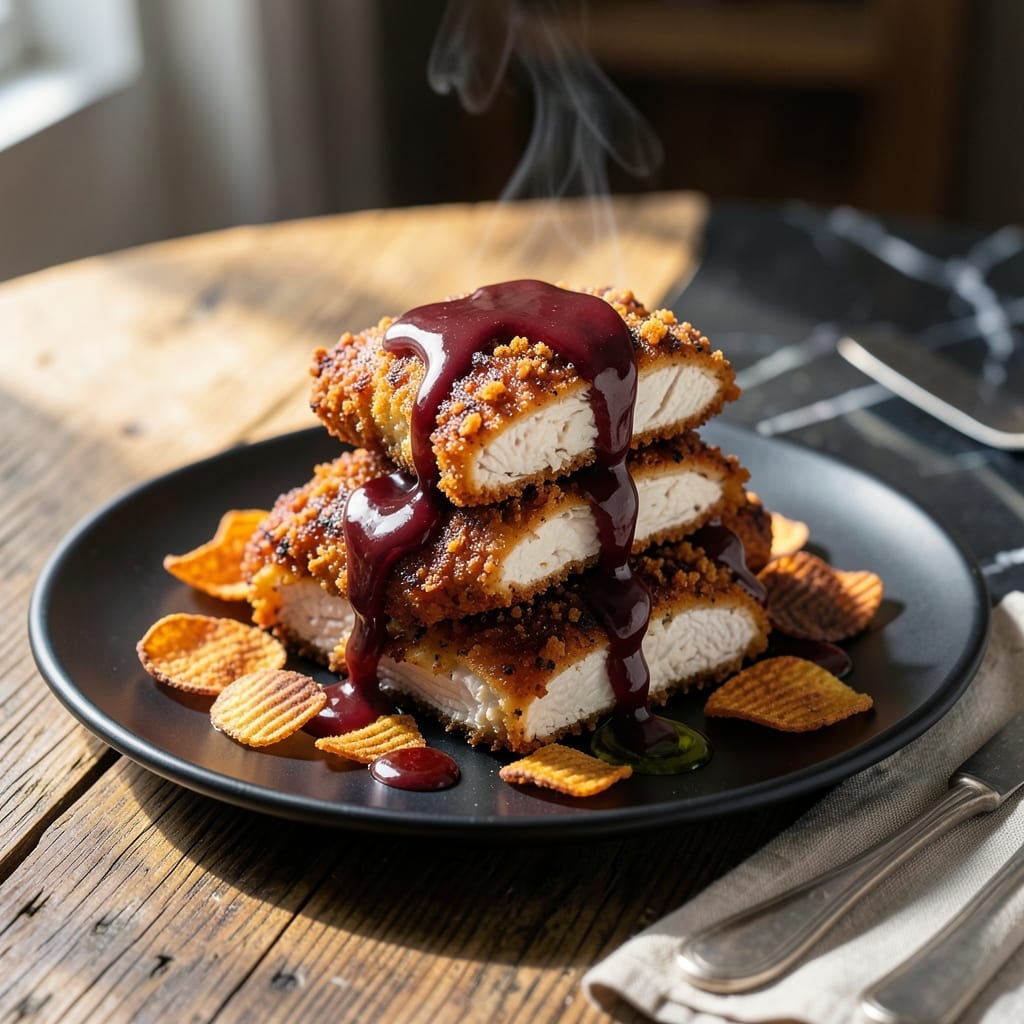
This dish transforms a humble weeknight dinner into something extraordinary. The barbecue chips create a crispy, flavorful crust that locks in juices while adding a smoky depth.
I developed this method after years of experimenting with coatings, and it never fails to deliver tender chicken with that satisfying crunch everyone loves.
Ingredients for Barbecue Chip Chicken
Transform weeknight dinner with a crispy, smoky barbecue chip crust on tender chicken breasts.
| Ingredient | Amount | Notes |
|---|---|---|
| Chicken Breast 🍗 | 1 ½ lb | Boneless, skinless, pounded to even thickness |
| Barbecue Potato Chips 🥔 | 4 cups | Crushed into coarse crumbs |
| All-Purpose Flour 🌾 | ½ cup | For dredging chicken |
| Large Eggs 🥚 | 2 whole | Beaten for binding |
| Buttermilk 🥛 | ½ cup | Full-fat for best adhesion |
| Barbecue Sauce 🍯 | ½ cup | Plus extra for serving |
| Dijon Mustard 🟡 | 2 tbsp | Enhances coating flavor |
| Garlic Powder 🧄 | 1 tsp | For seasoning flour |
| Onion Powder 🧅 | 1 tsp | For seasoning flour |
| Smoked Paprika 🌶️ | ½ tsp | Adds depth to crust |
| Kosher Salt 🧂 | 1 tsp | Plus more to taste |
| Black Pepper 🌶️ | ½ tsp | Freshly ground preferred |
| Vegetable Oil 🫒 | ½ cup | For frying, high smoke point |
[recipe_ingredient_scaler]
The barbecue chips are non-negotiable here—Lays or Ruffles original BBQ have the right texture and flavor balance. Opt for full-fat buttermilk; it adheres better to the chicken and creates a more robust crust. For the chicken, pound to even thickness to ensure even cooking. Most supermarkets carry pre-crushed chips in the snack aisle, but crushing your own ensures the perfect coarse crumb (worth the extra minute).
No buttermilk? Whole milk with 1 tbsp vinegar works in a pinch. Out of BBQ chips? Regular potato chips plus 1 tbsp BBQ seasoning gets you close. The flour dredge can be swapped for cornstarch for a gluten-free version, though the texture will differ slightly. Diamond Crystal kosher salt is ideal for even seasoning distribution.
Prep the chicken just before cooking to maintain crispness. Leftovers keep in an airtight container for up to 3 days—though the crust is best served immediately. The coating mixture can be prepped 1 day ahead and stored in the fridge.
Why You’ll Love This Recipe
- One Pan Magic: That buttermilk dip and chip coating comes together in a single bowl—minimal mess, maximum flavor.
- Smoky Crunch: The barbecue chips give it that addictive crispy crust with a hint of tangy, smoky sweetness.
- Weeknight Hero: I throw this together on busy evenings—it’s ready faster than takeout and way more satisfying.
- Budget Winner: A bag of chips and chicken breasts stretch further than you’d think, and leftovers reheat beautifully.
Step-by-Step Instructions for Barbecue Chip Chicken
Master the technique for achieving an ultra-crispy coating with smoky barbecue depth in every bite.
Step 1: Prepare and Season the Chicken
Begin by pounding the 1.5 lb Chicken Breast between plastic wrap to an even ½-inch thickness using a meat mallet. This ensures uniform cooking and prevents dry, overdone edges. Pat the pieces completely dry with paper towels—moisture is the enemy of crispiness.
Season both sides generously with the 1 tsp Kosher Salt and 0.5 tsp Black Pepper. The seasoning should be visible but not caked on. This foundational layer enhances the flavor of the entire dish, so don’t be shy with the salt.
Step 2: Create the Dredging and Coating Stations
In a shallow dish, combine the 0.5 cup All-Purpose Flour with the 1 tsp Garlic Powder, 1 tsp Onion Powder, and 0.5 tsp Smoked Paprika. Whisk until evenly distributed. This spiced flour adds depth to the crust and complements the barbecue flavor.
In a second shallow dish, whisk together the 2 whole Large Eggs, 0.5 cup Buttermilk, 0.5 cup Barbecue Sauce, and 2 tbsp Dijon Mustard until smooth. The buttermilk’s acidity tenderizes the chicken, while the mustard and barbecue sauce infuse the coating with tangy, smoky richness.
Place the 4 cups Barbecue Potato Chips, crushed into coarse crumbs, in a third shallow dish. The crumbs should be chunky, not fine—this texture is key to the final crunch.
Step 3: Dredge, Dip, and Coat the Chicken
Working one piece at a time, dredge the chicken in the seasoned flour, pressing firmly to adhere. Shake off any excess—too much flour creates a gummy layer. Next, dip the floured chicken into the egg mixture, allowing any excess to drip off for 5 seconds. This ensures a thin, even coating that will crisp properly.
Immediately press the chicken into the crushed barbecue potato chips, turning to coat all sides completely. Use your fingers to press the crumbs into the chicken, ensuring they stick in an even layer. Place the coated chicken on a wire rack set over a baking sheet and let it rest for 10 minutes to set the coating.
Step 4: Pan-Fry to Golden Perfection
Heat the 0.5 cup Vegetable Oil in a large skillet over medium-high heat until shimmering but not smoking, about 3-4 minutes. To test readiness, drop in a pinch of the chip crumbs—if it sizzles immediately, the oil is ready.
Carefully place the chicken in the skillet, working in batches if necessary to avoid crowding. Cook for 4-5 minutes per side until the coating is deep golden brown and the internal temperature reaches 165°F. Avoid moving the chicken too soon—let it develop a crust before flipping. Transfer the cooked chicken to a paper towel-lined plate to drain excess oil.
Pro Tips For Making Barbecue Chip Chicken
- Pound the Chicken: Use a meat mallet to pound the chicken breasts to an even 1/2-inch thickness—I learned this the hard way after my first batch came out dry on the ends and raw in the middle.
- Crush Chips Fine: Pulse the barbecue chips in a food processor until they’re the texture of coarse breadcrumbs; big chunks won’t stick and you’ll lose that crispy coating.
- Skip Cold Buttermilk: Let the buttermilk and eggs sit out for 10 minutes before dipping; cold liquid makes the flour clump and the coating slide right off.
- Double-Dredge for Crunch: After the initial dip in flour and buttermilk, repeat the process once more—sounds tedious but it actually changes the outcome, giving you a thicker, crunchier crust.
Perfect Pairings for These Flavors
Side Dish Pairings
This crispy chicken shines with a simple coleselaw made from 4 cups shredded cabbage and ½ cup buttermilk dressing. The cool, creamy texture balances the smoky crunch perfectly. I also love serving it with baked beans for a classic BBQ vibe. 🥗
Fresh Salad Options
A corn salad with 2 cups fresh corn, 1 diced avocado, and ¼ cup cotija cheese adds a bright, summery contrast. For a lighter touch, try a cucumber-tomato salad with a lemon-herb vinaigrette.
Wine Pairings
A crisp Riesling cuts through the richness with its acidity and hints of stone fruit. For red lovers, a Pinot Noir offers enough body without overwhelming the dish. I prefer a Willamette Valley Pinot for its earthy notes. 🍷
Beer Selections
An amber ale like Fat Tire complements the smoky-sweet coating. For a lighter option, a pilsner cleanses the palate between bites. I’ve found local craft IPAs can be too hoppy for this dish.
Sauce Upgrades
Offer extra barbecue sauce for dipping, or try a spicy mayo mix with 2 tbsp mayo and 1 tsp sriracha. A honey-mustard glaze adds a sweet-tangy finish that pairs beautifully with the chip crust.
Nutrition Facts
Frequently Asked Questions
Can I use regular potato chips instead?
Yes, but add 1 tbsp BBQ seasoning to the crushed chips for similar flavor. The texture will be slightly different but still delicious.
How do I keep the coating from falling off?
Pat the chicken completely dry before dredging, and let the coated pieces rest for 10 minutes before frying. This helps the coating adhere properly.
What’s the best way to crush the chips?
Place them in a sealed bag and use a rolling pin for coarse crumbs. Avoid pulverizing them—chunky pieces create the best crunch.
Can I bake this instead of pan-frying?
Yes! Bake at 400°F for 20-25 minutes on a wire rack for even crispiness. Flip halfway through for best results.

Trained in classic French technique but raised on slow-cooked ribs and spicy rubs, she blends culinary skill with smoke and soul.
- Recipe for Boneless Pork Chops in Cast Iron Skillet: Sear and Baste to Juicy Perfection - October 3, 2026
- Recipe for Boneless Cross Rib Roast: Slow-Roasted Beef with Herb Crust - October 3, 2026
- Hamburgers in Sauce Recipe Crock Pot: Slow-Cooked Savory Delight - October 3, 2026