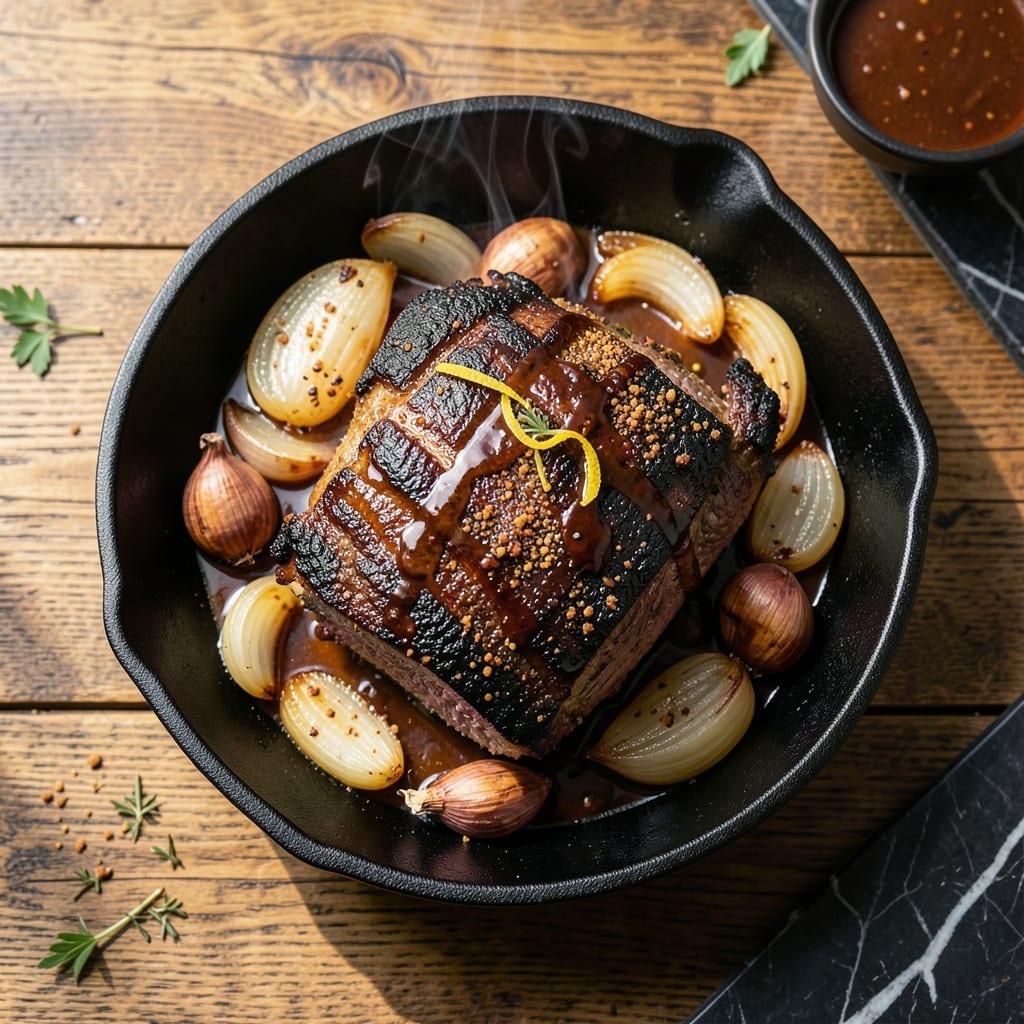
Getting my first whiff of hickory smoke at a family cookout taught me that great barbecue starts with patience and bold flavors. This oven-braised method delivers tender meat with a deeply flavored crust.
My French technique training taught me that a well-balanced spice rub transforms a simple roast into something extraordinary. The slow cooking process ensures every bite is packed with smoky, savory depth.
Ingredients for Barbecue Roast
Bold spices, slow cooking, and one perfect cut of beef come together here.
| Ingredient | Amount | Notes |
|---|---|---|
| Beef Chuck Roast 🥩 | 3 lb | Well-marbled, trimmed of excess fat |
| Smoked Paprika 🌶️ | 1 ½ tbsp | Sweet or hot variety works |
| Garlic Powder 🧄 | 1 tbsp | Not garlic salt substitute |
| Onion Powder 🧅 | 1 tbsp | Freshly opened for potency |
| Brown Sugar 🍚 | 2 tbsp | Light or dark, packed |
| Kosher Salt 🧂 | 1 tbsp | Diamond Crystal preferred |
| Black Pepper 🌶️ | 1 tbsp | Coarsely ground for texture |
| Ground Cumin 🌿 | 1 tsp | Toasted for depth of flavor |
| Dried Oregano 🍃 | 1 tsp | Rubbed between fingers to release oils |
| Cayenne Pepper 🔥 | ½ tsp | Adjust for heat preference |
| Olive Oil 🫒 | 2 tbsp | Extra-virgin for searing |
| Beef Broth 💧 | 1 ½ cups | Low-sodium preferred for control |
| Apple Cider Vinegar 🍏 | ¼ cup | Adds necessary acidity to balance |
| Yellow Onion 🧅 | 1 whole | Large, thinly sliced for braising |
[recipe_ingredient_scaler]
The beef chuck roast is non-negotiable here—look for heavy marbling at Whole Foods or your local butcher. That fat renders down during the long cook, keeping the meat impossibly tender. I’ve tried sirloin before (regrettable). For the spices, Penzeys has the freshest smoked paprika, but any grocery store brand works if you check the date (spices fade fast).
No smoked paprika? Regular paprika plus a pinch of liquid smoke gets you close. Swap brown sugar for maple syrup if you’re out, but it’ll change the texture slightly. Need more heat? Double the cayenne or add a dash of chipotle powder. The beef broth can be swapped for water in a pinch, though you’ll lose some depth—Better Than Bouillon is my backup.
This actually tastes better the next day. Store in the fridge for up to 4 days, or freeze portions for 3 months. The fat solidifies when cold—skim it off before reheating if you prefer. Always reheat gently to keep it tender.
Why You’ll Love This Recipe
- I’ll be real: the sandwiches I make with the leftovers are even better than the first meal.
- Set It and Forget: I toss the chuck roast with the spices and sugar, then let the oven do the work for hours.
- Smoky Sweet Crust: The brown sugar caramelizes with the smoked paprika, creating a sticky, finger-licking crust on the beef.
- Feeds the Gang: This roast stretches to feed six with generous portions, perfect for Sunday dinners or meal prep.
Step-by-Step Instructions for Barbecue Roast
Here’s the method. Straightforward, tested, works every time.
Step 1: Create the Bold Spice Rub
In a small bowl, combine the 1.5 tbsp Smoked Paprika, 1 tbsp Garlic Powder, 1 tbsp Onion Powder, 2 tbsp Brown Sugar, 1 tbsp Kosher Salt, 1 tbsp Black Pepper, 1 tsp Ground Cumin, 1 tsp Dried Oregano, and 0.5 tsp Cayenne Pepper. I always rub the dried oregano between my fingers to release its aromatic oils before mixing.
Stir thoroughly until the mixture is uniform and the brown sugar is fully incorporated. The rub should be fragrant and slightly coarse from the black pepper. This blend provides the deep, smoky foundation that defines this dish.
Step 2: Sear the Beef Chuck Roast
Pat the 3 lb Beef Chuck Roast dry with paper towels—this ensures a proper sear. Season all sides generously with the spice rub, pressing it into the meat so it adheres well. Let it sit at room temperature for 15 minutes while you preheat the oven to 325°F.
Heat the 2 tbsp Olive Oil in a large Dutch oven over medium-high heat until shimmering. Sear the roast on all sides for 3-4 minutes per side until deeply browned. You want a dark, caramelized crust—this builds layers of flavor for the finished dish.
Step 3: Deglaze and Add Braising Liquid
Remove the roast and set it aside. In the same pot, add the thinly sliced 1 whole Yellow Onion and cook for 2-3 minutes until softened and beginning to brown. Pour in the 0.25 cup Apple Cider Vinegar to deglaze, scraping up all the browned bits from the bottom of the pot with a wooden spoon.
Add the 1.5 cups Beef Broth and bring to a simmer. The liquid should be fragrant and slightly tangy from the vinegar. Return the roast to the pot, along with any accumulated juices. The liquid should come about halfway up the side of the meat.
Step 4: Braise Until Fork-Tender
Cover the pot and transfer it to the preheated oven. Braise for 3 to 3.5 hours, turning the roast halfway through the cooking time. You’ll know it’s done when the meat is fork-tender and easily pulls apart with a gentle tug.
Check the pot occasionally—if the liquid reduces too much, add a splash of water or additional beef broth to maintain the level. The roast should be deeply browned on the outside and moist, tender, and infused with the bold spice flavors throughout.
Remove the pot from the oven and let the roast rest in the braising liquid for 15 minutes before serving. This resting period allows the juices to redistribute, ensuring every bite is flavorful and succulent.
Pro Tips For Making Barbecue Roast
- Sear First, Always: I learned this the hard way—browning the chuck roast in a hot pan for 3-4 minutes per side locks in juices and adds depth before the slow cook. Skip this and your barbecue roast will taste flat.
- Rub It Overnight: Mix the smoked paprika, garlic powder, onion powder, and brown sugar into the meat the night before. Sounds like extra work, but the flavors actually penetrate the beef instead of just sitting on the surface.
- Don’t Drown the Meat: After searing, resist the urge to add too much liquid to the pot. A half cup of broth or water is plenty—any more and you’ll steam the roast instead of letting it caramelize.
- Use a Meat Thermometer: Forget guessing—pull the roast when it hits 195°F internally. This guarantees tender, fall-apart barbecue without overcooking it into dry, stringy beef.
Storing and Reheating This Dish
Refrigerator Storage
Let the roast cool in its braising liquid for 30 minutes before storing. Transfer to an airtight container with the juices—I use glass containers for easy reheating. It’ll keep in the fridge for up to 4 days, and honestly, the flavors deepen overnight. ❄️
Freezer Method
For longer storage, freeze the roast in its liquid in quart-sized freezer bags. Lay flat to save space and freeze for up to 3 months. I always label with the date—trust me, you’ll forget. Thaw overnight in the fridge before reheating.
Stovetop Reheating
Gently reheat the roast and liquid in a pot over low heat for 15-20 minutes. Stir occasionally and add a splash of water if it looks dry. The meat should reach 165°F internally. This method keeps it tender and juicy.
Oven Reheating
For hands-off reheating, cover the container with foil and warm at 300°F for 20-25 minutes. Check the internal temperature with a meat thermometer. I prefer this for larger portions as it heats more evenly. 🔥
Microwave Option
For a quick meal, transfer a single portion to a microwave-safe dish, cover with a damp paper towel, and heat on 50% power in 1-minute intervals. Stir between intervals until warm throughout. Add a spoonful of broth to keep it moist.
Repurposing Leftovers
Shred leftover roast for tacos, sandwiches, or loaded baked potatoes. The flavors hold up well to new applications. I often make barbecue roast sliders with the leftovers for local BBQ competitions. 💛
Nutrition Facts
Frequently Asked Questions
What cut works best for this method?
Beef chuck roast is ideal due to its marbling and connective tissue that breaks down beautifully. Avoid leaner cuts like sirloin—they’ll end up dry and tough. Always choose well-marbled pieces for the juiciest results.
Can I make this in a slow cooker?
Yes! Sear the roast first, then transfer to your slow cooker with all braising liquid. Cook on low for 8-10 hours or high for 5-6 hours. The texture will be slightly different but still delicious.
Why let the meat rest before serving?
Resting allows juices to redistribute throughout the meat. If you slice too soon, all those flavorful juices will end up on your cutting board. 15 minutes is the sweet spot for optimal tenderness and moisture.
How do I know when it’s done?
It’s ready when it reaches fork-tender stage—easily pulling apart with minimal effort. For food safety, the internal temperature should reach at least 165°F. The meat will continue cooking slightly as it rests.

Trained in classic French technique but raised on slow-cooked ribs and spicy rubs, she blends culinary skill with smoke and soul.
- Recipe for Boneless Pork Chops in Cast Iron Skillet: Sear and Baste to Juicy Perfection - October 3, 2026
- Recipe for Boneless Cross Rib Roast: Slow-Roasted Beef with Herb Crust - October 3, 2026
- Hamburgers in Sauce Recipe Crock Pot: Slow-Cooked Savory Delight - October 3, 2026