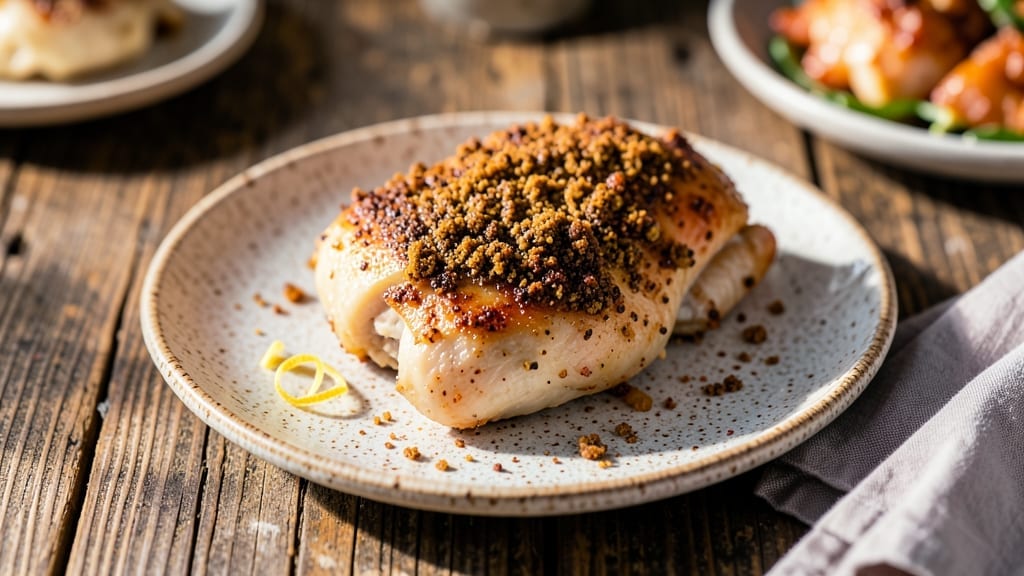
This basic chicken rub recipe is your secret weapon for turning simple chicken into showstopping dishes with just 10 minutes of prep. The secret lies in balancing salt, pepper, and aromatic herbs to create a crust that’s irresistibly crispy while keeping the meat juicy inside.
I’ve perfected this blend over years of testing—no complicated techniques, just precise seasoning and high-heat cooking.
The magic happens when you let the rub sit on the chicken for at least 30 minutes before cooking. This allows the spices to penetrate, ensuring every bite is packed with flavor.
Whether you’re grilling, baking, or pan-searing, this rub delivers consistent results—crispy golden skin and tender, juicy meat that holds up to any cooking method.
What makes this recipe stand out is its versatility. Use it on thighs for extra tenderness, breasts for lean protein, or even wings for a crispy, flavorful snack. The blend is simple but powerful, with just enough heat to wake up the chicken’s natural flavors without overpowering them.
Once you try this, you’ll never go back to store-bought seasonings. The key to success is patience—let the rub work its magic before cooking, and don’t rush the searing process. This is the kind of recipe that elevates everyday meals into something special.
Ingredients for basic chicken rub
Just 11 ingredients transform plain chicken into restaurant-worthy bites with crispy skin and juicy meat.
| Ingredient | Amount | Notes |
|---|---|---|
| Kosher Salt 🧂 | 2 tbsp | Coarse grain preferred for texture |
| Freshly Ground Black Pepper 🌶️ | 1 ½ tbsp | Freshly cracked for maximum flavor |
| Smoked Paprika 🌶️ | 1 ½ tbsp | For that signature smoky depth |
| Garlic Powder 🧄 | 1 tbsp | Freshly ground preferred |
| Onion Powder 🧅 | 1 tbsp | Adds subtle sweetness |
| Dried Thyme 🌿 | 1 tsp | French thyme if available |
| Dried Rosemary 🌿 | 1 tsp | Crushed between fingers for release |
| Ground Cayenne Pepper 🔥 | ½ tsp | Adjust for heat preference |
| Brown Sugar 🍯 | 1 tbsp | Enhances caramelization |
| Chicken Thighs 🍗 | 1 ½ lb | Bone-in, skin-on preferred |
| Extra-Virgin Olive Oil 🫒 | 1 tbsp | For even coating |
[recipe_ingredient_scaler]
The salt is non-negotiable—Diamond Crystal kosher salt dissolves perfectly and gives that perfect crust. I grab mine from Whole Foods or the bulk section at Trader Joe’s—both keep it fresh. For the pepper, freshly cracked makes all the difference (trust me, the pre-ground stuff tastes like dust). Smoked paprika? Penzeys has the best selection, but any quality brand works. The brown sugar might seem odd, but it’s what gets that golden, crispy skin—don’t skip it. Chicken thighs are your best bet here (skin-on, bone-in), but breasts work if you’re in a hurry. Just pat them dry first—moisture is the enemy of crispiness.
No smoked paprika? Regular paprika plus a pinch of liquid smoke gets you close. Short on thyme? Dried oregano at half the amount works in a pinch. The cayenne is optional—leave it out if you’re sensitive to heat, but I like a little kick. For the olive oil, use something fruity and high-quality (none of that cheap cooking oil). If you’re prepping ahead, mix the dry rub and store it in an airtight container for up to 3 months. The chicken itself? Buy it the day you plan to cook—freshness matters for that perfect texture.
This rub keeps beautifully in a sealed jar for 6 months if you make extra. I always double the batch—one for immediate use, one for later. The chicken? Cook it as soon as possible after applying the rub (within 8 hours for best results). Leftovers? Store in the fridge for 3 days or freeze for 2 months. Reheat gently in a skillet or oven—microwaving kills the crispy skin.
Why You’ll Love This Recipe
- No-Fuss Flavor Bomb: Honestly, this rub takes five minutes to mix—just toss everything in a bowl and whisk. The coarse kosher salt and freshly cracked pepper do all the heavy lifting while you prep the chicken. No fancy tools, no stress.
- Smoky-Sweet Magic: The smoked paprika and brown sugar caramelize into that perfect crispy crust—think restaurant-quality bark without the fuss. That little kick from the cayenne? Just enough to make every bite sing, especially when paired with the garlic and onion powders.
- Weeknight Hero: I make this every Tuesday night because it’s foolproof. Slap it on chicken thighs, pop them in the oven, and you’ve got a meal that feels special but takes less time than ordering takeout. Plus, the leftovers? Even better the next day.
- Budget-Friendly Treasure: For less than $5, you get a rub that lasts forever—store it for months, use it on chicken, roasted veggies, or even potatoes. The olive oil and bone-in thighs make it a steal, and the flavors deepen with every use. My secret weapon for feeding a crowd on a dime.
Instructions for basic chicken rub recipe
This bold, herby blend transforms simple chicken thighs into restaurant-quality bites.
Combine Dry Ingredients Thoroughly
In a medium bowl, whisk together the 2 tablespoons kosher salt, 1½ tablespoons freshly ground black pepper, 1½ tablespoons smoked paprika, 1 tablespoon garlic powder, 1 tablespoon onion powder, 1 teaspoon dried thyme, 1 teaspoon dried rosemary, ½ teaspoon ground cayenne pepper, and 1 tablespoon brown sugar. The coarse texture of the kosher salt helps create that perfect crust on the chicken skin.
Use a fork or whisk to break up any clumps in the dried rosemary and thyme, releasing their fragrant oils. You’ll notice the mixture turning a deep reddish-brown color from the smoked paprika and brown sugar. This blend is what will give your chicken that signature smoky, slightly sweet depth.
Coat the Chicken Evenly
Pat the 1½ pounds chicken thighs dry with paper towels—this is crucial for crispy skin. The extra-virgin olive oil helps the rub adhere better and promotes even browning. Place the chicken thighs skin-side up in a single layer on a plate.
Drizzle the 1 tablespoon extra-virgin olive oil over the chicken and rub it evenly across all surfaces, including the skin. Then, sprinkle half of the dry rub mixture over the chicken, pressing it gently into the meat. Flip the thighs and repeat with the remaining rub, making sure every inch is coated. This ensures maximum flavor penetration and that crispy bark we’re after.
Rest Before Cooking
Transfer the rubbed chicken thighs to a plate or tray and let them rest at room temperature for 30 minutes. This step allows the rub to fully adhere to the meat and helps the chicken cook more evenly. You’ll see the skin starting to take on a slightly glossy appearance from the olive oil.
Here’s the thing—don’t skip this resting time. Cold chicken straight from the fridge can cause uneven cooking, leading to tough meat. The room temperature step guarantees juicy, tender results. While they rest, you can preheat your oven or grill for perfect cooking conditions.
Cook to Crispy Perfection
Cook the chicken according to your preferred method—whether it’s on the grill, in a skillet, or in the oven. For oven-baked results, place the thighs on a wire rack set over a baking sheet and bake at 425°F for 35-40 minutes, until the internal temperature reaches 165°F and the skin is deep golden brown and crispy.
For grilled chicken, cook over medium-high heat for 6-8 minutes per side, turning once. You’ll know it’s ready when the skin releases easily from the grill grates and the juices run clear when pierced with a meat thermometer. The brown sugar in the rub will caramelize beautifully, creating that irresistible crust.
Pro Tips For Making Basic Chicken Rub
- Whisk the Paprika: Don’t just dump the smoked paprika—actually whisk it into the other dry ingredients first. I used to just toss it in, and the rub always looked streaky. Breaking up those clumps early ensures the brown sugar and spices blend smoothly, so every bite gets that even, deep smoky-sweet flavor.
- Press the Rub In: When coating the chicken, don’t just sprinkle—press the rub into the meat, especially the skin. I learned this after my first batch tasted like the seasoning was just sitting on top. A few firm presses with your fingers or a paper towel make the difference between flavor clinging to the surface and sinking in.
- Skip the Crowding: If baking, resist the urge to stack the thighs on top of each other. I’ve done it, and the skin steams instead of crisps. Give them space on the wire rack—even if it means two batches. That crispy bark only forms when hot air circulates freely.
- Preheat Like It’s Your Job: Your oven or grill needs to hit 425°F before the chicken goes in—no excuses. I once rushed this and ended up with sad, pale skin. A screaming-hot surface is what caramelizes the brown sugar and renders the fat for that perfect crust. Five minutes of waiting now saves you from dry, flavorless chicken later.
Best sauces and condiments for this recipe
Sweet & Tangy Pairings
Drizzle your perfectly rubbed chicken with 3 tbsp honey-mustard glaze (mix 2 tbsp honey with 1 tbsp Dijon mustard and 1 tsp apple cider vinegar) right before serving. The sweetness balances the rub’s smoky depth while the mustard adds a sharp contrast.
I brush it on just before the final minutes of cooking for maximum caramelization. This combo is especially great with grilled chicken thighs. 🍯
Spicy Sriracha Lime
For heat lovers, mix 2 tbsp sriracha with the juice of 1 lime and a splash of 1 tbsp water to create a quick sauce. The lime brightens the rub’s smoky flavors while the sriracha adds a fiery kick.
I serve this on the side so everyone can adjust the spice level to their taste. It’s perfect for serving with wings or thighs. 🌶️
Herby Yogurt Dip
Blend ½ cup plain Greek yogurt with 1 tbsp chopped fresh parsley, 1 tsp lemon zest, and a pinch of salt for a cooling contrast to the bold rub.
This dip works wonderfully with grilled chicken skewers or as a side for chicken salad. The yogurt’s creaminess cuts through the rub’s intensity beautifully. ✨
Smoky BBQ Sauce
For a Southern twist, top your cooked chicken with ¼ cup store-bought BBQ sauce (I recommend Sweet Baby Ray’s for its balanced sweetness). The smoky notes in the sauce complement the rub’s paprika beautifully.
Brush it on during the last 5 minutes of cooking to let it caramelize slightly. This pairing is a crowd-pleaser for BBQ lovers. 🔥
Fresh Citrus & Herb
Toss chopped 1 orange and 1 lemon over your chicken with 2 tbsp chopped cilantro and a drizzle of olive oil for a bright, refreshing finish.
The citrus cuts through the rub’s richness while the cilantro adds freshness. This works particularly well with grilled chicken or when serving at room temperature. 💛
Nutrition facts
Frequently asked questions
Why does the recipe call for bone-in, skin-on chicken thighs?
The bone and skin are essential for two reasons: they create a rich, flavorful broth when cooked, and the skin becomes deliciously crispy when seasoned properly. Bone-in thighs stay juicier during cooking, while the skin provides that perfect crunch. If you use breasts, they’ll dry out faster—thighs are the best choice for this recipe!
Can I use pre-ground spices instead of freshly cracked pepper?
While you can use pre-ground pepper, freshly cracked black pepper adds a more vibrant, aromatic flavor. The difference is noticeable—pre-ground pepper tastes more muted and dusty. For the best results, invest in a pepper mill or ask your grocer to grind it fresh for you.
What if I don’t have smoked paprika? What can I substitute?
If you’re missing smoked paprika, mix regular paprika with a pinch of liquid smoke (about ¼ teaspoon) for a similar smoky depth. The flavor won’t be identical, but it’ll get you close! This works especially well if you’re in a pinch and need to keep the recipe moving.
How do I adjust the heat level in the rub?
Start with the ½ teaspoon ground cayenne pepper included in the recipe. If you want less heat, reduce it to ¼ teaspoon or omit it entirely. For extra spice, increase to 1 teaspoon. Taste the rub before applying it to the chicken to get your desired kick.
Can I make this rub ahead of time?
The dry rub keeps beautifully in an airtight container for up to 3 months. Store it in a cool, dark place, and it’ll be ready whenever you need it. Just make sure to let the chicken rest after applying the rub before cooking. This is a great way to prep ahead for busy weeknights.

Trained in classic French technique but raised on slow-cooked ribs and spicy rubs, she blends culinary skill with smoke and soul.
- Smoked Beef Ribs Recipe: Fall-Apart Tenderness with Smoky Depth - November 4, 2026
- Dry Rub Wings Recipe: Smoky-Spiced Crunch Without the Mess - November 4, 2026
- Corned Brisket Slow Cooker Recipe: Fall-Apart Tender With Smoky Depth - November 4, 2026