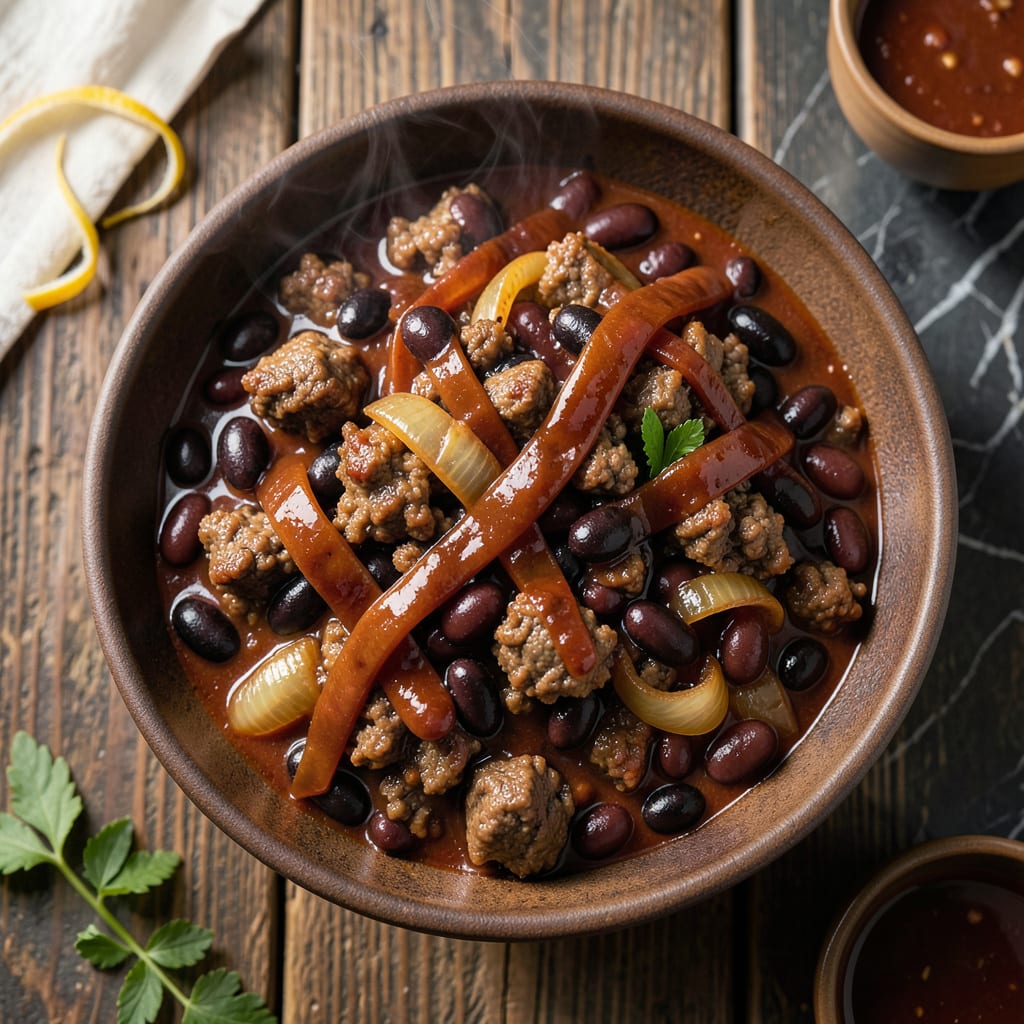
This chili brings the smoky depth of barbecue to your table without firing up the pit. I developed this recipe to capture that low-and-slow flavor in a single pot, using simple ingredients and a foolproof method.
What you get is a hearty, boldly spiced dish with tender meat and a sauce that clings to every spoonful. It’s the kind of chili that tastes like it simmered all day, even if it didn’t.
Ingredients for Bbq Chili
Ground beef and smoky barbecue sauce form the hearty base for this boldly spiced chili.
| Ingredient | Amount | Notes |
|---|---|---|
| Ground Beef 🥩 | 1 ½ lb | 80/20 lean-to-fat ratio preferred |
| Barbecue Sauce 🍯 | 1 ½ cups | Smoky, thick variety recommended |
| Black Beans 🌱 | 1 can | 15 oz can, drained and rinsed |
| Kidney Beans 🌱 | 1 can | 15 oz can, drained and rinsed |
| Yellow Onion 🧅 | 1 whole | Medium-sized, finely diced |
| Garlic Cloves 🧄 | 3 cloves | Minced for depth of flavor |
| Beef Broth 💧 | 1 cup | Low-sodium preferred for control |
| Tomato Paste 🍅 | 2 tbsp | For rich, concentrated flavor |
| Chili Powder 🌶️ | 2 tbsp | Bold, slightly smoky blend |
| Ground Cumin 🌿 | 1 tsp | Toasted for enhanced aroma |
| Smoked Paprika 🌶️ | 1 tsp | Key for barbecue smokiness |
| Brown Sugar 🍚 | 2 tbsp | Balances acidity and spice |
| Apple Cider Vinegar 🍏 | 1 tbsp | Adds tangy brightness to sauce |
| Salt 🧂 | 1 tsp | Adjust to taste at end |
| Black Pepper 🌶️ | ½ tsp | Freshly ground for best results |
[recipe_ingredient_scaler]
The ground beef is the foundation. Opt for 80/20 lean-to-fat ratio—it delivers the rich flavor and tenderness you want without being greasy. Most supermarkets carry it pre-ground, but ask the butcher to grind it fresh if you can. For the barbecue sauce, Stubb’s or Sweet Baby Ray’s are solid store-bought options. Look for a sauce with a deep, smoky profile rather than overly sweet. The beans should be canned for convenience, but ensure they’re drained and rinsed well.
No ground beef? Ground turkey or pork work fine, though the flavor will be milder. For a vegetarian twist, swap in crumbled tempeh or extra beans. If you’re out of barbecue sauce, mix ketchup with a dash of liquid smoke and molasses. The smoked paprika is non-negotiable for that barbecue essence, but regular paprika in a pinch works. Fresh garlic is ideal, but jarred minced garlic (about 1 tsp per clove) saves time.
This chili tastes even better the next day once the flavors meld. Store leftovers in an airtight container in the fridge for up to 5 days or freeze for 3 months. Reheat gently on the stove, adding a splash of broth if it’s too thick.
Why You’ll Love This Recipe
- One Pot Meal: I just brown the beef, dump in the beans, onion, and barbecue sauce, and let it simmer. Cleanup’s a breeze.
- Smoky Sweet Kick: The barbecue sauce brings this deep, tangy-sweet flavor that makes every bite ridculously good.
- Weeknight Hero: Honestly, it’s my go-to for busy evenings—ready in 30 minutes and still feels like a hearty meal.
- Stretches Far: One batch feeds my family for two nights, and the leftovers taste even better the next day.
Step-by-Step Instructions for BBQ Chili
Here’s the method. Straightforward, tested, works every time.
Step 1: Brown the Ground Beef with Aromatics
Heat a large pot or Dutch oven over medium-high heat. Add the 1.5 lb Ground Beef and break it up with a wooden spoon as it cooks. The meat should sizzle and turn deep brown with crispy edges—this takes about 6-8 minutes.
Once the beef is browned, stir in the diced Yellow Onion and cook for 3-4 minutes until softened and translucent. Add the minced 3 cloves Garlic Cloves and cook for 30 seconds until fragrant. Drain excess fat if needed, but leave about 1 tablespoon for flavor.
Step 2: Build the Flavor Base
Stir in the 2 tbsp Tomato Paste and cook for 1-2 minutes, allowing it to deepen in color. This step intensifies the tomato flavor and prevents a raw taste in the finished dish.
Add the 2 tbsp Chili Powder, 1 tsp Ground Cumin, 1 tsp Smoked Paprika, 1 tsp Salt, and 0.5 tsp Black Pepper. Toast the spices in the pot for 30 seconds until aromatic—this wakes up their essential oils and enhances their impact.
Step 3: Incorporate Liquids and Simmer
Pour in the 1 cup Beef Broth, 1.5 cups Barbecue Sauce, 2 tbsp Brown Sugar, and 1 tbsp Apple Cider Vinegar. Stir well to combine, scraping up any browned bits from the bottom of the pot. These bits add incredible depth to the sauce.
Add the drained and rinsed 1 can Black Beans and 1 can Kidney Beans. Stir everything together and bring the mixture to a gentle boil.
Step 4: Simmer to Perfection
Reduce the heat to low, cover the pot, and let the chili simmer for 25-30 minutes. Stir occasionally to prevent sticking and ensure even cooking. The chili is ready when the beans are tender and the sauce has thickened slightly.
Taste and adjust seasoning if needed. The flavors should be balanced with smoky depth from the barbecue sauce and spices, a touch of sweetness from the brown sugar, and a hint of tang from the vinegar.
Pro Tips For Making Bbq Chili
- Brown the Beef Well: Cook the ground beef until it’s deeply browned, not just gray—this builds a rich, meaty base that stands up to the bold BBQ sauce.
- Drain Excess Fat: After browning the beef, drain off most of the fat to keep the chili from getting greasy, but leave about a tablespoon for flavor.
- Rinse the Beans: Always rinse canned black and kidney beans under cold water to remove the starchy liquid, which can make the chili taste dull.
- Simmer Low and Slow: Once everything’s in the pot, let it simmer uncovered for at least 20-30 minutes so the flavors meld and the sauce thickens naturally.
Pro Cooking Tips for Perfect Results
Low and Slow Wins
For maximum flavor, I let this chili simmer on low heat for up to 45 minutes after the initial 25-30 minute cook time. The extra time lets the smoked paprika and chili powder really meld with the barbecue sauce, creating that deep, complex flavor we all love. 🔥
Brown Your Beef Well
Don’t rush the browning step—this is where the Maillard reaction creates those rich, meaty flavors. I use a cast iron Dutch oven for even heat distribution. Break the beef into ½-inch crumbles for the best texture in every bite.
Toast Your Spices
Blooming your spices in the pot for 30 seconds before adding liquids wakes up their essential oils. I learned this trick from my French training—it makes a noticeable difference in the final flavor profile. The aroma alone will tell you when they’re ready.
Scrape the Fond
When you add the liquids, use a wooden spoon to scrape up all those browned bits from the bottom of the pot. This fond is pure flavor—don’t let it go to waste. I promise it’ll make your chili taste like it’s been cooking all day.
Balance the Flavors
Taste as you go and adjust the balance. If it’s too sweet, add a splash more apple cider vinegar. If it needs depth, stir in another tablespoon of tomato paste. The perfect bowl should have smoky, sweet, and tangy notes all working together. 💡
Rest Before Serving
Let your chili rest off the heat for at least 10 minutes before serving. This allows the flavors to settle and the sauce to thicken slightly. I’ve found this simple step makes a big difference in the final texture.
Nutrition Facts

Trained in classic French technique but raised on slow-cooked ribs and spicy rubs, she blends culinary skill with smoke and soul.
- Recipe for Boneless Pork Chops in Cast Iron Skillet: Sear and Baste to Juicy Perfection - October 3, 2026
- Recipe for Boneless Cross Rib Roast: Slow-Roasted Beef with Herb Crust - October 3, 2026
- Hamburgers in Sauce Recipe Crock Pot: Slow-Cooked Savory Delight - October 3, 2026