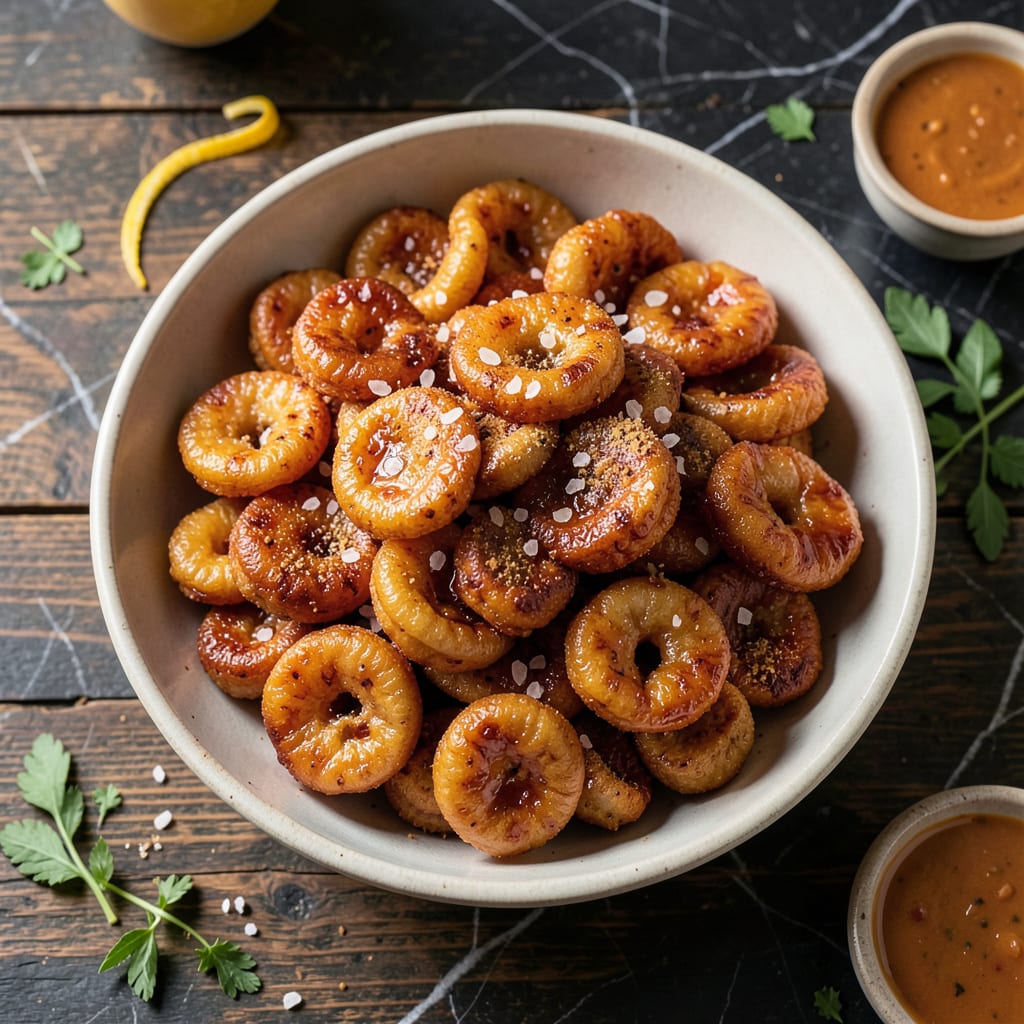
This recipe transforms pork skins into crispy, smoky BBQ bites with minimal effort. The key is slow baking at low temperature to render fat while achieving maximum crunch.
I developed this method after years of perfecting my smoke technique. The result is a snack with deep barbecue flavor and satisfying texture that rivals any store-bought version.
Ingredients for Bbq Pork Rinds
Pork skins, spices, and time create this irresistibly crispy, smoky snack with minimal effort.
| Ingredient | Amount | Notes |
|---|---|---|
| Pork Skins 🥓 | 1 lb | Fresh, thoroughly cleaned and dried |
| Sea Salt 🧂 | 1 tbsp | Coarse grain for seasoning |
| Smoked Paprika 🌶️ | 2 tsp | For deep smoky flavor |
| Garlic Powder 🧄 | 1 tsp | Fine ground for even distribution |
| Onion Powder 🧅 | 1 tsp | Enhances savory profile |
| Brown Sugar 🍚 | 1 tbsp | Light or dark variety |
| Black Pepper 🌶️ | 1 tsp | Freshly ground preferred |
| Cayenne Pepper 🔥 | ½ tsp | Adjust for heat preference |
| Olive Oil 🫒 | 1 tbsp | For light coating before seasoning |
| Apple Cider Vinegar 🍏 | 1 tsp | Balances richness with acidity |
| Liquid Smoke 🔥 | 1 tsp | For authentic barbecue aroma |
[recipeingredientscaler]
The pork skins are non-negotiable here. Source fresh, unprocessed skins from a trusted butcher or Latin market—they must be thoroughly cleaned and dried before use. Look for skins with a consistent thickness; uneven pieces will cook at different rates. I recommend Asking your butcher to remove excess fat (the good stuff, not the pre-packaged kind) to ensure even rendering during baking.
No smoked paprika? Regular paprika plus a pinch of chipotle powder works in a pinch. Liquid smoke can be swapped for half the amount of hickory-smoked salt if you’re avoiding additives. Brown sugar substitutes include coconut sugar or maple sugar (use one-third more for similar sweetness). The apple cider vinegar is subtle but essential—don’t skip it.
Store finished pork rinds in an airtight container at room temperature for up to 5 days, though they’re best within 48 hours. Re-crisp in a 300°F oven for 5 minutes if they soften. Freezing isn’t recommended—it ruins the texture.
Why You’ll Love This Recipe
- One Pan Wonder: I toss the skins with spices and bake—no deep fryer, no messy splatters, just crispy perfection.
- Smoky Crunch: The smoked paprika and garlic powder give that deep, savory BBQ flavor without the sauce.
- Party Starter: Honestly, these disappear faster than chips at any gathering I bring them to.
- Budget Snack: Pork skins are cheap, and a little goes a long way—my wallet loves this.
Step-by-Step Instructions for BBQ Pork Rinds
Here is the method to transform pork skins into crispy, smoky BBQ pork rinds.
Step 1: Clean and Cut the Pork Skins
Begin by thoroughly rinsing the 1 lb Pork Skins under cold water to remove any residual impurities. Pat them completely dry with paper towels—moisture is the enemy of crispiness. Using a sharp knife, cut the skins into 1-inch squares or rectangles, depending on your preference.
This step ensures even cooking and maximum surface area for the seasoning to adhere. I always work on a clean, dry cutting board to prevent cross-contamination and maintain hygiene.
Step 2: Prepare the BBQ Seasoning Blend
In a small bowl, combine the 1 tbsp Sea Salt, 2 tsp Smoked Paprika, 1 tsp Garlic Powder, 1 tsp Onion Powder, 1 tbsp Brown Sugar, 1 tsp Black Pepper, and 0.5 tsp Cayenne Pepper. Stir until the mixture is uniform and all the spices are evenly distributed.
The balance of sweet, smoky, and spicy flavors in this blend defines the BBQ profile. The coarse grain of the sea salt adds texture, while the smoked paprika delivers that deep, authentic barbecue aroma.
Step 3: Season and Marinate the Pork Skins
Place the cut pork skins in a large mixing bowl. Drizzle with the 1 tbsp Olive Oil, 1 tsp Apple Cider Vinegar, and 1 tsp Liquid Smoke. Toss gently to ensure every piece is lightly coated. The oil helps the seasoning stick, while the vinegar and liquid smoke infuse the skins with tangy and smoky depth.
Sprinkle the prepared seasoning blend over the pork skins and toss thoroughly until each piece is evenly coated. Let the skins marinate for 10-15 minutes to allow the flavors to penetrate.
Step 4: Bake to Crispy Perfection
Preheat your oven to 375°F. Arrange the seasoned pork skins in a single layer on a baking sheet lined with parchment paper, ensuring they do not overlap. Overcrowding will prevent even crisping.
Bake for 40-50 minutes, flipping the skins halfway through, until they are golden brown and completely crisp. Watch closely during the last 10 minutes to prevent burning. The pork rinds should puff up and develop a deep, rich color with a satisfying crunch when cooled.
Step 5: Cool and Store
Remove the pork rinds from the oven and transfer them to a wire rack to cool completely. This step is crucial—residual heat can make them soggy if left on the baking sheet. As they cool, they’ll crisp up even more.
Once fully cooled, store the pork rinds in an airtight container at room temperature for up to 5 days. If they lose their crispness, a quick 5-10 minute stint in a 300°F oven will revive them perfectly.
Pro Tips For Making Bbq Pork Rinds
- Dry the Skins: Pat the pork skins completely dry with paper towels before seasoning—any moisture left will steam them instead of crisping, and I learned this the hard way after my first batch came out chewy.
- Low and Slow First: Start the pork rinds in a 300°F oven for 20 minutes to render fat, then crank it to 400°F to crisp. Skipping this step means uneven cooking and burnt edges.
- Season Twice: Hit the skins with half the sea salt and spices before baking, then dust with the rest right after they come out—this builds layers of flavor instead of just surface seasoning.
- Cool Before Serving: Let the rinds sit for 5 minutes after baking so they firm up and stay crisp. I used to dig in too soon and ended up with a greasy, floppy mess.
Troubleshooting Great bbq pork rinds
Uneven Browning
If some pieces brown faster than others, your oven likely has hot spots. Rotate the baking sheet 180 degrees halfway through baking. I also recommend using a light-colored metal pan for more even heat distribution. 🔥
Not Crispy Enough
This usually means they need more time. Return them to the 375°F oven for 5-10 minutes, watching closely. If they’re still soft, increase oven temperature to 400°F for the final stretch. Moisture is the enemy—pat them dry before seasoning.
Burnt Edges
Your oven may be running hot. Try lowering the temperature to 350°F and extending the baking time. Also, ensure your baking sheet isn’t too close to the heating element. I learned this the hard way at my first BBQ competition.
Seasoning Falls Off
The oil coating might be insufficient. Use 2 tbsp olive oil instead of 1 tbsp for better adhesion. Alternatively, press the seasoning into the skins more firmly before baking. A light spray of oil halfway through baking can help.
Too Salty
Reduce the sea salt to 2 tsp next time, or balance the flavor by adding a pinch of brown sugar to the finished product. Remember that liquid smoke also contains sodium, so adjust accordingly.
Soggy After Storage
Re-crisp in a 300°F oven for 5-10 minutes. To prevent this, ensure they’re completely cooled before storing in an airtight container. I add a silica gel packet to absorb any lingering moisture. ✨
Nutrition Facts

Trained in classic French technique but raised on slow-cooked ribs and spicy rubs, she blends culinary skill with smoke and soul.
- Recipe for Boneless Pork Chops in Cast Iron Skillet: Sear and Baste to Juicy Perfection - October 3, 2026
- Recipe for Boneless Cross Rib Roast: Slow-Roasted Beef with Herb Crust - October 3, 2026
- Hamburgers in Sauce Recipe Crock Pot: Slow-Cooked Savory Delight - October 3, 2026