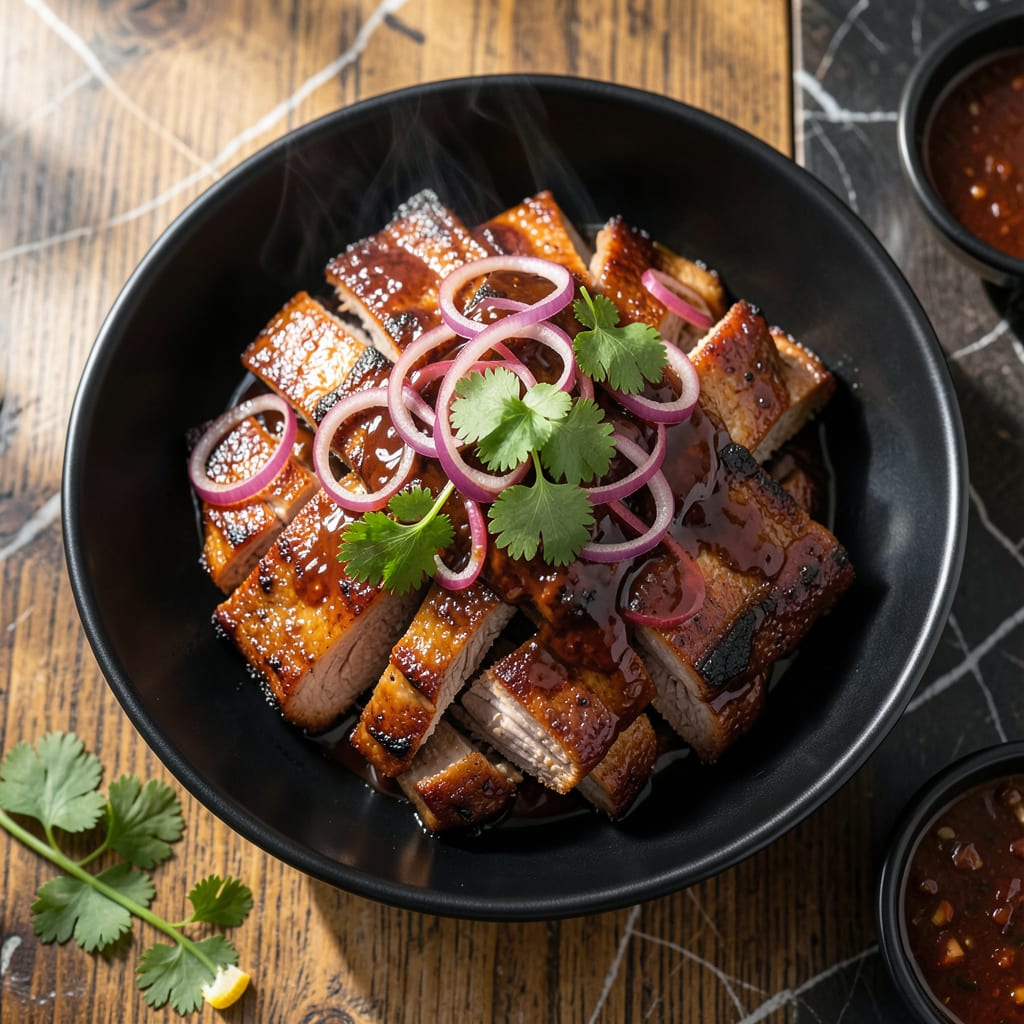
I first fell in love with the smell of hickory smoke at family cookouts, and this dish brings that same smoky-sweet magic to your table. The strips cook up tender with caramelized edges that hold up perfectly for serving crowds.
This method transforms simple pork into restaurant-quality finger food with a balance of sweet and smoky flavors that’ll have everyone reaching for seconds.
Ingredients for Bbq Pork Strips
These smoky-sweet strips start with simple pork and bold flavors everyone loves.
| Ingredient | Amount | Notes |
|---|---|---|
| Pork Shoulder 🥩 | 2 lb | Boneless, cut into strips |
| BBQ Sauce 🍯 | 1 ½ cups | Hickory-smoked preferred |
| Brown Sugar 🧈 | ¼ cup | Light or dark variety |
| Apple Cider Vinegar 💧 | 2 tbsp | Balances sweetness |
| Worcestershire Sauce 🍶 | 1 tbsp | Adds depth of flavor |
| Garlic Powder 🧄 | 1 tsp | For savory note |
| Onion Powder 🧅 | 1 tsp | Complements pork well |
| Smoked Paprika 🌶️ | 1 tsp | Enhances smoky flavor |
| Salt 🧂 | 1 tsp | Kosher or sea salt |
| Black Pepper 🌶️ | ½ tsp | Freshly ground preferred |
| Olive Oil 🫒 | 2 tbsp | For searing pork |
| Yellow Mustard 🟡 | 1 tbsp | Tangy kick for sauce |
[recipe_ingredient_scaler]
The pork shoulder is key here—look for good marbling at your butcher or Costco for the best texture. It should feel slightly tacky when raw, which means it’ll stay juicy. I’ve had luck with pre-cut strips from Whole Foods (the good stuff, not the pre-shredded kind) when I’m short on time. Avoid lean cuts like tenderloin; they dry out too fast.
No hickory BBQ sauce? Any bold, smoky variety works—just avoid the super sweet kinds. Swap apple cider vinegar for white vinegar in a pinch (the flavor’s milder). If you’re out of Worcestershire, soy sauce plus a dash of lemon juice gets you close. The brown sugar can be skipped if you’re watching sugar, but it helps caramelize those edges.
Leftovers keep 4-5 days in the fridge and reheat beautifully in the oven. Freeze cooked strips for up to 3 months—perfect for game day. I always make extra; they disappear fast.
Why You’ll Love This Recipe
- One Pan Magic: I toss the pork shoulder with the sauce and spices, then let the oven do the work—minimal cleanup, maximum flavor.
- Sweet & Tangy Bite: The brown sugar caramelizes while the apple cider vinegar cuts through with a zing that keeps me coming back.
- Meal Prep Hero: I make a big batch on Sunday and it reheats beautifully for tacos, sandwiches, or straight from the container.
- Budget Stretch: Pork shoulder is cheap, and this recipe turns it into something ridiculously good for a crowd.
Step-by-Step Instructions for BBQ Pork Strips
Here’s my tested method for achieving tender, smoky pork strips with a sticky-sweet glaze.
Step 1: Season and Sear the Pork
Pat the 2 lb Pork Shoulder strips dry with paper towels. In a bowl, combine 1 tsp Salt, 0.5 tsp Black Pepper, 1 tsp Garlic Powder, 1 tsp Onion Powder, and 1 tsp Smoked Paprika. Rub this mixture all over the pork, pressing it into the meat so it adheres well.
Heat 2 tbsp Olive Oil in a large skillet over medium-high heat until shimmering. Add the pork strips in a single layer—don’t overcrowd the pan or they’ll steam instead of sear. Cook for 3-4 minutes per side until deep golden brown and slightly charred in spots. Transfer to a plate and set aside.
Step 2: Build the BBQ Glaze
In the same skillet, reduce the heat to medium. Add 1.5 cups BBQ Sauce, 0.25 cup Brown Sugar, 2 tbsp Apple Cider Vinegar, 1 tbsp Worcestershire Sauce, and 1 tbsp Yellow Mustard. Stir to combine, scraping up any browned bits from the bottom of the pan.
Let the mixture simmer for 3-4 minutes, stirring occasionally, until the sugar dissolves and the sauce thickens slightly. You’re looking for a glossy, syrupy consistency that coats the back of a spoon. This balance of sweet, tangy, and smoky flavors will take your pork to the next level.
Step 3: Finish the Pork in the Sauce
Return the seared pork strips to the skillet, nestling them into the sauce. Spoon the sauce over the pork to ensure every strip is well coated. Reduce the heat to low and cover the skillet.
Let the pork simmer gently for 15-20 minutes, turning the strips occasionally, until the pork is fork-tender and the sauce has thickened into a sticky glaze. The pork should absorb the flavors beautifully, and the sauce should cling to each strip without being runny.
Step 4: Rest and Serve
Transfer the pork strips to a serving platter and let them rest for 5 minutes. This allows the juices to redistribute, ensuring every bite is moist and flavorful. Spoon any remaining sauce from the skillet over the top for extra shine.
Serve warm, with extra sauce on the side if desired. The pork should pull apart easily with a gentle tug, and the glaze should have a perfect balance of sweetness and smokiness. These strips are perfect for game day, parties, or a casual dinner with friends.
Pro Tips For Making Bbq Pork Strips
- Slice Against the Grain: Cut the pork shoulder into strips perpendicular to the muscle fibers—I learned this the hard way after serving chewy strips that were tough to eat.
- Carve the Fat Cap: Trim excess fat from the pork shoulder before cooking, but leave about 1/4 inch to keep the meat juicy and prevent it from drying out.
- Simmer the Sauce: After mixing BBQ sauce, brown sugar, vinegar, and Worcestershire, simmer it for 3-4 minutes to meld the flavors—sounds like a small step, but it makes a real difference.
- Rest Before Slicing: Let the pork rest under foil for 10 minutes after cooking, even if you’re hungry—this keeps the juices from running out when you slice it.
Make-Ahead Tips for Leftovers
Marinade Prep Ahead
Mix the 1.5 cups BBQ Sauce, 0.25 cup Brown Sugar, and all spices the night before. Store in an airtight container in the fridge for up to 24 hours. This lets the flavors meld deeply. I swear by this for competition-day efficiency. ⏰
Pork Pre-Cutting
Ask your butcher to cut the 2 lb Pork Shoulder into 1-inch thick strips when you buy it. This saves 15 minutes of prep time. If cutting yourself, partially freeze the pork first for cleaner slices. The butcher at my local shop always hooks me up with perfect cuts.
Partial Cook Method
Sear the pork strips as directed, then cool and refrigerate in the sauce for up to 2 days. When ready, simmer for just 10-12 minutes to finish. This works great for weekend cookouts when you want to prep early.
Freezer-Friendly
Cook the strips completely, cool, then freeze in a single layer on a tray before transferring to bags. Reheat from frozen in a 350°F oven for 20 minutes. They’ll taste nearly fresh-made. I always keep a batch for those last-minute coastal rides with friends. 💡
Sauce Separation
Make the sauce separately and store it in a jar. When ready to serve, reheat the pork in a skillet with ½ cup sauce per pound. This prevents the meat from drying out during storage.
Cold Serving Option
These strips taste great cold too—perfect for picnic spreads. Just bring to room temperature before serving. The flavors actually intensify after chilling overnight in my experience.
Nutrition Facts

Trained in classic French technique but raised on slow-cooked ribs and spicy rubs, she blends culinary skill with smoke and soul.
- Recipe for Boneless Pork Chops in Cast Iron Skillet: Sear and Baste to Juicy Perfection - October 3, 2026
- Recipe for Boneless Cross Rib Roast: Slow-Roasted Beef with Herb Crust - October 3, 2026
- Hamburgers in Sauce Recipe Crock Pot: Slow-Cooked Savory Delight - October 3, 2026