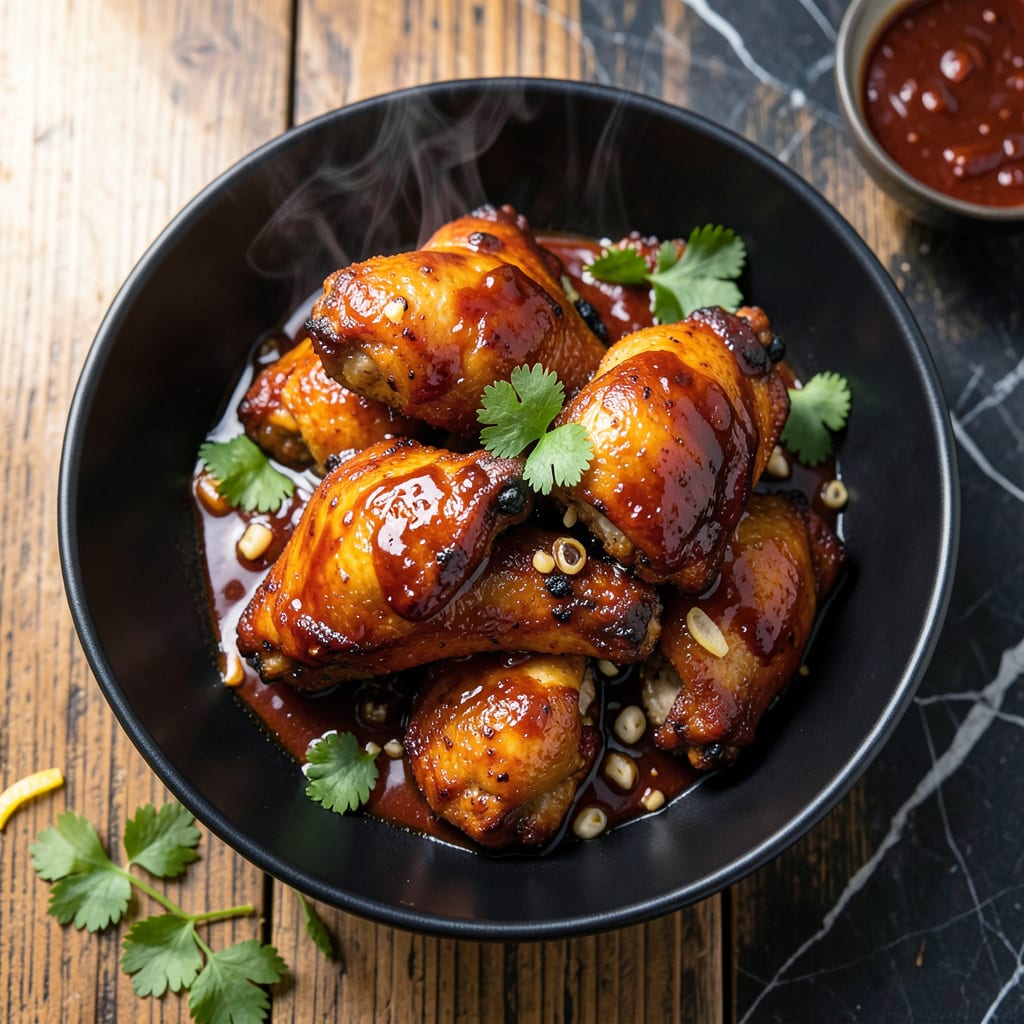
This recipe delivers juicy chicken thighs with a caramelized glaze that clings to every bite. The secret lies in a balanced marinade and precise cooking technique.
I developed this method after years of perfecting the art of sticky, finger-licking BBQ chicken. The result is tender meat with a glossy, deeply flavored coating.
Ingredients for Bbq Sticky Chicken
Juicy thighs and a glossy glaze start with these carefully chosen ingredients.
| Ingredient | Amount | Notes |
|---|---|---|
| Chicken Thighs 🍗 | 2 lb | Boneless, skin-on preferred |
| BBQ Sauce 🍯 | 1 ½ cups | Thick, sweet variety preferred |
| Brown Sugar 🧈 | ¼ cup | Light or dark works |
| Apple Cider Vinegar 🍏 | 2 tbsp | Balances sweetness in glaze |
| Worcestershire Sauce 💧 | 1 tbsp | Adds umami depth |
| Garlic Cloves 🧄 | 4 cloves | Minced for marinade |
| Soy Sauce 🧂 | 2 tbsp | Low-sodium recommended |
| Olive Oil 🫒 | 2 tbsp | For searing chicken |
| Smoked Paprika 🌶️ | 1 tsp | For smoky flavor |
| Salt 🧂 | 1 tsp | Kosher salt preferred |
| Black Pepper 🌶️ | ½ tsp | Freshly ground |
| Onion Powder 🧅 | 1 tsp | Enhances marinade flavor |
[recipe_ingredient_scaler]
The chicken thighs are non-negotiable here. Bone-in, skin-on gives you the juiciest results with crispy skin that holds the glaze. Most supermarkets carry them in family packs—look for air-chilled if available (it’s plumped with less water). The BBQ sauce should be thick and sticky; Sweet Baby Ray’s or Stubb’s are reliable choices. Avoid the vinegar-heavy Carolina styles for this recipe.
No Worcestershire? Soy sauce plus a dash of lemon juice gets you close. Brown sugar can be swapped for honey (1:1), though the molasses notes in brown sugar are ideal. Missing smoked paprika? Regular paprika plus a pinch of liquid smoke works. The apple cider vinegar can be white vinegar in a pinch, but it’ll be sharper. Always taste as you go—balancing sweet, tangy, and smoky is key.
Marinate the chicken for at least 4 hours (overnight is best). Leftovers keep 3-4 days in the fridge, though the skin loses crispness. Reheat in a 400°F oven for 10 minutes to revive the stickiness. Freezes well for up to 3 months—thaw overnight before reheating.
Why You’ll Love This Recipe
- One Pan Wonder: I just toss everything on a sheet pan and let the oven do the work—no fancy prep.
- Sweet & Tangy Magic: The brown sugar caramelizes with the vinegar and BBQ sauce for that sticky, finger-licking glaze.
- Feed a Crowd: I make a double batch for Sunday dinner and have leftovers for lunch the next day.
- Budget Hero: Chicken thighs stay juicy and cheap, and a little sauce goes a long way.
Step-by-Step Instructions for BBQ Sticky Chicken
Here’s the method. Straightforward, tested, works every time.
Step 1: Marinate the Chicken for Maximum Flavor
In a large bowl, whisk together the 2 tbsp Soy Sauce, 2 tbsp Olive Oil, 1 tbsp Worcestershire Sauce, minced 4 cloves Garlic Cloves, 1 tsp Smoked Paprika, 1 tsp Salt, 0.5 tsp Black Pepper, and 1 tsp Onion Powder until fully combined. The soy sauce and Worcestershire add depth while the spices build layers of flavor.
Add the 2 lb Chicken Thighs to the marinade, ensuring each piece is well coated. I always let this sit for at least 30 minutes at room temperature or up to 4 hours in the refrigerator. This step guarantees the meat stays juicy throughout cooking and absorbs all the savory, smoky notes.
Step 2: Sear the Chicken for Crispy Skin
Heat a large skillet over medium-high heat. Remove the chicken from the marinade (reserve the marinade) and place it skin-side down in the hot skillet. Sear undisturbed for 5-6 minutes until the skin turns deep golden brown and releases easily from the pan.
Flip the chicken and sear the other side for 3-4 minutes. You’re looking for an even, rich color—that’s your visual cue that the Maillard reaction is creating complex flavors. Transfer the chicken to a plate and set aside.
Step 3: Create the Sticky Glaze
In the same skillet, reduce heat to medium and add the reserved marinade, 1.5 cups BBQ Sauce, 0.25 cup Brown Sugar, and 2 tbsp Apple Cider Vinegar. Stir to combine, scraping up any browned bits from the bottom of the pan.
Let the mixture simmer for 3-4 minutes until it thickens slightly and becomes glossy. The vinegar balances the sweetness of the brown sugar and BBQ sauce, creating that signature sticky, tangy glaze. Taste and adjust seasoning if needed.
Step 4: Glaze and Finish the Chicken
Return the chicken to the skillet, skin-side up. Spoon the glaze generously over each piece, ensuring they’re fully coated. Reduce heat to medium-low and let it cook for 8-10 minutes, basting the chicken with the glaze every 2 minutes.
The glaze should bubble and thicken, clinging to the chicken in a glossy, finger-licking layer. The chicken is done when the internal temperature reaches 165°F and the glaze has reduced to a sticky consistency. Serve immediately while hot and saucy.
Pro Tips For Making Bbq Sticky Chicken
- Sear First, Sauce Later: I learned this the hard way—sear the chicken thighs skin-side down in a hot pan for 5-6 minutes before adding any sauce. This builds a crispy base that keeps the meat from turning soggy under the sticky glaze.
- Score the Skin: Use a sharp knife to make 2-3 shallow cuts in the skin of each thigh. Sounds weird, but it works: the sauce seeps into those slits and flavors the meat deeper, plus it helps render the fat evenly.
- Reduce the Sauce: After mixing BBQ sauce, brown sugar, vinegar, and Worcestershire, simmer it for 3-4 minutes before glazing. This thickens it just enough so it clings to the chicken instead of sliding right off.
- Rest Before Serving: Give the chicken a solid 5 minutes under loose foil after cooking. My grandmother swore by this, and she was right: the juices redistribute, and that sticky glaze sets instead of running all over the plate.
Essential Equipment for This Recipe
Quality Skillet
I always reach for my 12-inch Lodge cast iron skillet for this recipe. Its even heat distribution and retention are perfect for searing chicken skin to crispy perfection. A heavy-bottomed stainless steel skillet works too, but cast iron adds that extra touch of authenticity.
Instant-Read Thermometer
Never guess doneness again. My ThermoWorks ThermoPop gives accurate readings in 3-4 seconds. For sticky chicken, you’re aiming for 165°F internal temperature in the thickest part of the thigh. It’s a small investment that makes a huge difference. 🌡️
Silicon Basting Brush
A high-heat silicone basting brush is essential for coating the chicken with that glossy glaze. I prefer the OXO brand with its angled head for easy reach. The silicone withstands the medium-high heat needed for proper caramelization.
Mixing Bowls
For the marinade, I use a large stainless steel mixing bowl (at least 3-quart capacity). It’s durable, easy to clean, and gives plenty of room to coat all the chicken thighs evenly. A glass bowl works too, but I find stainless conducts temperature better.
Tongs for Handling
Spring-loaded locking tongs are my go-to for flipping and moving the chicken. Look for 12-inch length to keep your hands safe from the heat. I prefer the OXO Good Grips version for its comfortable handle and precise control.
These tools make the process smoother and more enjoyable, and they’ll last for years with proper care. 💪
Nutrition Facts

Trained in classic French technique but raised on slow-cooked ribs and spicy rubs, she blends culinary skill with smoke and soul.
- Recipe for Boneless Pork Chops in Cast Iron Skillet: Sear and Baste to Juicy Perfection - October 3, 2026
- Recipe for Boneless Cross Rib Roast: Slow-Roasted Beef with Herb Crust - October 3, 2026
- Hamburgers in Sauce Recipe Crock Pot: Slow-Cooked Savory Delight - October 3, 2026