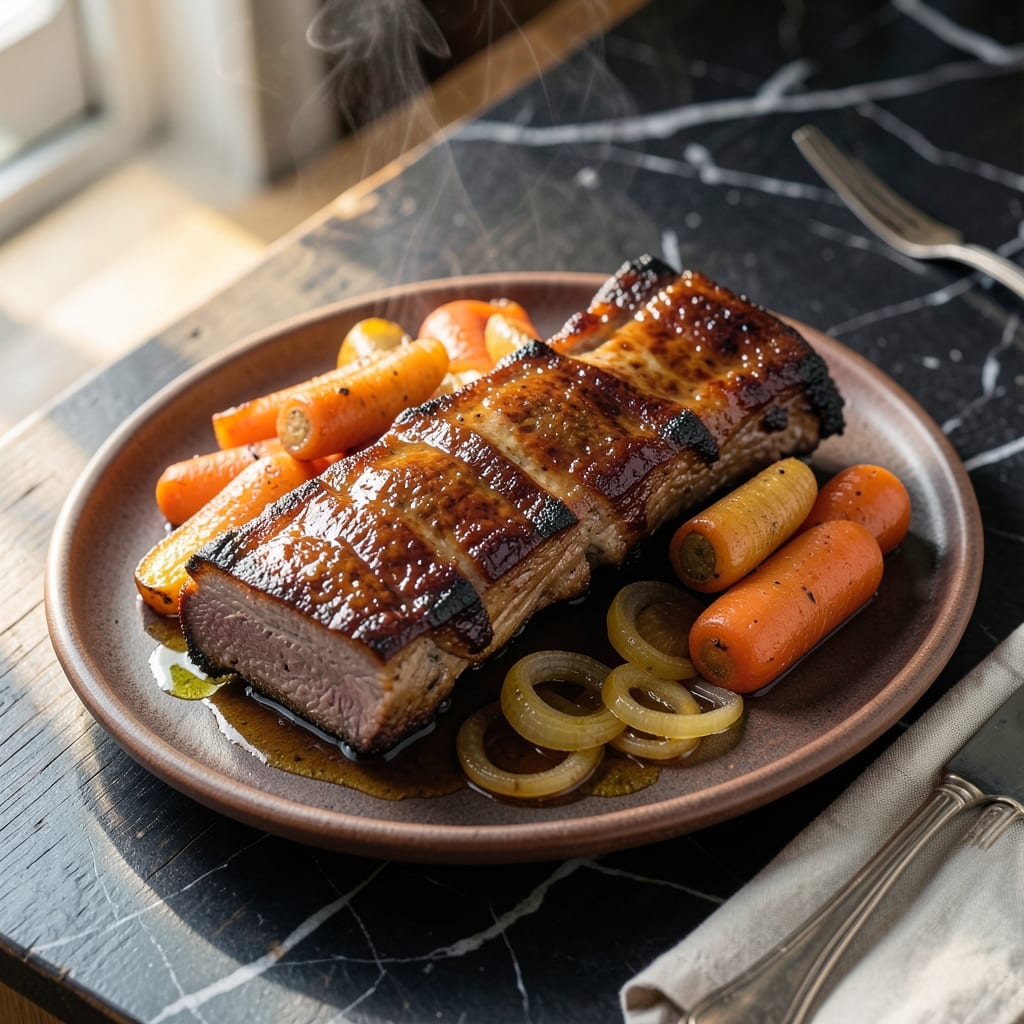
There’s a reason braised beef back ribs remain a staple in my family’s New England kitchen. The slow cooking process transforms tough cuts into melt-off-the-bone tenderness that can’t be rushed.
This method relies on low, steady heat to break down connective tissue while infusing the meat with deep, rich flavors. I’ve tested variations in my small Boston kitchen, always returning to this foolproof approach.
The result is ribs so tender they fall apart at the touch of a fork, with a sauce that’s developed complex layers from the braising liquid. The aroma alone makes the wait worthwhile.
Perfect for Sunday suppers or special occasions, this dish delivers restaurant-quality results with minimal active effort. The ribs practically cook themselves.
Ingredients for Beef Back Ribs Recipe Braised
A few fresh ingredients and some time work wonders for this comforting dish.
| Ingredient | Amount | Notes |
|---|---|---|
| Beef Back Ribs 🥩 | 3 lb | Bone-in, trimmed of excess fat |
| Kosher Salt 🧂 | 2 tsp | Diamond Crystal preferred |
| Black Pepper 🌶️ | 1 tsp | Freshly ground for best flavor |
| Olive Oil 🫒 | 2 tbsp | Divided for searing and braising |
| Yellow Onion 🧅 | 1 whole | Large, roughly chopped |
| Carrots 🥕 | 3 whole | Medium, peeled and chopped |
| Celery Stalks 🌿 | 3 whole | Chopped for aromatic base |
| Garlic Cloves 🧄 | 6 cloves | Peeled and smashed |
| Red Wine 🍷 | 2 cups | Dry, bold variety like Cabernet |
| Beef Stock 🥫 | 2 cups | Low-sodium preferred |
| Tomato Paste 🍅 | 2 tbsp | For depth of flavor |
| Fresh Thyme 🌿 | 4 whole | Sprigs, plus extra for garnish |
| Bay Leaves 🍃 | 2 whole | Dried for braising liquid |
| Apple Cider Vinegar 🍏 | 1 tbsp | For brightness in sauce |
[recipe_ingredient_scaler]
The beef back ribs are the star here. Look for well-marbled ribs at your butcher or Whole Foods—the fat keeps them moist during the long braise. I usually ask for them cut into individual ribs (the butcher will do this for free). If you’re in Boston, Savenor’s has amazing quality. Don’t skip patting them dry first—it’s worth the extra minute for better browning.
No red wine? Beef broth with a splash of balsamic vinegar works in a pinch. Fresh thyme is ideal, but dried at one-third the amount is fine. Short on tomato paste? Those Trader Joe’s squeeze tubes are perfect (no waste, lasts forever). The onion, carrot, and celery are classic for building flavor—don’t skip any of the trio.
Ribs taste even better the next day once everything melds. Refrigerate for up to 4 days or freeze for 3 months. I like to make a big batch on Sunday—leftovers reheat beautifully (just add a splash of stock).
Why You’ll Love This Recipe
- Set and Forget: I brown the ribs, add the onion, salt, and pepper, then let the oven do the work for hours. Hands-off doesn’t get easier.
- Fall-Off-The-Bone Good: The slow braise turns the meat so tender it nearly melts, while the onion and olive oil build a rich, savory depth.
- Sunday Supper Star: This feeds my whole family with barely any effort, and it feels special enough for company.
- Leftovers That Improve: Honestly, the ribs taste even better the next day—perfect for sandwiches or quick reheats.
Step-by-Step Instructions for Braised Beef Back Ribs
Here’s my foolproof method for fall-off-the-bone ribs with rich, deep flavor.
Step 1: Season and Sear the Beef Back Ribs
Pat the 3 lb Beef Back Ribs completely dry with paper towels. This ensures a perfect sear. Season both sides evenly with the 2 tsp Kosher Salt and 1 tsp Black Pepper, pressing the seasoning into the meat so it adheres well.
Heat 1 tbsp Olive Oil in a large Dutch oven over medium-high heat until shimmering. Add the ribs in a single layer (work in batches if needed) and sear for 4-5 minutes per side until deep golden brown. Don’t move them too soon—let that crust develop. Transfer the seared ribs to a plate and set aside.
Step 2: Build the Aromatic Base
In the same pot, add the remaining 1 tbsp Olive Oil if needed. Toss in the 1 whole Yellow Onion, 3 whole Carrots, and 3 whole Celery Stalks. Cook for 6-7 minutes, stirring occasionally, until the vegetables soften and begin to brown around the edges.
Add the 6 cloves Garlic Cloves and 2 tbsp Tomato Paste, stirring constantly for 1-2 minutes until the tomato paste darkens slightly and coats the vegetables. This builds the flavor foundation for your braising liquid. The kitchen should smell incredibly fragrant at this point.
Step 3: Deglaze and Add Braising Liquid
Pour in the 2 cups Red Wine, using a wooden spoon to scrape up all the browned bits from the bottom of the pot. Let it simmer for 3-4 minutes until the liquid reduces by about half. This step is crucial—it incorporates all those caramelized flavors into your sauce.
Add the 2 cups Beef Stock, 4 whole Fresh Thyme, and 2 whole Bay Leaves. Stir to combine, then return the seared ribs to the pot, along with any accumulated juices. The liquid should come about halfway up the ribs. If it doesn’t, add a splash more beef stock.
Step 4: Braise Until Tender
Bring the liquid to a gentle simmer, then cover the pot and transfer it to a preheated 325°F oven. Braise for 2.5 to 3 hours, turning the ribs halfway through, until the meat is fork-tender and nearly falling off the bone.
Check occasionally to ensure the liquid isn’t reducing too much—add a little hot water if needed. The ribs are done when they pull away from the bone with just a gentle tug. This slow cooking process transforms the tough meat into something meltingly tender.
Step 5: Finish with Brightness and Serve
Carefully remove the ribs to a serving platter. Skim any excess fat from the braising liquid, then stir in the 1 tbsp Apple Cider Vinegar. This adds a subtle brightness that cuts through the richness.
Spoon the braising liquid over the ribs or serve it on the side for dipping. The sauce should be thick enough to coat the back of a spoon. Garnish with extra thyme if desired, and serve immediately while hot. The meat should be so tender it practically slides off the bone with each bite.
Pro Tips For Making Beef Back Ribs Recipe Braised
- Dry the Ribs Well: Pat the beef back ribs completely dry with paper towels before seasoning—this guarantees a better sear when you brown them in olive oil, and I learned this the hard way after steaming my first few batches.
- Season Aggressively: Use more kosher salt and black pepper than you think you need, especially on the meaty side, since braising mellows the seasoning. My grandmother swore by this, and she was right.
- Brown in Batches: Resist the urge to crowd the pan—brown the ribs in batches so each piece gets proper contact with the hot oil and onion, or you’ll end up with pale, soggy meat.
- Low and Slow: After searing, drop the heat to 275°F and braise for 3-4 hours. Sounds long, but it’s the only way to get fall-off-the-bone tenderness without drying them out.
Flavor Customization for This beef back ribs recipe braised
Spicy Kick
Add 1 tsp red pepper flakes when browning the vegetables, or stir in 1 tbsp hot sauce at the end. I love using Frank’s RedHot for a tangy heat. For deeper spice, a dash of cayenne pepper in the seasoning mix works wonders. 🌶️
Sweet Glaze
During the last 30 minutes of braising, brush the ribs with a mix of ¼ cup honey and 2 tbsp brown sugar. This creates a sticky, caramelized glaze. It’s a trick I learned from my Nonna—it balances the richness beautifully.
Herb Variations
Swap thyme for 2 tbsp fresh rosemary or 1 tbsp dried oregano. I often use rosemary when I want a piney note. For Mediterranean flair, add 1 tsp dried sage with the bay leaves.
Umami Boost
Stir in 1 tbsp soy sauce or 1 tbsp fish sauce into the braising liquid. This adds depth without overpowering. I discovered this while testing in my tiny Boston kitchen—it always surprises guests.
Citrus Brightness
Along with the apple cider vinegar, add the zest of 1 orange or 1 lemon at the end. This lifts the flavors and cuts through the fat. The citrus oils add a subtle freshness that’s perfect for this dish.
Mushroom Addition
Add 8 oz cremini mushrooms when browning the vegetables. They soak up the braising liquid and add a meaty texture. I often grab them from the Italian deli near my old triple-decker—they always have the freshest. 💪
Nutrition Facts
Frequently Asked Questions
What’s the best way to know when the ribs are done?
They’re ready when the meat pulls away from the bone with a gentle tug. A fork should slide in effortlessly, and the meat will be fork-tender after 2.5 to 3 hours at 325°F.
Can I use a slow cooker instead of the oven?
Yes! Sear as directed, then transfer everything to a slow cooker. Cook on low for 6-8 hours or high for 4-5 hours. The texture will be slightly different but still delicious.
Why do I need to pat the ribs dry before searing?
Moisture prevents proper browning. Patting them dry ensures a deep, flavorful crust forms during searing, which enhances the overall dish. It’s a small step with big impact.

Trained in classic French technique but raised on slow-cooked ribs and spicy rubs, she blends culinary skill with smoke and soul.
- Recipe for Boneless Pork Chops in Cast Iron Skillet: Sear and Baste to Juicy Perfection - October 3, 2026
- Recipe for Boneless Cross Rib Roast: Slow-Roasted Beef with Herb Crust - October 3, 2026
- Hamburgers in Sauce Recipe Crock Pot: Slow-Cooked Savory Delight - October 3, 2026