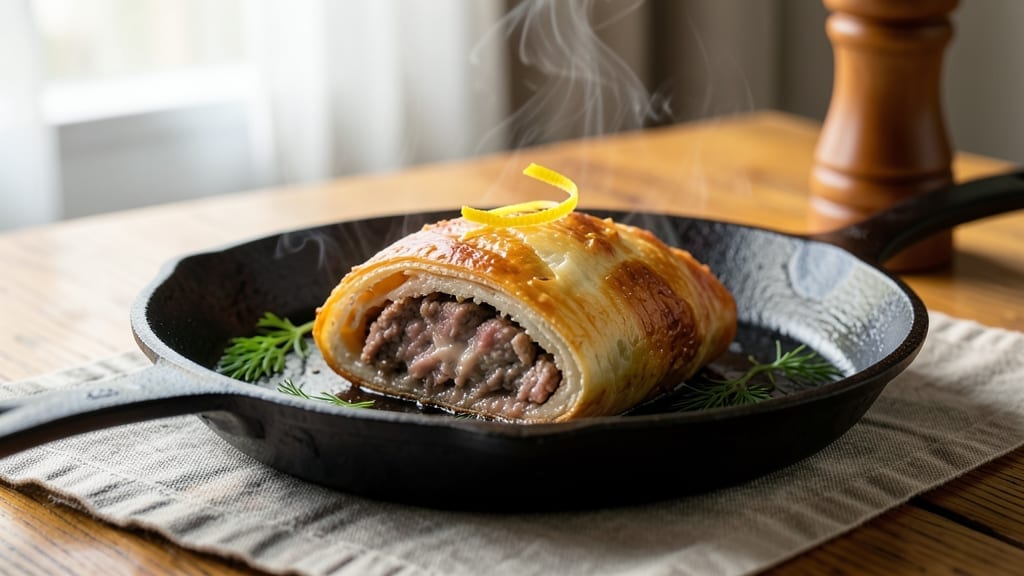
This beef brisket knish recipe transforms tough brisket into tender, melt-in-your-mouth bites wrapped in golden, flaky dough. 🌟 The secret lies in slow-cooking the brisket until it practically falls apart, then encasing it in a crispy, layered dough that bakes to perfect golden perfection.
I first perfected this recipe during a particularly chilly Portland winter when I needed something hearty enough to warm a crowd.
The process begins with a foolproof brisket method—rubbed with spices and slow-cooked until fork-tender—then wrapped in dough that puffs beautifully in the oven. The dough itself is simple: just flour, butter, and a touch of sour cream for that signature flakiness.
This isn’t your average knish; it’s a showstopper that balances rich, savory beef with a crispy, buttery crust that holds up to every bite.
By the time you pull these knishes from the oven, you’ll have golden-brown pockets filled with tender, juicy brisket that practically melts on the tongue.
The aroma alone will have everyone gathering around the table, and the contrast of crispy dough with succulent meat makes every bite worth the effort. Perfect for holiday gatherings, potlucks, or when you want to impress without fuss.
Ready in about 3 hours (mostly hands-off time), this recipe delivers restaurant-quality results with minimal active work. The key is patience—letting the brisket cook low and slow while the dough rests before baking. Let’s get started on creating your next crowd-pleaser!
Ingredients for beef brisket knish
A few hearty ingredients transform tough brisket into golden, flaky bites that’ll have everyone begging for more.
| Ingredient | Amount | Notes |
|---|---|---|
| Beef Brisket 🥩 | 3 lb | Flat cut, well-marbled |
| Yellow Onion 🧅 | 1 whole | Yellow or red, diced |
| Garlic Cloves 🧄 | 6 cloves | Peeled, minced |
| Beef Broth 💧 | 1 ½ cups | Low-sodium preferred |
| Apple Cider Vinegar 🍎 | ¼ cup | For tenderizing |
| Brown Sugar 🍯 | ¼ cup | Light or dark |
| Smoked Paprika 🌶️ | 2 tbsp | For smoky depth |
| Ground Black Pepper 🌶️ | 1 ½ tsp | Freshly cracked |
| Kosher Salt 🧂 | 1 ½ tbsp | For seasoning |
| All-Purpose Flour 🌾 | 3 ½ cups | For dough |
| Unsalted Butter 🧈 | 1 cup | Cold, cubed |
| Sour Cream 🥛 | ½ cup | Full-fat preferred |
| Ice Water ❄️ | ½ cup | For dough elasticity |
| Large Egg 🥚 | 1 whole | For egg wash |
| Sesame Seeds 🌱 | 2 tbsp | Optional topping |
[recipe_ingredient_scaler]
The brisket is where the magic happens. Look for a well-marbled flat cut—the fat keeps it moist. I grab mine from Costco or the butcher counter at Whole Foods when I can. If you can’t find brisket, chuck roast works in a pinch, but it won’t be as tender. Trim any thick fat caps to about 1/4-inch—just enough to render flavor, not grease. The apple cider vinegar is non-negotiable here; it tenderizes the meat while adding a subtle tang that pairs perfectly with the smoky spices. For the smoked paprika, Penzeys or Trader Joe’s have the best quality—avoid the dusty stuff from the back of your pantry.
No smoked paprika? Regular paprika plus a pinch of liquid smoke gets you close. Short on apple cider vinegar? Red wine vinegar works too, but add an extra pinch of salt. The dough is foolproof—just flour, butter, and sour cream. For the butter, use full-fat and keep it cold—this is what gives you that signature flakiness. If you’re feeling fancy, add a pinch of salt to the butter cubes before mixing. The sesame seeds are optional but add a nice crunch—toast them lightly in a dry pan before sprinkling for extra flavor. And if you’re making these ahead, freeze the filled knishes before baking—just add 10 minutes to the baking time.
The brisket keeps best in the fridge for 3-4 days once cooked, but the dough can wait up to 2 days in the fridge if wrapped tightly in plastic. For the sesame seeds, store them in an airtight container away from light—they’ll stay fresh for 6-12 months. If you’ve got leftovers, these knishes reheat beautifully in a 350°F oven for 10-15 minutes—just cover them loosely with foil to keep them from drying out. I always make a double batch because they disappear fast, especially when you’ve got a crowd to impress.
Why You’ll Love This Recipe
- No-Fuss Feast: I make this when my brain’s already full—just dump the ingredients in, let them simmer for hours, and boom, you’ve got tender brisket with zero stress. The dough takes five minutes to mix, and the oven does the rest while I grab a coffee.
- Smoky-Sweet Payoff: That apple cider vinegar and brown sugar? They turn tough brisket into melt-in-your-mouth goodness, while the smoked paprika adds a depth that makes every bite taste like a cozy night in. Trust me, the first forkful is chef’s kiss.
- Leftovers? More Like Leftovers 2.0: The brisket keeps for days, so I double the recipe and freeze half—perfect for lazy weeknights or game day. Just toss the frozen knishes in the oven, add 10 minutes, and you’ve got a crowd-pleaser with zero effort.
- Budget’s Happy: A 3-pound brisket feeds six people (plus leftovers), and the rest of the ingredients? Basic pantry staples. You’re looking at a meal that costs less than takeout but tastes like a restaurant—without the bill. Win.
Step-by-step instructions for beef brisket knish
Here’s how to transform slow-cooked brisket into golden, flaky knishes that’ll have everyone begging for seconds.
🔥 Step 1: Slow-Cook the Brisket Until Fork-Tender
In a heavy pot, combine the 3 lb beef brisket, 1 yellow onion (diced), 6 garlic cloves (minced), 1½ cups beef broth, ¼ cup apple cider vinegar, ¼ cup brown sugar, 2 tbsp smoked paprika, 1½ tsp ground black pepper, and 1½ tbsp kosher salt. Bring to a boil over high heat, then reduce to a simmer and cover partially.
Cook for 3-4 hours until the brisket is fork-tender and the sauce has reduced to a thick, glossy consistency. Real talk: the vinegar and sugar combo tenderizes the meat while building deep flavor. Skim any foam that rises during the first 30 minutes—this keeps your sauce clean and velvety.
Once tender, remove the brisket and shred it using two forks. Return the shredded meat to the pot and simmer uncovered for another 10 minutes to thicken the sauce further. Let it cool completely before stuffing—warm filling makes the dough soggy.
👨🍳 Step 2: Make the Flaky Dough
In a large bowl, combine 3½ cups all-purpose flour and 1½ tbsp kosher salt. Cut in 1 cup unsalted butter (cold and cubed) using a pastry cutter or your fingers until the mixture resembles coarse crumbs with pea-sized butter pieces. This is the secret to flaky layers—don’t overwork it.
Add ½ cup sour cream and ½ cup ice water gradually, mixing just until the dough comes together. The ice water keeps the butter cold so it doesn’t melt during mixing. Turn the dough onto a lightly floured surface and knead gently 5-6 times—just enough to form a smooth ball. Over-kneading develops gluten, which makes the knishes tough.
Wrap the dough in plastic and refrigerate for 30 minutes. This rest period relaxes the gluten and makes rolling easier. While it chills, preheat your oven to 375°F—you’ll want it hot for those golden knishes.
🥘 Step 3: Assemble and Bake the Knishes
Divide the chilled dough into 6 equal portions (about 6 oz each) and roll each into a 12-inch circle on a floured surface. Keep the remaining dough covered to prevent drying. Here’s the thing—don’t stress if the circles aren’t perfect. Imperfections make them look homemade!
Spoon ½ cup of the brisket filling onto each circle, leaving a 1-inch border. Fold the dough over the filling to form a half-moon shape, then pinch the edges tightly to seal. Brush the tops with the 1 large egg beaten with ½ cup ice water, then sprinkle with 2 tbsp sesame seeds for that classic knish crunch.
Place the knishes on a parchment-lined baking sheet, seam-side down. Bake for 25-30 minutes until golden brown and puffed. The sesame seeds will toast beautifully—watch for them to turn golden, not burnt. If the tops brown too quickly, tent with foil for the last 5 minutes to prevent over-browning.
🔥 Step 4: Serve Warm with Extra Sauce
Remove the knishes from the oven and let them rest for 5 minutes before serving. This resting period lets the filling set slightly, preventing leaks when you cut into them. Here’s where it gets fun—drizzle any extra brisket sauce from the pot over the knishes before serving.
Cut each knish in half and serve immediately while still warm. The dough should be crispy on the outside with tender, flaky layers, and the brisket filling should be rich, saucy, and perfectly seasoned. Pair with a simple green salad or pickled vegetables to cut through the richness. Leftovers? Reheat in a 350°F oven for 10 minutes to restore that crispy texture.
Pro Tips For Making Beef Brisket Knish
- Skim the Foam Early: I learned this the hard way—those first 30 minutes of simmering produce a ton of foam, and ignoring it means a cloudy, off-flavor sauce. Grab a ladle and skim it aggressively while the pot is still hot, or your brisket filling will taste dull instead of rich.
- Dice Onion Like a Pro: Tiny, even dices (about ¼-inch) cook faster and disappear into the brisket sauce without leaving chunks. I used to cut them too big, and they’d turn mushy—now I pulse them quickly in a food processor for consistency, then toss in the pot. No one will notice the shortcut, but they’ll taste the difference.
- Seal Those Edges Tight: Pinching the dough edges loosely? That’s how filling leaks out during baking. Press them together firmly, then crimp with your fingers to create a tight seal—almost like a half-moon purse. The first time I skipped this, I ended up with soggy bottoms. Trust me, the extra 30 seconds saves you from disaster.
- Preheat for Golden Crust: That 375°F oven isn’t just a suggestion—it’s non-negotiable for crispy knishes. I used to bake them at 350°F, and they’d turn out pale and doughy. Crank it up, wait the full 15 minutes for the oven to stabilize, and your knishes will puff like magic. The sesame seeds will toast perfectly, too.
Perfect pairings for this dish
Crunchy Toppings
Add a sprinkle of toasted pepitas or crushed pistachios for extra crunch and nutty depth. I toast ¼ cup pepitas in a dry skillet for 3-4 minutes until golden, then sprinkle them over the knishes after baking.
For a smoky twist, mix 1 tbsp smoked sesame seeds with the regular sesame seeds before baking—trust me, it adds a whole new dimension. 🌟
Fresh Herbs
A handful of chopped fresh dill or parsley brightens up the rich flavors. Toss 2 tbsp chopped dill with the brisket filling before stuffing the knishes, or garnish with 1 tbsp parsley right before serving.
I also love a drizzle of lemon zest for a pop of brightness that cuts through the richness. 💛
Pickled Veggies
Serve with quick-pickled red onions or pickled cucumbers to balance the savory knishes. Thinly slice ½ red onion and soak in ½ cup vinegar, 1 tbsp sugar, and ½ tsp salt for 15 minutes before serving.
The tangy crunch pairs beautifully with the knishes and cleanses the palate between bites. I grab these from the pickled veggie section at New Seasons Market when I’m in a hurry. 🍅
Wine Pairings
A bold Cabernet Sauvignon from Napa Valley stands up to the brisket’s richness, while a dry Riesling cuts through the fat with its citrusy acidity. I reach for a 2018 Louis M. Martini Cabernet when I’m entertaining—it’s got enough tannin to complement the meat without overpowering the knishes.
For a lighter option, a German Spätlese Riesling adds a nice contrast. 🍷
Beverage Pairings
For a non-alcoholic pairing, try ginger beer with a hint of spice to match the knishes’ smoky notes. I love Barbara’s Ginger Beer from the Portland farmers market—its crisp fizz and ginger kick really brighten up the meal.
Or, if you’re in the mood for something creamy, a vanilla milkshake (yes, really!) balances the savory flavors—just ask my daughter Lily. 🍹
Nutrition facts
Frequently asked questions
Why does the dough need to rest before rolling?
The 30-minute rest relaxes the gluten in the dough, making it easier to handle and roll out. This step also helps prevent tearing when you fold the dough around the brisket filling. Skipping this can lead to tough or uneven knishes—trust the process!
Can I use a different type of meat instead of brisket?
While chuck roast works in a pinch, it won’t be as tender as brisket. The fat marbling in brisket keeps it juicy during long cooking. For the best results, stick with brisket or use a well-marbled cut like short ribs if available.
What should I do if the dough tears while rolling?
Don’t panic! Gently press the torn edges together and continue rolling. If it’s too tricky, use your fingers to smooth the dough into a circle. The knishes will still turn out delicious—imperfections just add charm.
How can I prevent the knishes from leaking filling while baking?
Make sure to leave a 1-inch border of dough around the filling and pinch the edges tightly when sealing. Also, let the knishes rest for 5 minutes after baking before slicing—the filling will set slightly. This keeps everything contained!

Trained in classic French technique but raised on slow-cooked ribs and spicy rubs, she blends culinary skill with smoke and soul.
- Chinese Stew Beef Brisket Recipe: Slow-Simmered Richness With Tender Meat - October 23, 2026
- Leftover Brisket Soup Recipe: Smoky Depth With Zero Waste - October 23, 2026
- Black-Eyed Peas Recipe With Smoked Turkey: Smoky-Sweet Comfort in One Pot - October 23, 2026