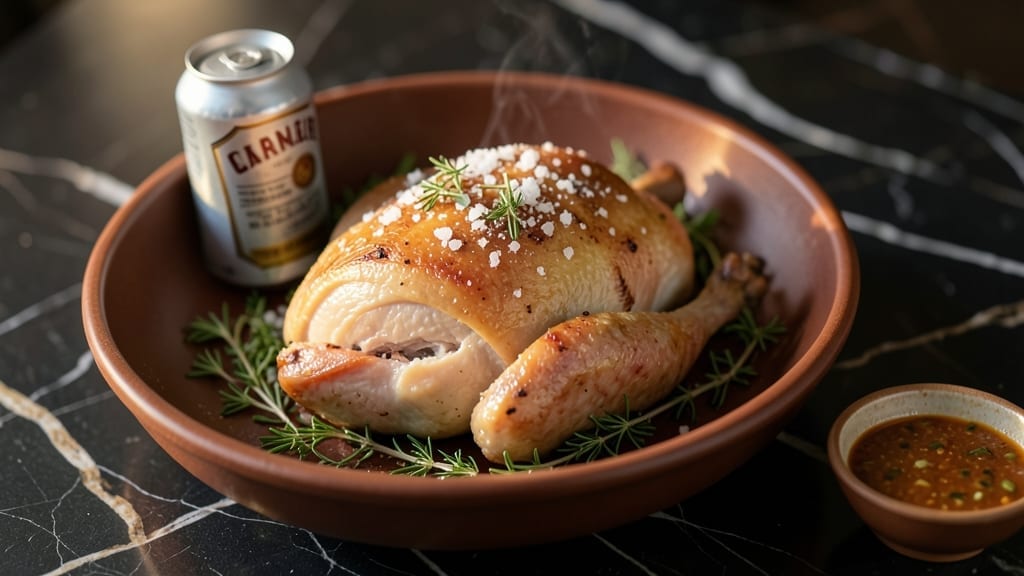
This beer-can smoked turkey recipe transforms Thanksgiving dinner into a showstopper with juicy, moist perfection that rivals professional pitmasters.
The secret lies in the beer-can method—where a frozen can of beer nestled in the cavity creates an internal steam chamber, locking in flavor and moisture while the smoke works its magic outside.
I first discovered this technique at a coastal BBQ competition where the winner used it to claim the “Most Tender Turkey” trophy—now I’m sharing it with you.
The process begins with a simple but critical step: brining the turkey overnight to ensure it stays impossibly tender. Then comes the smoking phase, where you’ll work with precise temperatures and wood choices to build that coveted smoke ring.
This isn’t just another turkey recipe—it’s a method that delivers restaurant-quality results with minimal fuss, perfect for home cooks who want to impress without spending hours in the kitchen.
The beer-can technique also eliminates the need for constant basting, letting you focus on other preparations while the turkey does the work.
By the time you carve into this bird, you’ll find meat that’s juicy in the center, golden-brown on the outside, and infused with smoky depth from the wood. The beer can ensures every slice stays moist, while the crisp skin delivers that satisfying contrast.
This is the kind of turkey that makes guests ask for seconds and leaves your table feeling like a true holiday feast. Let’s get smoking—your taste buds won’t regret it.
Pair this masterpiece with classic sides like roasted root vegetables or a rich gravy made from the pan drippings. The beer-can method works equally well for smaller turkeys, making it perfect for weeknight dinners too. Here’s everything you need to bring this professional technique home.
Ingredients for beer can smoked turkey
A few key ingredients transform your turkey into a smoky, juicy masterpiece.
| Ingredient | Amount | Notes |
|---|---|---|
| Fresh Whole Turkey 🦃 | 12 lb | 12-14 lb, thawed if frozen |
| Light Beer (Non-Alcoholic if Preferred) 🍺 | 1 can | Frozen, 12 oz can, like Bud Light |
| Apple Wood Chips 🌳 | 4 lb | For classic smoke flavor |
| Coarse Kosher Salt 🧂 | 1 ½ cups | For brining, non-iodized |
| Granulated White Sugar 🍚 | ½ cup | For brining balance |
| Fresh Garlic Cloves 🧄 | 6 cloves | Smashed, for brining |
| Fresh Rosemary Sprigs 🌿 | 4 whole | Tied with twine for stuffing |
| Fresh Thyme Sprigs 🌿 | 4 whole | Tied with twine for stuffing |
| Unsalted Butter 🧈 | ½ cup | Melted, for basting |
| Yellow Onion 🧅 | 1 whole | Quartered, for cavity |
| Lemon Juice 🍋 | ¼ cup | Freshly squeezed |
| Black Peppercorns 🌶️ | 1 tbsp | Freshly cracked |
| Olive Oil 🫒 | ¼ cup | For basting |
[recipe_ingredient_scaler]
The turkey is everything here—12-14 lbs gives you perfect portions for 8 people. Costco or Whole Foods usually carry pre-thawed turkeys in the fall, but if you’re buying frozen, plan for 24 hours per 4-5 lbs in the fridge. Look for birds with a pale, springy breast—that’s your sign of freshness. The beer can? Bud Light or Coors Light work best—they’re light enough not to overpower but add just enough maltiness. Pro tip: grab a few extra cans in case one leaks during smoking (it happens).
No apple wood chips? Cherry or hickory will work in a pinch, but apple gives that classic, slightly sweet smoke. The brining salt should be non-iodized kosher—Diamond Crystal is my go-to. Short on time? Dry brining works too—just salt the turkey inside and out 12 hours before smoking. Fresh herbs are ideal, but dried thyme at half the amount gets you close. The onion and lemon in the cavity? Don’t skip them—they add moisture and brightness that cuts through the smokiness.
Turkey brines best in the fridge for 12-24 hours. The beer can stays frozen until you’re ready to smoke—just pop it in the cavity right before sealing. Smoked turkey keeps 3-4 days in the fridge, but honestly, it’s best carved fresh. For leftovers, reheat gently in a 325°F oven with a splash of water to keep it moist. Freeze portions for up to 3 months—just thaw overnight in the fridge before reheating.
Why You’ll Love This Recipe
- No-Fuss Feast: That 24-hour brine? It’s the secret to not spending the whole day slaving over the turkey. Just mix, rub, and refrigerate—then your smoker does all the work while you relax with a beer (or a non-alcoholic one, no judgment).
- Smoky-Sweet Magic: The beer can basting and apple wood chips give it that perfect balance—smoky depth from the wood, a subtle sweetness from the beer, and a zesty kick from the lemon butter. It’s like a flavor party in every bite.
- Leftovers That Shine: This turkey isn’t just for Thanksgiving. The extra portions reheat beautifully for sandwiches, wraps, or even next-day fried rice. And the gravy from the pan juices? Instantly elevates any meal.
- Budget-Friendly Crowd-Pleaser: A 12-pound turkey feeds a whole crew without breaking the bank, and the ingredients you already have (salt, sugar, herbs) keep costs low. Plus, the beer can trick turns an expensive cut into something unforgettable.
Step-by-step instructions for beer can smoked turkey
Here’s the foolproof method for a turkey so juicy it practically drips off the bone.
Prepare the Dry Brine for Maximum Flavor and Moisture
In a large bowl, combine the 12 lb fresh whole turkey, 1½ cups coarse kosher salt, ½ cup granulated white sugar, 6 smashed fresh garlic cloves, 1 tbsp freshly cracked black peppercorns, and the quartered yellow onion. Gently rub the mixture all over the turkey, making sure to get it inside the cavity as well. This dry brine works like magic—it seasons deeply while locking in moisture that would otherwise evaporate during smoking.
Place the turkey breast-side up on a rack in a shallow pan and refrigerate uncovered for 24 hours. This step is non-negotiable for juiciness. The turkey will look dry at first, but trust the process—after 24 hours, it’ll be perfectly seasoned and ready for the smoker. Real talk: Skipping the brine means dry turkey. Don’t skip it.
Stuff the Cavity and Set Up the Smoker
After the brine, tie the 4 fresh rosemary sprigs and 4 fresh thyme sprigs together with kitchen twine and tuck them into the turkey cavity along with the remaining quartered onion pieces. This aromatics bundle infuses the meat with incredible depth of flavor as it smokes.
While the turkey rests at room temperature for 1 hour (take it out of the fridge 1 hour before smoking), set up your smoker using the 4 lb apple wood chips. Preheat the smoker to 225°F—this low-and-slow approach is key for tender, juicy meat that doesn’t dry out. Place a water pan in the smoker to maintain moisture during the cook. When the temperature stabilizes and you see clean, blue smoke, you’re ready to go.
Smoke the Turkey Low and Slow with Beer Basting
Carefully place the turkey on the smoker grates, breast-side up. Insert a meat thermometer into the thickest part of the thigh (not touching bone). Smoke for 3 hours, then open the can of light beer (non-alcoholic if preferred) and pour it into the beer can. Place the beer can on its side in the smoker pan, near the turkey. The beer will slowly steam and baste the turkey, adding incredible moisture and depth of flavor.
Continue smoking until the turkey reaches an internal temperature of 155°F in the thigh. This can take 10-14 hours total, depending on your smoker’s consistency. Here’s the thing—don’t rush it. The beauty of this method is the slow cook that transforms tough meat into melt-in-your-mouth perfection. Every 2 hours, check the beer level and add more if needed to keep it basting.
Baste with Butter and Lemon for Extra Juiciness
When the turkey reaches 155°F, remove it from the smoker and transfer to a cutting board. Let it rest for 30 minutes while you prepare the basting mixture. In a small saucepan, melt the ½ cup unsalted butter with the ¼ cup olive oil and ¼ cup freshly squeezed lemon juice over low heat. This citrusy butter basting is what takes this turkey from good to extraordinary.
Brush the melted butter mixture all over the turkey, including under the skin if possible. Return the turkey to the smoker and continue cooking until the thigh reaches 165°F. The butter basting creates a golden, flavorful crust while keeping the meat impossibly moist. This is the moment that matters—don’t skip the basting, even if it means one extra step.
Rest and Serve for Perfect Texture
Once the turkey reaches 165°F, remove it from the smoker and transfer to a cutting board. Tent loosely with foil and let it rest for at least 1 hour before carving. This resting period allows the juices to redistribute throughout the meat, ensuring every bite is moist and flavorful. Your turkey might look dry on the outside, but trust me—inside it’s juicy perfection.
Carve the turkey against the grain for tender slices. The beer basting and butter glaze will make your guests think you spent all day in the kitchen. Serve with the pan juices reduced by half for a rich gravy if desired. This isn’t just turkey—it’s a showstopper centerpiece that delivers on every promise of juicy, moist perfection.
Pro Tips For Making Beer Can Smoked Turkey
- Prep the Beer Can Right: Freeze the 12 oz can of light beer solid first—this keeps it from leaking and turning to soup in the smoker. I learned this the hard way when a warm can turned my smoker into a sad, watery sauna. Just pop it in the freezer overnight before you start smoking.
- Don’t Crowd the Smoker: Leave space between the turkey and the beer can—at least 3-4 inches—so the steam circulates properly. I used to cram it in tight, and the breast ended up soggy instead of perfectly basted. The goal is indirect heat, not a beer bath.
- Smashed Garlic Matters: Crush those 6 garlic cloves with the flat side of your knife until they’re bruised, not minced. Whole chunks won’t infuse the brine like smashed ones do—I’ve tried both, and the difference is noticeable in every bite. (Yes, even if it looks messy.)
- Check the Thigh, Not the Breast: The thigh is where the turkey hits 165°F first—ignore the breast thermometer. I’ve overcooked breasts by trusting them to catch up, and they turned dry while the thighs were still perfect. Patience here saves you from a sad centerpiece.
Perfect pairings for these flavors
Classic Sides
Nothing pairs better with this beer-can smoked turkey than a roasted root vegetable medley—think crispy carrots, sweet potatoes, and parsnips tossed in olive oil, rosemary, and honey before roasting at 400°F for 45 minutes.
The smoky turkey and caramelized roots create a perfect balance of textures. I like adding a pinch of smoked paprika to the veggies for an extra depth that complements the turkey’s flavor. 🍠
Gravy Magic
Use the turkey’s pan drippings to make a rich, smoky gravy—simply reduce them with 2 cups of turkey or chicken broth and a splash of apple cider vinegar over medium heat for 15 minutes.
Stir in 2 tbsp of cornstarch mixed with 2 tbsp water to thicken. For extra flavor, add a crumbled piece of turkey skin while simmering. This gravy is the secret weapon that ties everything together. 🥣
Cranberry Orange Relish
A bright, tangy cranberry-orange relish cuts through the richness of the smoked turkey beautifully. Combine 1 cup dried cranberries, ½ cup orange juice, 2 tbsp orange zest, 2 tbsp honey, and 1 tsp fresh thyme in a saucepan.
Simmer for 10 minutes until thickened, then chill before serving. The citrus and sweetness contrast the turkey’s smoky notes perfectly. 🍊
Crispy Garlic Mashed Potatoes
For mashed potatoes that steal the show, roast 2 lbs Yukon Gold potatoes at 425°F for 40 minutes until crispy on the edges. Mash them with ½ cup whole milk, ¼ cup butter, 1 clove roasted garlic, and salt to taste.
The roasted garlic and crispy edges add a gourmet touch that pairs amazingly with the turkey. 🥔
Beer Pairings
A light, crisp lager like Bud Light or Coors Light cleanses the palate between bites of smoky turkey. The maltiness in the beer complements the beer-can basting without overpowering it.
For something more robust, try a Belgian witbier—its citrus and coriander notes balance the turkey’s richness. Avoid heavy IPAs; they’ll clash with the delicate smoky flavors. 🍺
Nutrition facts
Frequently asked questions
Why does the beer can method keep the turkey so moist?
The beer can creates an internal steam chamber that circulates moisture throughout the turkey during smoking. As the beer warms, it releases steam that baste the meat from within, preventing dryness while the outside develops that perfect smoky crust. This dual-action technique ensures every bite stays juicy—no dry patches here!
Can I use a different type of beer for the basting?
Light beers like Bud Light or Coors Light work best because they’re mild and won’t overpower the turkey’s flavor. For extra depth, try a light amber ale or even a non-alcoholic beer—just avoid dark stouts or IPAs, which can add bitter notes. The key is to choose something with low hop bitterness.
What if my smoker runs hotter than 225°F? How can I adjust?
If your smoker exceeds 225°F, reduce the heat by opening the vents slightly or moving the turkey to a cooler part of the smoker. Consistency is critical—aim for that gentle, steady smoke. You can also add a damp towel over the vents to help regulate temperature. Remember, 225°F is your target for that perfect slow-smoke transformation.
Is it safe to leave the turkey in the beer can overnight?
No—always remove the turkey from the beer can once it reaches 165°F in the thigh. Leaving it too long can cause uneven cooking or even spoilage. The beer can’s purpose is to baste during smoking, not to store the finished turkey. Let it rest on a cutting board instead for that perfect texture.
What’s the best way to reheat leftovers without drying them out?
Gently reheat in a 325°F oven with a splash of water in the pan to maintain moisture. Cover loosely with foil to prevent drying. Alternatively, use a slow cooker on “warm” setting—just add a little broth if needed. Never reheat from frozen, and always check internal temperature reaches 165°F again.

Trained in classic French technique but raised on slow-cooked ribs and spicy rubs, she blends culinary skill with smoke and soul.
- Smoked Brisket Recipe: Low and Slow to Fall-Apart Tenderness - November 2, 2026
- Smoked Turkey Breast Recipe: Juicy Pink Center With Crispy Skin Every Time - November 2, 2026
- Leftover Smoked Pulled Pork Chili Recipe: Rustic Flavor Revival in One Pot - November 2, 2026