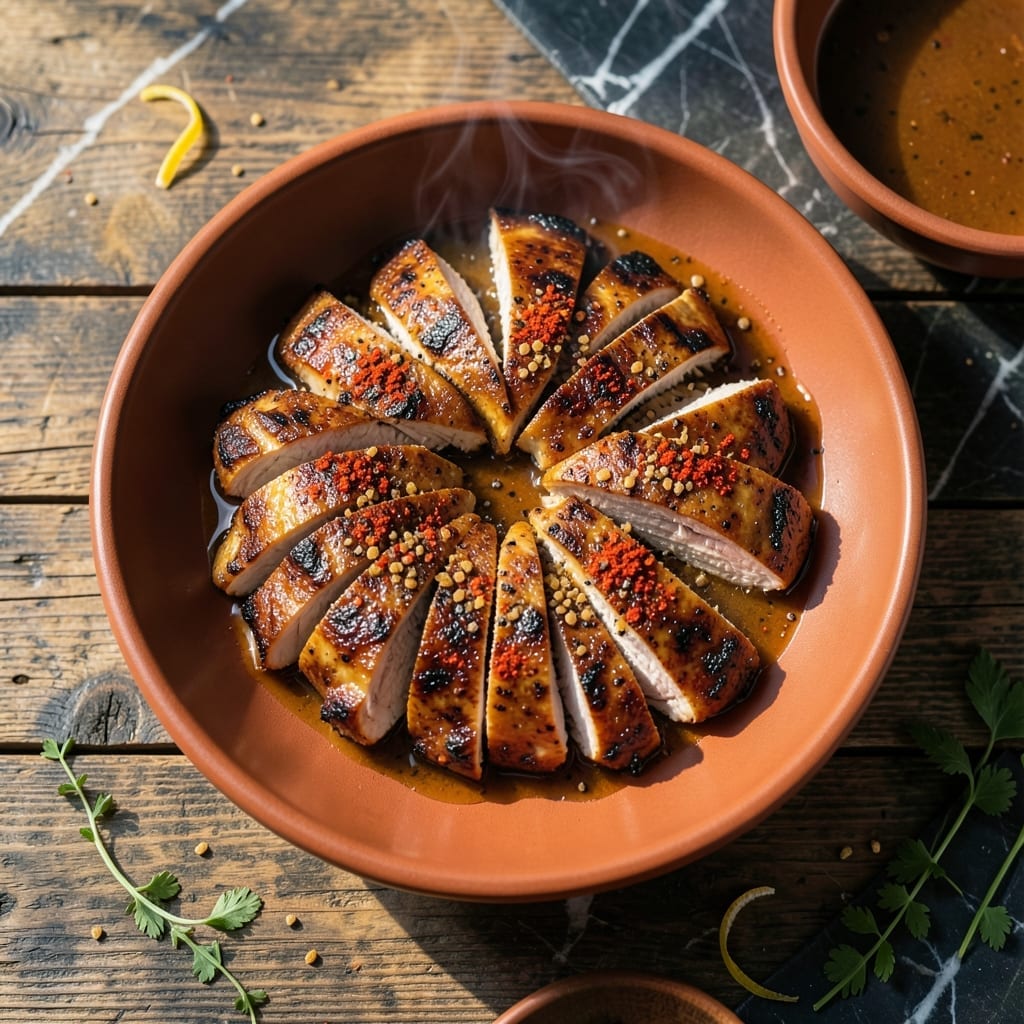
This barbecued chicken breast delivers the perfect balance of smoky depth and sweet caramelization every time. A carefully crafted glaze and precise grilling technique ensure restaurant-quality results in your own backyard.
The secret lies in a two-step process: first a dry rub for flavor foundation, then a sticky glaze applied during the final minutes of cooking. This creates those coveted grill marks while locking in juiciness.
You’ll achieve tender chicken with a golden, slightly charred exterior that peels away from the bone. The glaze reduces to a glossy coat that clings to every bite, offering layers of sweet, smoky, and tangy flavor.
Ideal for summer cookouts or weeknight dinners when you crave that authentic barbecue experience without the fuss.
Ingredients for Best Barbecued Chicken Breast
Nothing exotic here—just good stuff for restaurant-quality results at home.
| Ingredient | Amount | Notes |
|---|---|---|
| Chicken Breast 🍗 | 2 lb | Boneless, skinless, split thickness |
| Brown Sugar 🍚 | ½ cup | Light or dark variety |
| Paprika 🌶️ | 2 tbsp | Smoked for best flavor |
| Garlic Powder 🧄 | 1 tbsp | Not garlic salt |
| Onion Powder 🧅 | 1 tbsp | Fresh ground preferred |
| Salt 🧂 | 1 tsp | Kosher or sea salt |
| Black Pepper 🌶️ | 1 tsp | Freshly ground preferred |
| Ketchup 🍅 | ¾ cup | High-quality brand |
| Apple Cider Vinegar 🍏 | 2 tbsp | For tangy balance |
| Worcestershire Sauce 🫒 | 2 tbsp | Adds umami depth |
| Molasses 🍯 | 1 tbsp | For rich sweetness |
| Olive Oil 🫒 | 2 tbsp | For brushing chicken |
| Lemon Juice 🍋 | 1 tbsp | Freshly squeezed preferred |
| Dijon Mustard 🥄 | 1 tbsp | For glaze complexity |
[recipe_ingredient_scaler]
The chicken is the star here. Boneless, skinless breasts work best—split them to even thickness so they cook fast and stay juicy. I grab mine from Costco when I’m feeding a crowd, but any grocery store works for a weeknight meal. Look for even sizing so everything finishes at once. The brown sugar? Dark gives a deeper molasses note, but light is fine too (whatever’s in your pantry).
No smoked paprika? Regular paprika plus a pinch of chipotle powder gets you close. Out of Worcestershire? Soy sauce with a dash of vinegar works in a pinch. The glaze is flexible—swap molasses for honey or maple syrup if that’s what you’ve got. If you’re avoiding sugar, sugar-free ketchup works but the caramelization won’t be as deep.
The dry rub can sit on the chicken overnight—honestly makes it better. Leftovers keep for 3-4 days in the fridge. The glaze? Make extra and stash it in the freezer for up to 3 months. Just thaw and brush on next time.
Why You’ll Love This Recipe
- One Pan Magic: I just toss the chicken with brown sugar, paprika, and those powdered garlic and onion staples—no chopping, no fuss.
- Smoky Sweet Bite: That brown sugar caramelizes with the paprika into this ridiculous sticky-sweet crust that’s honestly hard to stop sneaking bites of.
- Meal Prep Hero: I make a double batch on Sunday and it’s my lunch savior all week—still juicy, still flavorful, even cold.
- Budget Stretcher: Chicken breasts on sale plus pantry spices means I’m feeding four for what a takeout meal for one would cost.
Step-by-Step Instructions for Barbecued Chicken Breast
This method delivers that perfect balance of smoky char and sweet glaze you crave.
Step 1: Season the Chicken Breast Generously
Pat the 2 lb chicken breast completely dry with paper towels—this ensures your seasoning sticks properly. In a small bowl, mix together the 2 tbsp paprika, 1 tbsp garlic powder, 1 tbsp onion powder, 1 tsp salt, and 1 tsp black pepper.
Rub this spice mixture all over the chicken, pressing it in firmly so it adheres well. I like to get into all the nooks and crannies, especially if the chicken breasts have any natural grooves. Let the seasoned chicken sit at room temperature for 15-20 minutes while you prepare the glaze.
Step 2: Make the Smoky-Sweet Barbecue Glaze
In a medium saucepan, combine the 0.5 cup brown sugar, 0.75 cup ketchup, 2 tbsp apple cider vinegar, 2 tbsp Worcestershire sauce, 1 tbsp molasses, 1 tbsp lemon juice, and 1 tbsp Dijon mustard.
Bring the mixture to a simmer over medium heat, then reduce to low heat and let it cook for 8-10 minutes, stirring occasionally. You want it to thicken slightly, coating the back of a spoon. The glaze should be rich, glossy, and have a deep reddish-brown color.
Step 3: Grill the Chicken to Perfection
Preheat your grill to medium-high heat (about 375-400°F). Brush the grates with olive oil to prevent sticking. Place the seasoned chicken breasts on the grill and cook for 6-7 minutes per side, or until you see beautiful grill marks forming.
During the last 2 minutes of cooking, generously brush the chicken with the prepared glaze. Flip and brush the other side, then close the grill lid to let the glaze caramelize. The chicken is done when it reaches an internal temperature of 165°F and the juices run clear.
Step 4: Rest and Serve with Extra Glaze
Transfer the grilled chicken to a clean plate and tent loosely with foil. Let it rest for 5-10 minutes—this allows the juices to redistribute, keeping the meat moist and flavorful. While the chicken rests, warm any remaining glaze over low heat for 1-2 minutes.
Slice the chicken against the grain into ½-inch thick pieces and drizzle with the warmed glaze. Serve immediately while still warm. The glaze should be sticky and glossy, with a perfect balance of sweet, smoky, and tangy flavors in every bite.
Pro Tips For Making Best Barbecued Chicken Breast
- Pound the Breasts: Chicken breasts cook unevenly if left thick on one end—pound them to an even ½-inch thickness so they cook through without drying out.
- Bloom the Spices: Toast the paprika, garlic powder, and onion powder in a dry pan for 30 seconds before mixing with brown sugar to wake up their flavors.
- Skip the High Heat: I learned this the hard way—barbecuing chicken breast over screaming hot coals burns the sugar before the meat cooks; medium heat is the sweet spot.
- Rest Before Serving: Give it a solid 5 minutes under foil after grilling—this keeps the juices from running all over the plate when you slice it.
Troubleshooting Perfect Results
Glaze Too Thin
If your glaze isn’t thickening after 10 minutes, you likely have too much liquid. Simmer it uncovered over medium heat while stirring frequently. I add 1 tsp cornstarch mixed with 1 tbsp water to speed up the process when I’m in a hurry. 💡
Chicken Sticks to Grill
This happens when your grill isn’t hot enough or the grates aren’t clean. Preheat to 400°F and scrub grates with a brush. Always oil the grates right before adding the chicken—use tongs and a paper towel dipped in olive oil. The chicken should release easily when ready to flip.
Glaze Burns
Sugars in the glaze can burn if applied too early. Wait until the last 2-3 minutes of cooking to brush it on. Keep a spray bottle of water nearby to quickly douse any flames. I learned this the hard way with a batch of charred glaze.
Dry Chicken Results
Overcooking is the main culprit here. Use a meat thermometer and pull the chicken at exactly 165°F. Also, don’t skip the resting step—5-10 minutes under foil makes a huge difference. Thicker chicken breasts may need butterflying to cook evenly.
Uneven Cooking
If some pieces are done while others aren’t, your chicken breasts were likely uneven in thickness. Pound them to ¾-inch thickness with a meat mallet before seasoning. This ensures even cooking and prevents dry spots near thinner edges.
Weak Flavor
For more depth, let the dry rub sit on the chicken for at least 30 minutes before grilling. I often do this the night before. Also, use smoked paprika instead of regular—it adds that authentic barbecue taste we all love. ✨
Nutrition Facts
Frequently Asked Questions
Can I use bone-in chicken instead?
Yes, but cook it longer. Bone-in pieces need about 10-12 minutes per side on medium-high heat. Use a thermometer to check for 165°F at the thickest part. The bones add flavor to the meat.
How do I store leftover grilled chicken?
Place in an airtight container and refrigerate for up to 3-4 days. Reheat gently in a 350°F oven with extra glaze to prevent drying out. Avoid microwaving for best texture.
What’s the best way to prevent flare-ups?
Trim excess fat and keep a spray bottle of water nearby. Move chicken to indirect heat if flames get too high. Never apply glaze too early—wait until the last 2-3 minutes.
Can I make the glaze ahead of time?
The glaze keeps for up to 1 week in the fridge or 3 months frozen. Reheat on low heat before using. This actually deepens the flavors.

Trained in classic French technique but raised on slow-cooked ribs and spicy rubs, she blends culinary skill with smoke and soul.
- Recipe for Boneless Pork Chops in Cast Iron Skillet: Sear and Baste to Juicy Perfection - October 3, 2026
- Recipe for Boneless Cross Rib Roast: Slow-Roasted Beef with Herb Crust - October 3, 2026
- Hamburgers in Sauce Recipe Crock Pot: Slow-Cooked Savory Delight - October 3, 2026