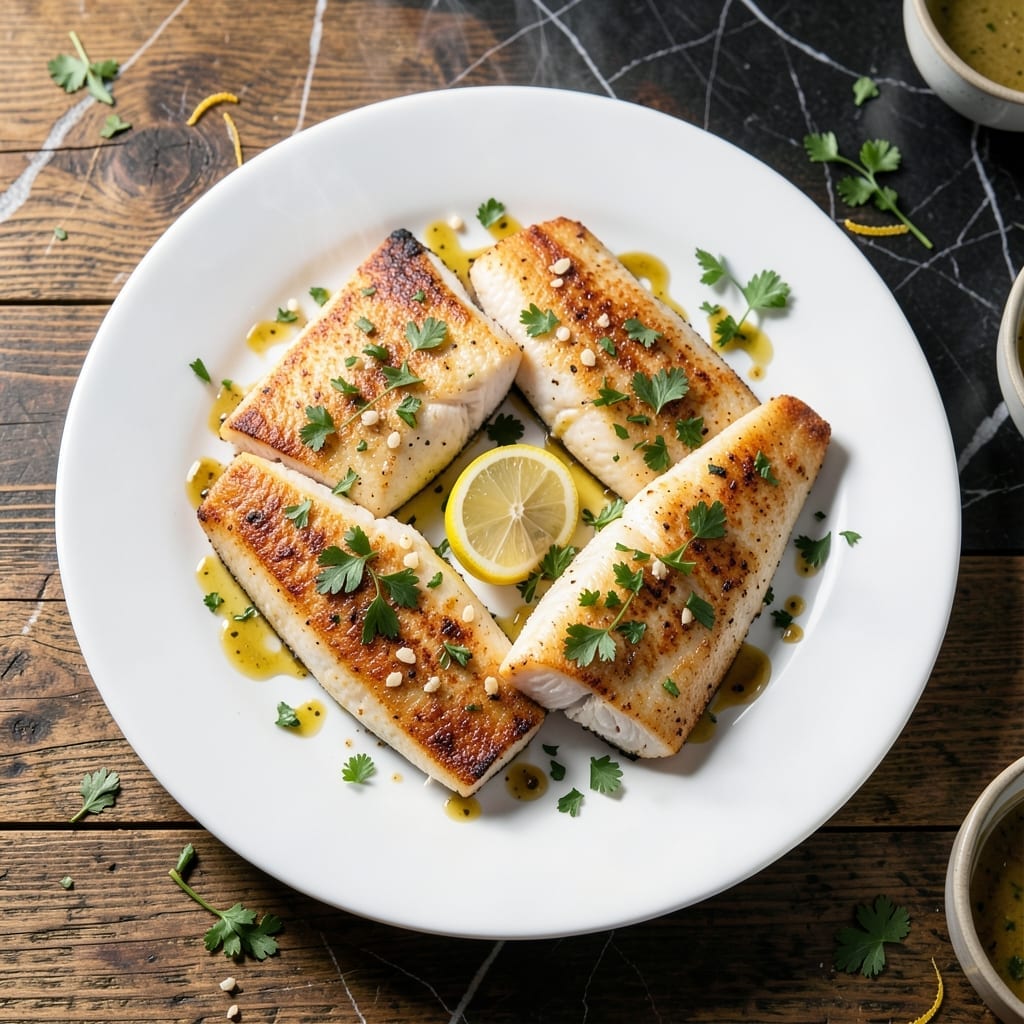
This broiled flounder delivers perfectly flaky fish with minimal effort and maximum flavor. The high heat of the broiler ensures a delicate texture while keeping the preparation simple.
Ready in 15 minutes, this method highlights the natural sweetness of flounder with a crisp, golden finish. It’s an elegant dish that’s surprisingly easy to master.
Ingredients for Best Broiled Flounder
Light, flaky fish with just a handful of quality ingredients for maximum flavor.
| Ingredient | Amount | Notes |
|---|---|---|
| Flounder Fillets 🐟 | 1 ½ lb | Fresh or thawed, skinless |
| Extra-Virgin Olive Oil 🫒 | 3 tbsp | Divided for brushing and drizzling |
| Lemon 🍋 | 1 whole | Zested and juiced |
| Garlic Cloves 🧄 | 3 cloves | Minced finely |
| Fresh Parsley 🌿 | ¼ cup | Chopped, for garnish |
| Dijon Mustard 🟡 | 1 tbsp | Smooth variety preferred |
| Salt 🧂 | 1 tsp | Diamond Crystal kosher salt |
| Black Pepper 🌶️ | ½ tsp | Freshly ground |
| Paprika 🌶️ | ½ tsp | Sweet or smoked variety |
| Dry White Wine 🥂 | ¼ cup | Optional for deglazing |
| Unsalted Butter 🧈 | 2 tbsp | Melted, for finishing |
| Shallot 🧅 | 1 whole | Minced finely |
[recipe_ingredient_scaler]
The flounder itself is paramount. Wild-caught fillets from a trusted seafood counter (like Whole Foods or a local fishmonger) ensure the best texture and flavor. Look for fillets that are uniform in thickness—about 1/2-inch thick—so they cook evenly under the broiler. Avoid any with a fishy odor; it should smell clean and slightly sweet, like the ocean.
For the wine, any dry white works—Sauvignon Blanc or Pinot Grigio are perfect. No wine? Substitute chicken or vegetable broth with a splash of lemon juice. The Dijon can be swapped for whole-grain mustard if you prefer texture. If using frozen flounder, thaw completely and pat dry to prevent steaming instead of broiling.
Prepared fish is best served immediately, but leftovers keep 1-2 days in the fridge. Reheat gently in a low oven to preserve moisture. For the freshest herbs, store parsley stems in water like a bouquet. The compound butter (olive oil, garlic, herbs) can be made ahead and refrigerated for up to 3 days.
Why You’ll Love This Recipe
- Ready in 15: I can get this from fridge to table faster than takeout arrives.
- Bright & Zesty: That lemon-garlic-olive oil combo makes every bite sing.
- Weeknight MVP: Honestly, it’s my go-to for busy evenings when I need something light but satisfying.
- Budget Hero: Flounder is affordable, and a little goes a long way with these bold flavors.
Step-by-Step Instructions for Broiled Flounder
Achieve restaurant-quality results with this precise method for perfectly flaky fish every time.
Step 1: Prepare the Flounder Fillets
Pat the 1.5 lb flounder fillets completely dry with paper towels. This critical step ensures proper browning and prevents steaming. Arrange the fillets on a rimmed baking sheet lined with parchment paper.
Brush both sides of the fillets with 1 tbsp extra-virgin olive oil from the 3 tbsp total. Season evenly with the 1 tsp salt, ½ tsp black pepper, and ½ tsp paprika. The paprika adds a subtle depth of flavor and beautiful color.
Step 2: Create the Lemon-Garlic-Shallot Mixture
In a small bowl, combine the zest and juice from the 1 whole lemon, the 3 minced garlic cloves, and the 1 minced shallot. Add the 1 tbsp Dijon mustard and the remaining 2 tbsp extra-virgin olive oil, whisking until fully emulsified.
This aromatic mixture will infuse the flounder with bright, complementary flavors. The acidity from the lemon helps balance the richness of the fish while the Dijon mustard adds a subtle tang that enhances the natural sweetness of the flounder.
Step 3: Broil to Perfection
Position the oven rack about 6 inches from the broiler element and preheat the broiler on high. Spoon the lemon-garlic-shallot mixture evenly over the seasoned flounder fillets, spreading it to cover the surface completely.
Broil for 6-8 minutes until the tops are golden brown and the fish flakes easily with a fork. Avoid opening the oven door during cooking, as temperature fluctuations can affect even cooking. The fish is done when it reaches an internal temperature of 145°F and the flesh is opaque and separates easily.
Step 4: Finish with Wine and Butter
Carefully transfer the broiled flounder to serving plates. Return the baking sheet to the oven and pour the ¼ cup dry white wine onto the hot surface, using a wooden spoon to scrape up any browned bits. This deglazing step creates a light pan sauce.
Remove from the oven and whisk in the 2 tbsp melted unsalted butter until fully incorporated. Spoon this sauce over the flounder fillets, then garnish with the ¼ cup chopped fresh parsley for a pop of color and freshness.
Pro Tips For Making Best Broiled Flounder
- Preheat the Broiler: I learned this the hard way—crank the broiler for at least 10 minutes before cooking. Flounder cooks so fast that a cold broiler means uneven doneness and sad, steamed fish.
- Pat Fillets Dry: Sounds tedious, but it’s non-negotiable: press the fillets between paper towels until they’re bone-dry. Wet fish won’t sear under the broiler, just steam in its own juices.
- Skip the Overcrowding: Resist the urge to cram all the fillets on one tray. Give them an inch of space so the heat circulates, otherwise you’ll end up with soggy, stuck-together fish.
- Use Room-Temp Fish: Pull the flounder from the fridge 15 minutes before cooking—cold fillets straight from the icebox cook unevenly and dry out before the center warms through.
Dietary Considerations for best broiled flounder
Low-Calorie Option
This dish is naturally low-calorie, with each serving containing approximately 200-220 calories without the wine-butter sauce. The flounder provides lean protein while the olive oil adds healthy fats. I often skip the butter for an even lighter version. 💪
Gluten-Free Friendly
All ingredients in this recipe are naturally gluten-free. Just ensure your Dijon mustard and wine are certified gluten-free if you have celiac disease. I use Annie’s Dijon for guaranteed safety and great flavor.
Pescatarian Perfect
This is an ideal dish for pescatarians, offering a complete protein source with all essential amino acids. The flounder’s mild flavor makes it versatile for various dietary preferences. I love that it satisfies both seafood lovers and those new to fish.
Low-Carb Keto
With only 2-3g net carbs per serving (mostly from the lemon and shallot), this fits perfectly into keto diets. The healthy fats from olive oil and butter provide sustained energy. I’ve served this to keto friends with rave reviews.
Dairy-Free Adaptation
Simply omit the butter or replace it with 2 tbsp extra-virgin olive oil for a fully dairy-free version. The lemon-garlic mixture provides enough flavor that you won’t miss the butter. I often make it this way for lactose-sensitive guests.
Allergen Notes
This recipe contains fish and mustard. For mustard allergies, replace the Dijon with 1 tbsp lemon juice and ½ tsp dried herbs. Always check wine labels for potential allergens like sulfites.
Nutrition Facts
Frequently Asked Questions
What oven rack position works best?
Place the rack about 6 inches from the broiler element for even cooking. This distance allows the fish to cook through without burning the topping.
Can I use frozen fillets?
Yes, but thaw completely and pat dry first. Frozen flounder releases moisture that can steam rather than broil, affecting texture.
How do I know when it’s done?
The fish is ready when it reaches 145°F internally and flakes easily with a fork. Look for opaque flesh that separates cleanly.
What can I substitute for white wine?
Use chicken or vegetable broth with a splash of lemon juice. This mimics the acidity and depth of wine in the pan sauce.

Trained in classic French technique but raised on slow-cooked ribs and spicy rubs, she blends culinary skill with smoke and soul.
- Recipe for Boneless Pork Chops in Cast Iron Skillet: Sear and Baste to Juicy Perfection - October 3, 2026
- Recipe for Boneless Cross Rib Roast: Slow-Roasted Beef with Herb Crust - October 3, 2026
- Hamburgers in Sauce Recipe Crock Pot: Slow-Cooked Savory Delight - October 3, 2026