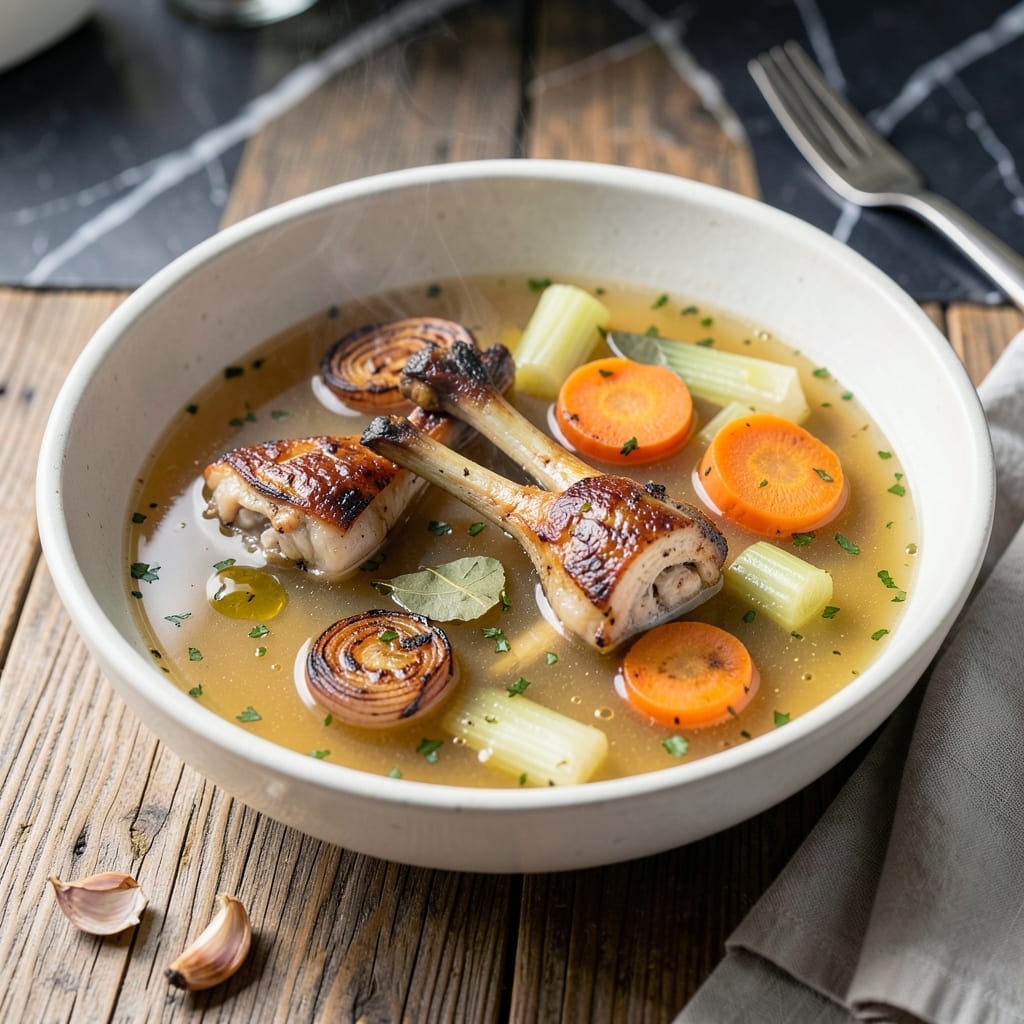
This chicken bone broth delivers rich, nourishing depth that only slow simmering can achieve. I rely on quality bones and precise timing to extract maximum flavor and gelatin.
The result is a perfect golden liquid with body and complexity. It forms the foundation for soups or stands beautifully on its own.
Ingredients for Best Chicken Bone Broth
Quality bones and aromatics create this deeply flavorful, nourishing foundation.
| Ingredient | Amount | Notes |
|---|---|---|
| Chicken Bones 🍗 | 2 lb | Necks, backs, or carcasses preferred |
| Yellow Onion 🧅 | 1 whole | Quartered, skin on for color |
| Carrots 🥕 | 2 whole | Cut into large chunks |
| Celery Stalks 🥬 | 2 whole | Cut into large chunks |
| Garlic Cloves 🧄 | 4 cloves | Smashed, skin on |
| Bay Leaves 🌿 | 2 pieces | Dried, whole |
| Black Peppercorns 🌶️ | 1 tbsp | Whole, uncrushed |
| Apple Cider Vinegar 🍏 | 2 tbsp | Helps extract minerals from bones |
| Fresh Parsley 🌿 | ½ cup | Stems included for flavor |
| Fresh Thyme Sprigs 🌿 | 4 pieces | Optional but recommended |
| Cold Water 💧 | 4 cups | Enough to cover bones by 2 inches |
[recipe_ingredient_scaler]
The bones are everything here. Chicken necks, backs, or carcasses have the most gelatin—wings and legs work too but yield less. Ask your butcher for bones specifically for broth (they often give them away). Whole Foods or local farms are great sources. Roasting the bones first (400°F for 20 minutes) adds depth, but raw bones work if you’re short on time.
No chicken bones? Beef or turkey bones make excellent broth too—just simmer longer (24-48 hours). Skip the vinegar if you don’t have it, but it’s worth keeping apple cider vinegar on hand for the mineral boost. The veggies can be swapped: leeks for onions, fennel for celery. Don’t peek while simmering—this keeps the broth clear.
Broth keeps in the fridge for 5 days or frozen for 6 months. Strain and cool quickly (ice bath works) before refrigerating. For the clearest broth, skip stirring and avoid boiling. I freeze in quart-sized jars for easy portioning.
Why You’ll Love This Recipe
- Set and Forget: I toss everything in the pot, let it simmer, and walk away—no babysitting required.
- Deep Rich Flavor: The slow-cooked garlic and carrots give this broth a warmth that store-bought can’t touch.
- Meal Prep Magic: I use it for soups, rice, or just sipping—this broth turns into meals all week long.
- Pennies per Batch: Those leftover chicken bones and veggie scraps? They become liquid gold, not trash.
Step-by-Step Instructions for Chicken Bone Broth
Here’s the method I’ve perfected for extracting maximum flavor and nutrients from these ingredients.
Step 1: Roast the Bones and Vegetables
Preheat your oven to 400°F. Spread the 2 lb Chicken Bones on a baking sheet. I like to roast them first—this deepens the flavor and gives the broth a rich, caramelized base. Add the 1 whole Yellow Onion (quartered, skin on), 2 whole Carrots (cut into large chunks), and 2 whole Celery Stalks (cut into large chunks) to the same tray.
Roast for 25-30 minutes until the bones and vegetables are deeply browned. You’ll notice the kitchen filling with a rich, savory aroma—that’s how you know it’s working. The onion skins will darken, adding a beautiful golden hue to your broth later.
Step 2: Combine Everything in the Pot
Transfer the roasted bones and vegetables to a large stockpot. Add the 4 cloves Garlic Cloves (smashed, skin on), 2 pieces Bay Leaves, 1 tbsp Black Peppercorns, 2 tbsp Apple Cider Vinegar, 0.5 cup Fresh Parsley, and 4 pieces Fresh Thyme Sprigs. The vinegar is key here—it helps pull minerals from the bones, making your broth more nourishing.
Pour in the 4 cups Cold Water, ensuring the bones and vegetables are fully submerged. If the water doesn’t cover everything by 2 inches, add a bit more. This ensures even extraction of flavors and nutrients as the broth simmers.
Step 3: Simmer Gently for Maximum Extraction
Bring the pot to a boil over high heat, then immediately reduce to a low simmer. Skim off any foam or impurities that rise to the surface during the first 30 minutes—this keeps your broth clean and clear. Partial cover the pot with a lid to maintain a gentle simmer.
Let it cook for at least 8 hours, but I prefer 12-24 hours for the deepest, most gelatinous result. The longer it simmers, the more collagen breaks down into gelatin, giving your broth that luxurious, mouth-coating texture. You’ll see the liquid transform into a rich, amber color with a layer of fat on top.
Step 4: Strain and Store the Broth
Carefully strain the broth through a fine-mesh sieve into a large bowl or another pot. Discard the solids—they’ve given up all their goodness. Let the broth cool slightly, then skim off the fat that rises to the surface if you prefer a leaner broth, or leave it for extra richness.
Once cooled, transfer the broth to airtight containers. It will keep in the refrigerator for up to 5 days or in the freezer for 6 months. The broth should gel when chilled—a sign of high collagen content and a job well done. Reheat gently before using in soups, stews, or sipping on its own.
Pro Tips For Making Best Chicken Bone Broth
- Roast the Bones: Toss chicken bones with a little oil and roast at 400°F for 20-25 minutes until golden—I learned this the hard way after my first few batches tasted flat and weak.
- Skip the Peel: Leave the skins on your onion and garlic cloves, just give them a quick rinse. Sounds weird, but it works: the papery bits add depth and color without bitterness.
- Simmer, Don’t Boil: Keep the heat low enough that tiny bubbles just barely break the surface. After burning three batches, I finally figured out that a rolling boil makes broth cloudy and greasy.
- Add Vinegar: Splash in 2 tablespoons of apple cider vinegar when you start—it pulls minerals from the bones and makes a real difference in the final richness.
Make-Ahead Tips for This best chicken bone broth
Batch Prep Strategy
I always make broth in double batches—it freezes so well that there’s no reason not to. Use a 12-quart stockpot or split between two 6-quart pots to keep the ratio of bones to water consistent. This way, you’ll have broth ready for soups, grains, or sipping anytime. 💡
Cool and Store Quickly
After straining, cool the broth rapidly by setting the pot in an ice bath or dividing it into smaller containers. This prevents bacterial growth and preserves freshness. I use wide-mouth mason jars for easy portioning.
Freezer Organization
Label containers with the date and freeze flat to save space. For best results, use within 6 months. I freeze in 1-cup portions for recipes and 2-cup portions for sipping. This makes it easy to grab exactly what you need. ❄️
Reheating Tips
Gently reheat frozen broth in a pot over medium-low heat until thawed and hot. Avoid microwaving large quantities, as it can heat unevenly. If the fat separates, just stir it back in—it adds flavor!
Flavor Boosting
If you’re using broth within a week, store it in the fridge and skim off any solidified fat before using. For extra richness, leave the fat layer intact and stir it back in when reheating.
Nutrition Facts
Frequently Asked Questions
How long should I simmer for maximum gelatin?
Aim for 12-24 hours on low heat. This slow process breaks down collagen into gelatin, giving your broth that rich, mouth-coating texture. Less than 8 hours works, but won’t be as nourishing.
Can I use raw bones instead of roasted?
Yes, but roasting first adds deeper, caramelized flavor. If using raw, add 1 tbsp vinegar to help extract minerals. The broth will be lighter but still nutritious.
Why did my broth turn cloudy?
Cloudiness usually means it boiled too vigorously or was stirred. Keep it at a gentle simmer and avoid stirring. Straining through cheesecloth can help clarify.
What’s the best way to store leftover broth?
Cool quickly in an ice bath, then refrigerate for up to 5 days or freeze for 6 months. Use airtight containers or jars for best results.

Trained in classic French technique but raised on slow-cooked ribs and spicy rubs, she blends culinary skill with smoke and soul.
- Recipe for Boneless Pork Chops in Cast Iron Skillet: Sear and Baste to Juicy Perfection - October 3, 2026
- Recipe for Boneless Cross Rib Roast: Slow-Roasted Beef with Herb Crust - October 3, 2026
- Hamburgers in Sauce Recipe Crock Pot: Slow-Cooked Savory Delight - October 3, 2026