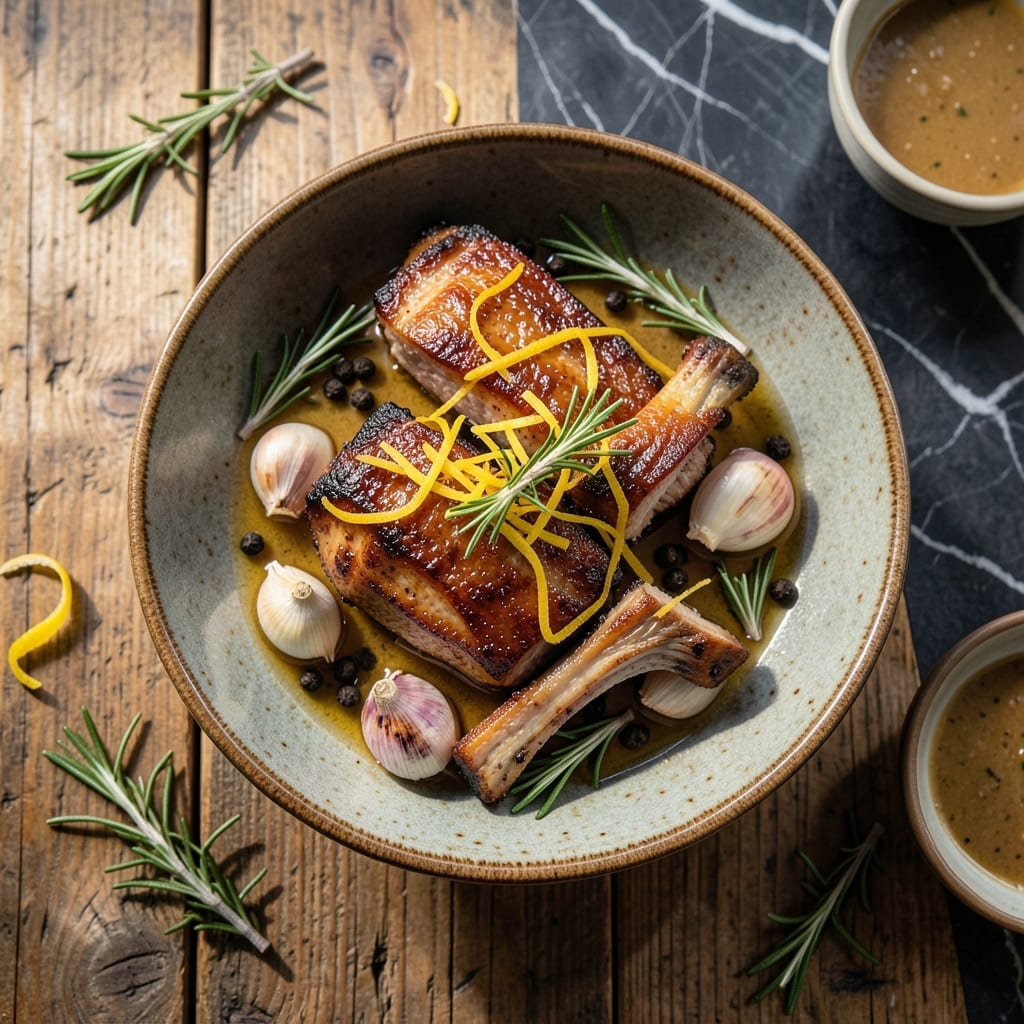
This cast-iron method transforms ordinary pork chops into something extraordinary. The secret lies in achieving a deeply crispy crust while keeping the interior juicy and tender.
I developed this technique after years of experimenting with heat levels and timing. The high smoke point of cast iron creates the perfect sear, while a simple brine ensures the meat stays moist throughout cooking.
What you get is a pork chop with a golden, caramelized exterior and a center that melts in your mouth. The contrast between the crisp crust and tender meat makes every bite unforgettable.
Serve with your favorite sides for a meal that impresses every time.
Ingredients for Best Damn Pork Chop
A short list of quality ingredients delivers that perfect crispy-juicy contrast every time.
| Ingredient | Amount | Notes |
|---|---|---|
| Bone-In Pork Chops 🥩 | 4 whole | 1 to 1.5 inches thick, rib or loin |
| Kosher Salt 🧂 | ¼ cup | Diamond Crystal preferred for brine |
| Granulated Sugar 🍚 | 2 tbsp | Balances brine salinity |
| Black Peppercorns 🌶️ | 1 tbsp | Freshly cracked for best flavor |
| Garlic Cloves 🧄 | 4 cloves | Smashed for brine infusion |
| Fresh Rosemary Sprigs 🌿 | 2 whole | Optional but recommended for aroma |
| Olive Oil 🫒 | 3 tbsp | High smoke point variety for searing |
| Unsalted Butter 🧈 | 2 tbsp | For basting during cooking |
| Fresh Thyme Sprigs 🍃 | 3 whole | Optional garnish, leaves stripped |
| Vegetable Oil 💧 | 2 tbsp | Neutral flavor, high smoke point |
| Lemon 🍋 | 1 whole | Zested and juiced for brightness |
[recipe_ingredient_scaler]
The pork chops are the star—bone-in, 1 to 1.5 inches thick is non-negotiable for even cooking and that crispy crust. Whole Foods or Costco have great options, but any butcher worth their salt can hook you up. Look for chops with good marbling and a pale pink hue. The brine is simple but critical: Diamond Crystal kosher salt (it dissolves faster) and a touch of sugar to balance the saltiness. Freshly cracked black peppercorns make a noticeable difference here.
No fresh rosemary? Dried at one-third the amount works fine, but add it to the brine a bit earlier to rehydrate. Garlic is flexible—powder at half the quantity if you’re in a pinch, but fresh cloves are ideal. For the sear, any high smoke point oil works: avocado oil if you’ve got it, vegetable oil if you don’t. The butter at the end is optional but adds a ridiculous amount of flavor (trust me on this).
Brine the chops for at least 4 hours but no more than 12 hours—any longer and the texture gets mealy. Cooked chops keep in the fridge for 3-4 days, but they’re best fresh. Reheat gently in a pan to keep that crust crispy. The brine ingredients? Last forever in the pantry.
Why You’ll Love This Recipe
- 5-Minute Prep: I just mix salt, sugar, and crushed peppercorns with garlic, rub it on the chops, and let them sit—no fancy steps.
- Sweet & Savory Crust: That sugar in the dry brine caramelizes into a ridiculous crust while the garlic works its magic.
- Weeknight Hero: I’ve served these for fancy dinners and thrown them on paper plates for the kids. Always a win.
- Stretches the Budget: Bone-in chops are cheaper, and this recipe makes them taste like a steakhouse special.
Step-by-Step Instructions for Cast-Iron Pork Chops
Here’s how I achieve that perfect crust and moist interior every single time.
Step 1: Brine the Pork Chops for Maximum Juiciness
In a large bowl, combine the 0.25 cup kosher salt, 2 tbsp granulated sugar, and 1 tbsp black peppercorns with 4 cups of hot water. Stir until the salt and sugar dissolve completely. Add 4 cloves garlic cloves, 2 whole fresh rosemary sprigs, and the zested lemon.
Submerge all 4 bone-in pork chops in the brine, making sure they’re fully covered. I like to place a plate on top to keep them submerged. Let them brine in the refrigerator for 1-2 hours—this step ensures every bite stays succulent. Don’t skip this; it’s the secret to preventing dry chops.
Step 2: Dry and Season for the Perfect Crust
Remove the pork chops from the brine and pat them completely dry with paper towels. I mean thoroughly dry—any moisture will steam the chops instead of searing them. This is crucial for achieving that deep, golden-brown crust we’re after.
Season both sides generously with more kosher salt and freshly cracked black pepper. Let the seasoned chops sit at room temperature for 30 minutes while you preheat your cast-iron skillet. This resting period allows the salt to penetrate the surface for better flavor.
Step 3: Sear in Cast Iron for Optimal Browning
Place your cast-iron skillet over medium-high heat and add the 2 tbsp vegetable oil. When the oil shimmers and a drop of water sizzles immediately, it’s ready. Add the pork chops, being careful not to crowd the pan—I do this in batches if needed.
Sear undisturbed for 4-5 minutes per side until a deep, rich brown crust forms. You’ll know it’s time to flip when the chop releases easily from the pan. For the last 2 minutes of cooking, add the 2 tbsp unsalted butter, 3 tbsp olive oil, and 3 whole fresh thyme sprigs to the pan. Baste the chops continuously with the foaming butter for extra flavor.
Step 4: Rest and Serve with Pan Juices
Transfer the pork chops to a cutting board and let them rest for 5-10 minutes. This allows the juices to redistribute throughout the meat. I tent them loosely with foil to keep them warm without trapping steam, which would make the crust soggy.
While they rest, squeeze the juiced lemon into the pan and swirl to combine with the browned bits and remaining butter. Pour this flavorful liquid over the chops before serving. The result should be a beautiful mahogany crust with a tender, rosy interior that’s bursting with flavor.
Pro Tips For Making Best Damn Pork Chop
- Dry the Chops: Pat those bone-in pork chops thoroughly dry with paper towels before seasoning—I learned this the hard way after my first three batches steamed instead of seared.
- Crush the Peppercorns: Freshly crack those black peppercorns with a mortar or rolling pin; pre-ground pepper loses its punch and won’t give you that bold crust you’re after.
- Don’t Rush the Rest: After salting, let the chops sit uncovered on a rack in the fridge for at least an hour (or up to overnight)—this draws out moisture for a better crust and more even cooking.
- Smash the Garlic: Instead of mincing, just smash the garlic cloves with the flat of your knife and toss them in whole; they’ll infuse the oil with flavor without burning, and you can pull them out before serving.
Creative Variations of This Recipe
Smoky BBQ Style
For a backyard cookout vibe, add 1 tsp smoked paprika and ½ tsp chipotle powder to your dry rub. I learned this trick at local BBQ competitions—it adds that authentic smokehouse flavor without firing up the smoker. Finish with a drizzle of honey for sweetness. 🔥
Herb-Crusted French
Channel my French training by pressing a mix of breadcrumbs, chopped fresh parsley, and grated Parmesan onto the chops before searing. The crust gets incredibly crispy, and the herbs add a bright, fresh note that pairs perfectly with the rich pork.
Apple-Cider Brined
Swap the water in your brine for apple cider—it adds a subtle sweetness that complements the pork beautifully. I forage wild herbs like sage to add to the brine for an extra layer of autumnal flavor. This variation is a hit at fall gatherings.
Spicy Korean-Inspired
Marinate the chops in a mix of gochujang, soy sauce, and minced garlic for 2 hours before cooking. The heat from the gochujang creates a stunning caramelized crust. Serve with pickled vegetables for contrast.
Lemon-Pepper Zing
After searing, finish the chops with a squeeze of lemon juice and a sprinkle of coarsely ground black pepper. This simple twist brightens the dish and cuts through the richness. I love this with a side of roasted potatoes. 💛
Mustard-Glazed
Spread 2 tbsp Dijon mustard on each chop before searing for a tangy, crispy crust. The mustard caramelizes beautifully in the cast iron. Add 1 tbsp whole grain mustard to the pan sauce for extra depth.
Nutrition Facts
Frequently Asked Questions
Why brine pork chops before cooking?
Brining keeps them juicy by letting the meat absorb moisture. The salt also seasons deeply and helps form a better crust. Skip it, and you risk dry chops even with perfect searing.
Can I use boneless chops instead?
Boneless works but won’t be as flavorful. Bone-in chops stay moister and develop a better sear. If using boneless, reduce cooking time by 1-2 minutes per side to avoid drying out.
How do I know when they’re done?
Use a meat thermometer—the internal temp should hit 145°F. The meat will still be slightly pink but safe to eat. Let them rest 5-10 minutes; the temp will rise to 150°F.

Trained in classic French technique but raised on slow-cooked ribs and spicy rubs, she blends culinary skill with smoke and soul.
- Recipe for Boneless Pork Chops in Cast Iron Skillet: Sear and Baste to Juicy Perfection - October 3, 2026
- Recipe for Boneless Cross Rib Roast: Slow-Roasted Beef with Herb Crust - October 3, 2026
- Hamburgers in Sauce Recipe Crock Pot: Slow-Cooked Savory Delight - October 3, 2026