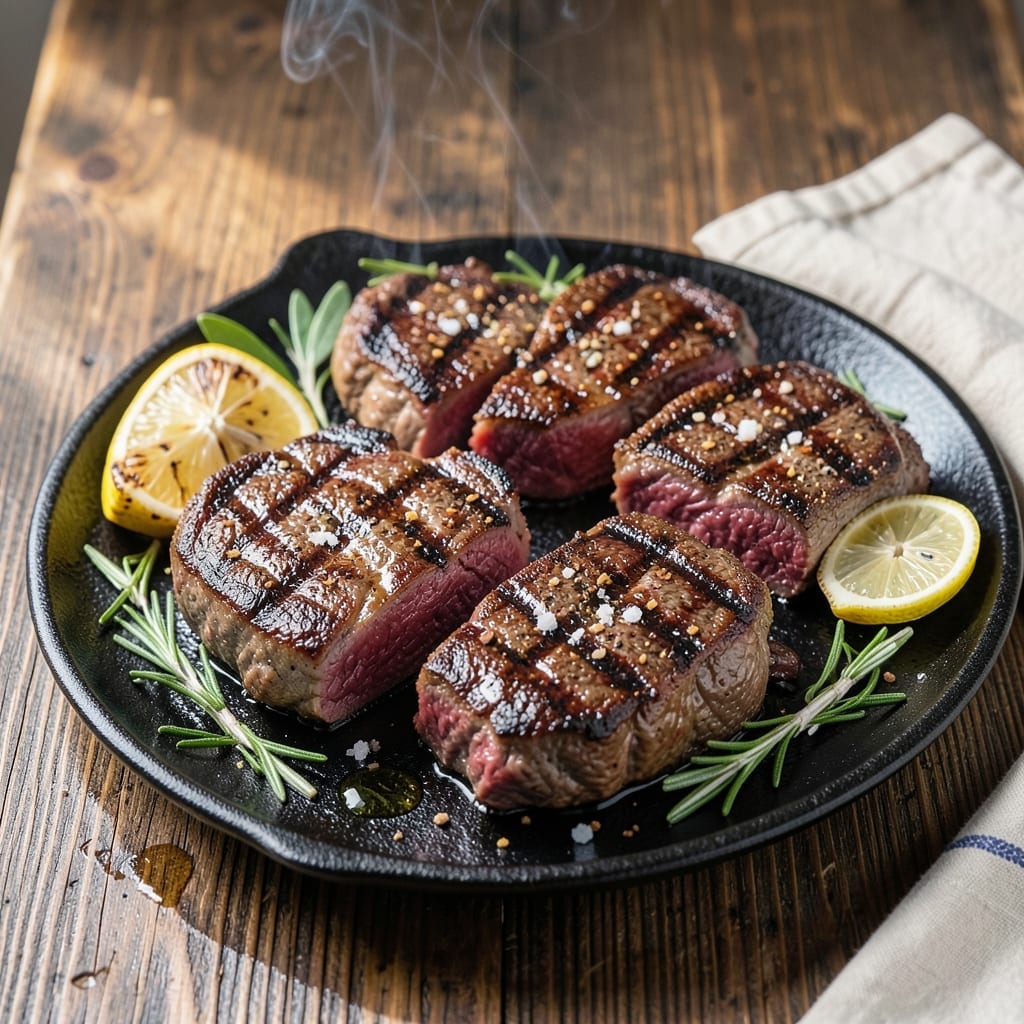
Achieving steakhouse-level results at home comes down to mastering a few key techniques. High heat, proper seasoning, and precise timing transform a simple cut into something extraordinary.
I learned early that the best steaks start with quality meat and a well-seasoned grill. The sizzle when the meat hits the grates is the first sign you’re on the right track.
What follows is a foolproof method for perfectly charred, juicy steak every time. The secret lies in the details—from prep to resting.
This approach delivers consistent, restaurant-quality results without the premium price tag.
Ingredients for Best Grilled Steak Recipe Ever
Quality steaks and bold seasonings make this dish shine every time.
| Ingredient | Amount | Notes |
|---|---|---|
| Ribeye Steaks 🥩 | 4 whole | 1.5 inches thick, bone-in preferred |
| Kosher Salt 🧂 | 2 tbsp | Diamond Crystal preferred for texture |
| Freshly Ground Black Pepper 🌶️ | 1 ½ tbsp | Coarse grind for bold flavor |
| Garlic Powder 🧄 | 1 tsp | Not garlic salt |
| Onion Powder 🧅 | 1 tsp | Balances the seasoning blend |
| Smoked Paprika 🌶️ | ½ tsp | Adds depth and subtle smokiness |
| Extra-Virgin Olive Oil 🫒 | 2 tbsp | High smoke point for searing |
| Unsalted Butter 🧈 | 4 tbsp | For basting while grilling |
| Fresh Rosemary Sprigs 🌿 | 4 pieces | Optional for aromatic basting |
| Fresh Thyme Sprigs 🍃 | 4 pieces | Optional for aromatic basting |
| Garlic Cloves 🧄 | 4 cloves | Smashed for basting |
[recipe_ingredient_scaler]
The ribeye is non-negotiable for that marbled, juicy bite. Costco has great pre-cut options, but I always ask my butcher at Whole Foods for a bone-in cut—extra flavor. Look for vibrant red color with plenty of white fat streaks. Thickness matters: anything under 1.25 inches will overcook fast. If you’re splurging, dry-aged ribeye from a specialty shop is next-level (worth every penny).
No ribeye? New York strip or filet work too—just adjust cook time (thinner cuts need less heat). Out of fresh herbs? Dried rosemary and thyme at half the amount still infuse flavor. Skip the garlic powder? Fresh minced garlic in the butter works, but don’t let it burn. For the best crust, pat the steaks bone-dry before seasoning—this isn’t the time for damp paper towels.
Seasoned steaks can sit uncovered in the fridge for up to 24 hours—actually improves the flavor. Leftover cooked steak? Slice thin, reheat gently in a skillet, or toss into salads. Freezes well for 3 months if wrapped tight (but honestly, it’s best fresh off the grill).
Why You’ll Love This Recipe
- I’ll be real: cold steak slices in a sandwich the next day might be even better.
- 5-Minute Seasoning: I just rub the ribeye with salt, pepper, garlic and onion powder—no marinade, no fuss.
- Crispy Char, Juicy Inside: Honestly, the first bite with that crust and tender center sold me on grilling ribeyes forever.
- Backyard BBQ Star: It’s my go-to for summer cookouts, birthdays, or even a random Tuesday craving.
Step-by-Step Instructions for Grilled Steak
This is the method I use to get a perfect crust and juicy interior every time.
Step 1: Season the Ribeye Steaks Aggressively
Pat the 4 whole Ribeye Steaks completely dry with paper towels—this is non-negotiable for achieving that perfect sear. Any moisture on the surface will create steam instead of a crust. I press down firmly with the paper towels to absorb every drop.
Combine the 2 tbsp Kosher Salt, 1.5 tbsp Freshly Ground Black Pepper, 1 tsp Garlic Powder, 1 tsp Onion Powder, and 0.5 tsp Smoked Paprika in a small bowl. Apply this seasoning blend generously to all surfaces of each steak, pressing it into the meat so it adheres. Let the seasoned steaks sit at room temperature for 30-45 minutes to allow the salt to penetrate and the meat to cook more evenly.
Step 2: Preheat the Grill to High Heat
Clean your grill grates thoroughly with a grill brush to remove any residue from previous use. Preheat the grill to high heat—you want it screaming hot. I test the heat by holding my hand about 5 inches above the grates; if I can only keep it there for 2-3 seconds, it’s ready.
Oil the grates just before cooking by folding a paper towel soaked in extra-virgin olive oil, using tongs to rub it over the hot grates. This prevents the steaks from sticking and helps create beautiful grill marks. Be careful—the grill is extremely hot at this point.
Step 3: Sear the Steaks to Develop a Crust
Place the steaks on the grill and close the lid. Sear for 3-4 minutes until a deep brown crust forms. Don’t move the steaks during this time—you want to develop a good sear before flipping. The steaks should release easily from the grates when they’re ready to be flipped.
Flip the steaks and sear the other side for another 3-4 minutes. For the 1.5-inch thick ribeyes, this timing will get you to about medium-rare if you follow it precisely. If you’re unsure, use an instant-read thermometer: 125-130°F for medium-rare.
Step 4: Baste with Aromatic Butter and Finish
Reduce the heat to medium and add the 4 tbsp Unsalted Butter, 4 cloves Garlic Cloves, 4 pieces Fresh Rosemary Sprigs, and 4 pieces Fresh Thyme Sprigs to the grill. Tilt each steak slightly and spoon the melted butter over the top repeatedly, basting for 1-2 minutes per side.
The aromatic butter adds incredible flavor and helps the steaks develop a glossy, restaurant-quality finish. Watch for flare-ups from the butter—move the steaks to a cooler part of the grill if the flames get too high. When the internal temperature reaches 125°F for medium-rare, remove the steaks from the grill.
Step 5: Rest and Serve
Transfer the steaks to a cutting board or warm plate and tent loosely with foil. Let them rest for 8-10 minutes before slicing. This resting period allows the juices to redistribute throughout the meat, ensuring every bite is tender and juicy.
Slice against the grain into ½-inch thick pieces. The grain runs in one direction through the meat—cutting perpendicular to these lines shortens the muscle fibers, making the steak more tender. Serve immediately while still warm, with any remaining herb butter spooned over the top.
Pro Tips For Making Best Grilled Steak Recipe Ever
- Dry the Steaks: Pat the ribeyes completely dry with paper towels before seasoning—I learned this the hard way after steaming more than searing my first few attempts.
- Salt Aggressively: Use more kosher salt than you think, pressing it into the meat so it actually penetrates; a light dusting just washes off on the grill.
- Let Them Rest: Give the steaks a full 10 minutes under foil after grilling; skip this and all those beautiful juices will end up on the cutting board.
- Preheat the Grill: Crank it to high and wait 10-15 minutes until the grates are screaming hot—anything less and you won’t get that restaurant-quality crust on your ribeye.
Essential Equipment for Perfect Results
The Right Grill
You need serious heat for a perfect sear, so I recommend a charcoal grill like my trusty Weber Kettle. The high, direct heat it produces is unbeatable for developing that beautiful crust. Gas grills work too, but look for one with BTU output of 12,000+. 🔥
Instant-Read Thermometer
Guessing doneness is for amateurs. I use a ThermoWorks Thermapen—it gives accurate readings in 2-3 seconds. The thin probe lets me check multiple spots without losing precious juices through large holes.
Long-Tongued Tongs
Invest in 12-inch locking tongs for safe flipping. I prefer the spring-loaded ones from OXO—they give me precise control without tearing the meat. Never use a fork; it pierces the surface and drains those delicious juices.
Cast Iron Grill Press
For even better grill marks, I use a cast iron grill press. It adds weight to ensure full contact with the grates. The Lodge version is my go-to—it’s durable and pre-seasoned, ready to use right out of the box.
Heat-Resistant Gloves
Handling hot grates and adjusting charcoal requires protection. I swear by silicon-coated gloves that let me grab hot grill grates barehanded. The Grill Armor brand offers excellent heat resistance up to 932°F. 💪
Butter Basting Spoon
A long-handled stainless steel spoon is essential for basting without burning your hands. I keep mine right next to the grill for those final minutes when I’m spooning that aromatic butter over the steaks.
Nutrition Facts
Frequently Asked Questions
How do I know when my steak is done?
Use an instant-read thermometer for accuracy. 125-130°F is medium-rare, 130-135°F is medium. The steak will continue cooking while resting, so pull it off the grill just before it reaches your target temperature.
Can I use a different cut of steak?
New York strip or filet mignon work well, but adjust cooking times. Thinner cuts need less time, while thicker ones require more. Ribeye remains my top pick for its rich marbling.
Why do I need to rest the steak?
Resting for 8-10 minutes allows juices to redistribute. Slicing too soon causes all those delicious juices to spill out, leaving your steak dry. Patience pays off with a juicier result every time.
What if my grill doesn’t get very hot?
Preheat longer and use direct heat zones. If using charcoal, ensure a thick, even layer. For gas grills, preheat with all burners on high heat for at least 15 minutes before cooking.

Trained in classic French technique but raised on slow-cooked ribs and spicy rubs, she blends culinary skill with smoke and soul.
- Recipe for Boneless Pork Chops in Cast Iron Skillet: Sear and Baste to Juicy Perfection - October 3, 2026
- Recipe for Boneless Cross Rib Roast: Slow-Roasted Beef with Herb Crust - October 3, 2026
- Hamburgers in Sauce Recipe Crock Pot: Slow-Cooked Savory Delight - October 3, 2026