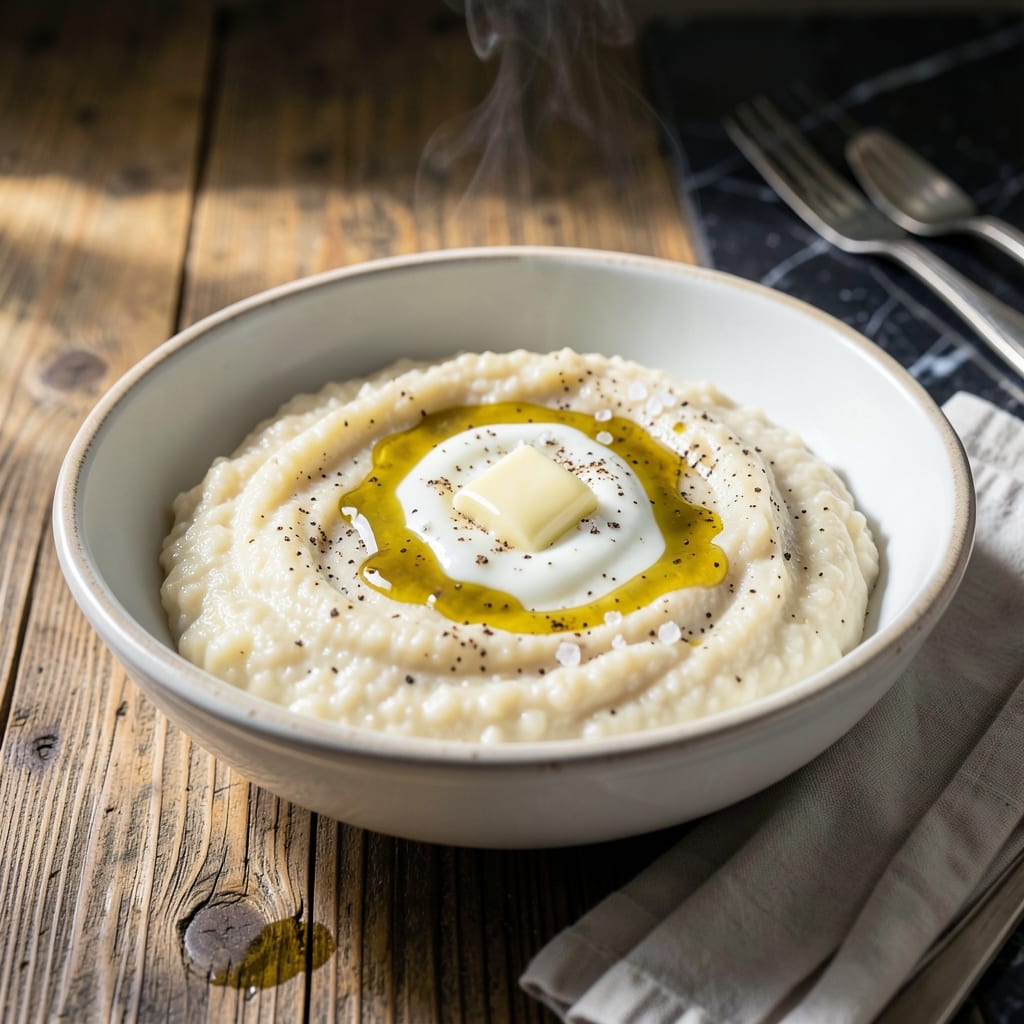
Southern breakfasts demand grits done right, and instant versions can deliver silky smooth results with the proper technique. This method transforms humble ingredients into a creamy, comforting dish in minutes.
I’ve tested countless ratios to perfect the texture—rich and velvety without lumps or grittiness. The key lies in the timing and a few simple adjustments that elevate this staple beyond the basics.
What you’ll get is a bowl of grits so perfectly smooth it rivals any diner’s, ready in under 10 minutes. No shortcuts, just a foolproof approach to a Southern classic.
Serve it as a base for shrimp, cheese, or simply with butter and salt. Here’s how to make it.
Ingredients for Best Instant Grits
Transform humble grits into silky smooth Southern perfection with these quality ingredients.
| Ingredient | Amount | Notes |
|---|---|---|
| Instant Grits 🌾 | 2 cups | Stone-ground preferred for texture |
| Water 💧 | 6 cups | Or use milk for creamier grits |
| Unsalted Butter 🧈 | 2 tbsp | European-style for richness |
| Kosher Salt 🧂 | 1 tsp | Diamond Crystal preferred |
| Freshly Ground Black Pepper 🌶️ | ½ tsp | Coarse grind for texture |
| whole milk 🥛 | 1 cup | Optional for extra creaminess |
| Sharp Cheddar Cheese 🧀 | 1 cup | Freshly shredded from block |
| Heavy Cream 🥛 | ¼ cup | Optional for ultra-rich texture |
| Garlic Powder 🧄 | ¼ tsp | For subtle savory depth |
| Onion Powder 🧅 | ¼ tsp | Complements the cheddar |
[recipe_ingredient_scaler]
The grits make all the difference here. Stone-ground instant grits from Bob’s Red Mill or Anson Mills deliver superior texture compared to standard supermarket brands. Look for fine or medium grind—coarse takes too long for instant prep. The butter should be high-quality, like Plugrá or Kerrygold, as it carries much of the flavor in this simple dish.
No whole milk? Half-and-half or evaporated milk works beautifully for extra richness. Skip the cheddar and use Pepper Jack for heat or Gouda for nuttiness. For a lighter version, 2% milk still delivers creaminess without the heaviness. The garlic and onion powders are subtle but essential—fresh minced versions can overpower the delicate grits flavor.
Cooked grits hold well for 4-5 days refrigerated in an airtight container. Reheat gently with a splash of milk to restore creaminess. For meal prep, cook without cheese, then stir in fresh shredded portions when reheating. Freezing isn’t recommended—texture suffers significantly.
Why You’ll Love This Recipe
- 5-Minute Meal: I can have creamy grits ready before my coffee finishes brewing.
- Buttery Richness: The unsalted butter melts in perfectly, giving that smooth, velvety texture I crave.
- Breakfast or Dinner: Honestly, I serve this for Sunday brunch or as a quick side with fried chicken on weeknights.
- Pantry Staple: Between us, a bag of instant grits costs pennies and lasts for multiple meals.
Step-by-Step Instructions for Creamy Grits
Achieve restaurant-quality results with this proven method for ultra-smooth, flavorful grits.
Step 1: Boil the Water and Season Properly
Bring all 6 cups Water to a rolling boil in a large, heavy-bottomed saucepan over high heat. I use a heavy pot to prevent scorching and ensure even heat distribution.
Once boiling, add the 1 tsp Kosher Salt. The water should taste seasoned like pasta water—salty enough to enhance the grits’ natural corn flavor. This early seasoning ensures the flavor penetrates every bite.
Step 2: Whisk in Grits and Reduce Heat
Gradually whisk in all 2 cups Instant Grits, pouring them in a slow, steady stream to prevent clumping. The mixture will thicken almost immediately. Reduce heat to medium-low to maintain a gentle simmer.
Cook the grits for 5-7 minutes, stirring frequently with a wooden spoon, until they thicken to the consistency of porridge. You’ll notice the texture change from thin to creamy as the grits absorb the liquid. If they become too thick before the time is up, add a splash of hot water.
Step 3: Incorporate Dairy for Creaminess
Stir in the 2 tbsp Unsalted Butter, 1 cup whole milk, and 0.25 cup Heavy Cream. The butter adds richness, while the milk and cream create a velvety texture. These ingredients should be at room temperature to incorporate smoothly.
Continue cooking for another 3-4 minutes on low heat, stirring constantly. The grits will transform from simple to luxurious as the dairy melts in. Watch for small bubbles around the edges—this indicates the right simmer level.
Step 4: Add Seasonings and Cheese
Remove the pot from heat. Stir in the 0.5 tsp Freshly Ground Black Pepper, 0.25 tsp Garlic Powder, and 0.25 tsp Onion Powder. These seasonings add subtle depth without overpowering the cheddar.
Gradually add all 1 cup Sharp Cheddar Cheese, stirring until fully melted and smooth. Freshly shredded cheese melts better than pre-shredded, which often contains anti-caking agents. The grits should now be thick, creamy, and glossy with a rich cheddar aroma.
Step 5: Rest and Serve Immediately
Let the grits sit covered for 2-3 minutes off the heat. This brief rest allows the flavors to meld and the texture to set slightly. The surface should look smooth with a slight sheen.
Serve hot in bowls, garnished with additional black pepper if desired. The ideal serving temperature is just above 160°F, ensuring they’re warm but not scalding. Each spoonful should be silky, with the sharp cheddar flavor balanced by the creamy, buttery base.
Pro Tips For Making Best Instant Grits
- Boil First, Whisk After: Bring water to a full rolling boil before adding grits—I learned this the hard way after too many lumps ruined my breakfast. Whisk vigorously for 30 seconds once they hit the water to prevent clumping.
- Double the Butter: Sounds indulgent, but use 2 tablespoons of unsalted butter per cup of grits. My grandmother swore by this, and she was right: it makes them rich without tasting greasy.
- Salt the Water: Add 1 teaspoon of kosher salt per cup of water before it boils. I was skeptical until I tried it, but it seasons the grits evenly instead of leaving a salty bite at the end.
- Cover and Rest: Once thickened, turn off the heat, cover, and let sit for 5 minutes. This isn’t the prettiest step, but it guarantees creamy grits every time—no raw taste or grainy texture.
Health Benefits of best instant grits
Nutrient-Rich Corn Base
Grits provide a solid foundation of complex carbohydrates from corn, offering sustained energy that keeps you full for hours. A ½ cup serving of cooked grits delivers about 10% of your daily iron needs, which helps transport oxygen in your blood. 💪
Low-Fat Comfort Food
When prepared with water, grits are naturally low in fat and calories, making them a guilt-free base for heartier add-ins. Even with butter and cheese, this dish stays balanced compared to many breakfast options. I love that it satisfies without weighs me down.
Gluten-Free Goodness
Made from corn, grits are inherently gluten-free, perfect for anyone with celiac disease or gluten sensitivity. Just ensure you use certified gluten-free brands like Bob’s Red Mill to avoid cross-contamination risks. This makes it a safe, comforting option for many dietary needs.
Calcium Boost Option
By preparing grits with milk or cream instead of water, you significantly increase the calcium content. A serving made with whole milk provides about 20% of your daily calcium, supporting bone health. I always use dairy for that extra nutritional boost.
Fiber Content
While not as high as some whole grains, stone-ground grits retain more fiber than finely processed versions. This aids digestion and helps maintain stable blood sugar levels. The fiber content is one reason I prefer stone-ground varieties for my morning bowl.
Protein Addition
Adding sharp cheddar to your grits introduces 7 grams of protein per ounce, helping build and repair tissues. This turns a simple carb into a more balanced meal. The combination of corn and dairy creates a complete amino acid profile. 🥛
Nutrition Facts
Frequently Asked Questions
Can I use milk instead of water for creamier texture?
Using whole milk instead of water creates richer, creamier grits. For extra decadence, try a mix of 4 cups water and 2 cups milk.
How do I prevent lumps in my grits?
Whisk constantly while slowly adding the grits to boiling water. A wire whisk breaks up clumps better than a spoon. Keep stirring for the first 2-3 minutes of cooking.
What’s the best cheese for grits?
Sharp cheddar is classic, but try Pepper Jack for heat or Gouda for nuttiness. Always shred fresh from the block—pre-shredded contains anti-caking agents that affect texture.
Can I make grits ahead of time?
Cooked grits keep 4-5 days refrigerated. Reheat gently with a splash of milk to restore creaminess. Avoid freezing—it ruins the silky texture.

Trained in classic French technique but raised on slow-cooked ribs and spicy rubs, she blends culinary skill with smoke and soul.
- Recipe for Boneless Pork Chops in Cast Iron Skillet: Sear and Baste to Juicy Perfection - October 3, 2026
- Recipe for Boneless Cross Rib Roast: Slow-Roasted Beef with Herb Crust - October 3, 2026
- Hamburgers in Sauce Recipe Crock Pot: Slow-Cooked Savory Delight - October 3, 2026