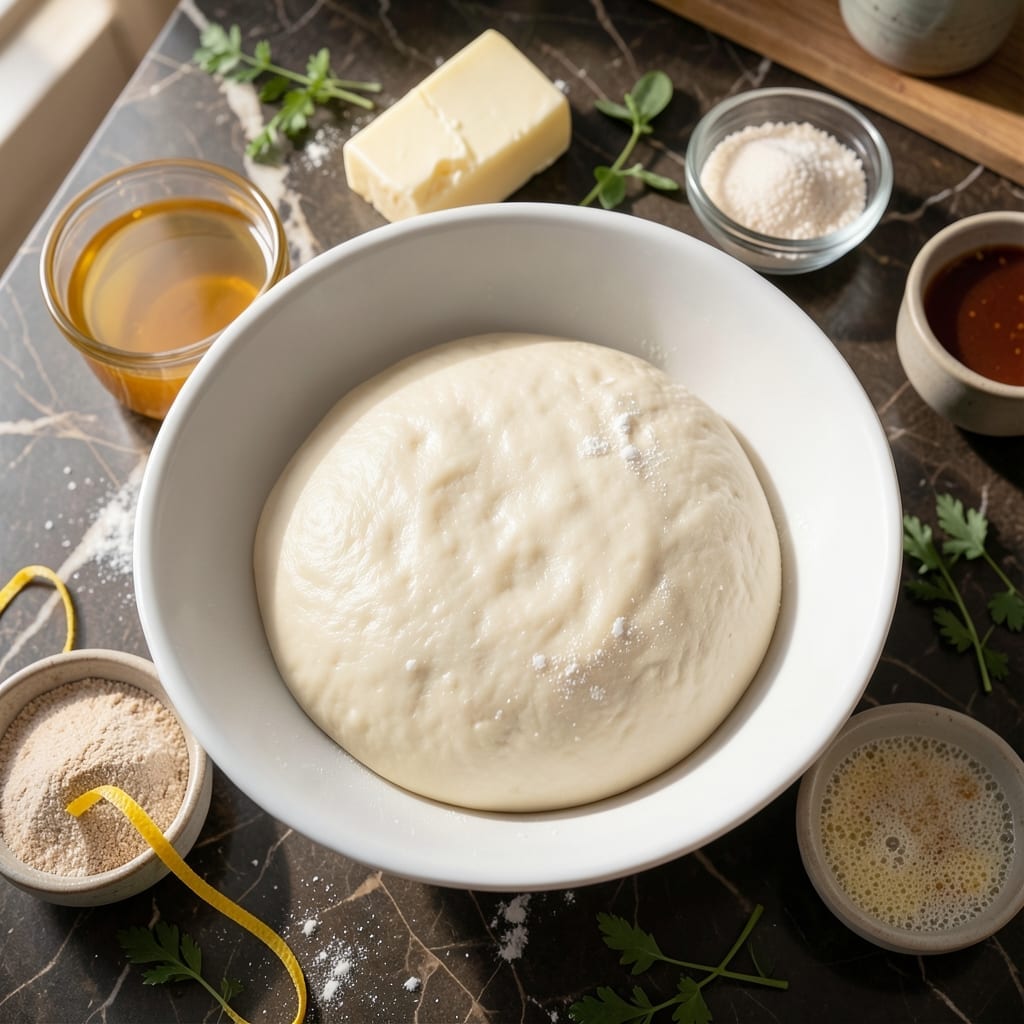
This recipe delivers the pillowy soft texture that defines perfect siopao. I developed it through years of testing to achieve that cloud-like consistency.
The dough comes together with simple ingredients but requires precise proofing for maximum fluffiness. It’s the foundation for both sweet and savory fillings.
Ingredients for Best Siopao Dough
Simple ingredients yield that signature pillowy soft texture for perfect siopao every time.
| Ingredient | Amount | Notes |
|---|---|---|
| Bread Flour 🌾 | 4 cups | High protein for structure |
| Granulated Sugar 🍚 | ¼ cup | Feeds the yeast for rise |
| Active Dry Yeast 🍞 | 2 ¼ tsp | Instant yeast works too |
| Warm Water 💧 | 1 cup | 110-115°F for activation |
| Whole Milk 🥛 | ½ cup | Warmed to lukewarm |
| Unsalted Butter 🧈 | 4 tbsp | Softened at room temperature |
| Large Egg 🥚 | 1 whole | Room temperature preferred |
| Salt 🧂 | 1 tsp | Fine sea salt for even distribution |
| Baking Powder 🧂 | 1 tsp | Ensures extra lift |
| Vegetable Oil 🫒 | 1 tbsp | For greasing bowl |
[recipe_ingredient_scaler]
The flour is critical here—King Arthur Bread Flour is my go-to for its consistent 12.7% protein content, which provides the structure needed for that cloud-like crumb. Yeast freshness matters: check the expiration date and store unopened packets in the freezer. Whole Foods bulk bins often have the freshest yeast. Milk and butter should be lukewarm (not hot) to avoid killing the yeast.
No bread flour? All-purpose flour plus 1 tbsp vital wheat gluten per cup gets close. Dairy-free? Swap unsweetened almond milk for whole milk and use vegan butter. The egg adds richness but can be omitted in a pinch (the texture will be slightly less tender). For extra softness, some bakers add 1 tbsp powdered milk to the dry ingredients.
The dough can be refrigerated overnight for a slow proof, which actually enhances flavor. Store shaped buns in an airtight container for up to 3 days at room temperature. For longer storage, freeze unbaked buns on a tray first, then transfer to a bag—they’ll keep for 1 month.
Why You’ll Love This Recipe
- Minimal Effort: I mix the dough in one bowl, let it rise, and that’s it—no fancy techniques, just bread flour and warm milk doing the work.
- Soft and Sweet: The whole milk and sugar make this dough ridiculously tender with just the right hint of sweetness, perfect for any filling.
- Meal Prep Magic: I make a big batch, shape and freeze the dough, then steam fresh siopao whenever I need a quick meal or snack.
- Budget Friendly: Bread flour and yeast are pantry staples, and this recipe stretches to feed a crowd without breaking the bank.
Step-by-Step Instructions for Siopao Dough
This method ensures a perfectly soft, elastic dough that rises beautifully for your steamed buns.
Step 1: Activate the Yeast and Combine Wet Ingredients
In a small bowl, whisk together the 2.25 tsp Active Dry Yeast with the 1 cup Warm Water at 110-115°F and the 0.25 cup Granulated Sugar. Let it sit for 5-7 minutes until frothy—this confirms the yeast is alive and active.
In a separate large mixing bowl, combine the 0.5 cup Whole Milk (warmed to lukewarm), the 1 whole Large Egg, and the 4 tbsp Unsalted Butter (softened). Whisk until the butter is mostly incorporated and the mixture is smooth.
Step 2: Incorporate Dry Ingredients and Knead
Add the yeast mixture to the wet ingredients and stir to combine. In a separate bowl, sift together the 4 cups Bread Flour, 1 tsp Salt, and 1 tsp Baking Powder. Gradually add the dry ingredients to the wet mixture, stirring until a shaggy dough forms.
Turn the dough out onto a lightly floured surface and knead for 8-10 minutes by hand, or 5-6 minutes in a stand mixer fitted with a dough hook. The dough should become smooth, elastic, and slightly tacky but not sticky. If it sticks to your hands, add 1 tbsp of bread flour at a time until it reaches the right consistency.
Step 3: First Rise Until Doubled
Lightly grease a large bowl with the 1 tbsp Vegetable Oil. Place the dough in the bowl, turning it once to coat all sides with oil. Cover the bowl with a damp kitchen towel or plastic wrap.
Let the dough rise in a warm, draft-free place for 1 to 1.5 hours, or until it has doubled in size. To test if it’s ready, gently press two fingers into the dough—if the indentations remain, it’s properly proofed. This step is crucial for achieving the pillowy texture.
Step 4: Punch Down and Rest
Once doubled, gently punch down the dough to release the air. This step redistributes the yeast and relaxes the gluten for easier shaping. Transfer the dough to a lightly floured surface and divide it into your desired portions for siopao.
Cover the portions with a damp towel and let them rest for 10-15 minutes. This short rest makes the dough more pliable and easier to shape into smooth, even buns without tearing.
Step 5: Shape and Second Rise
Shape each portion into a smooth ball or oval, depending on your siopao style. Place the shaped dough on parchment paper squares, leaving 1-2 inches between each piece to allow for expansion.
Cover loosely with a damp towel and let rise for another 30-45 minutes, or until the dough has puffed up noticeably but not yet doubled. This second rise ensures the buns will be light and airy after steaming. The dough is now ready for filling and steaming.
Pro Tips For Making Best Siopao Dough
- Activate Yeast Properly: Bloom the active dry yeast in 110°F warm water with a pinch of sugar for 5-10 minutes until foamy—I learned this the hard way after killing three batches with water that was too hot.
- Use Bread Flour Only: Skip all-purpose flour; bread flour’s higher protein content gives siopao that chewy, elastic texture we all love.
- Warm the Milk: Take the whole milk out of the fridge 30 minutes early or microwave for 20 seconds—cold milk slows yeast activity and makes dough sluggish.
- Knead Long Enough: Don’t stop at smooth—knead for a full 10-12 minutes until the dough passes the windowpane test, or your siopao will be dense instead of light and fluffy.
Health Benefits of best siopao dough
Energy Boost
This dough provides complex carbohydrates from bread flour, offering sustained energy release. The 4 cups of flour delivers fiber that aids digestion and keeps you full longer. David always notices his energy stays steady after eating these buns. 💪
Protein Source
The combination of 1 whole egg and 0.5 cup milk adds about 12g of protein to the entire batch. Protein is essential for muscle repair and immune function, making this more than just empty carbs.
Vitamin Enrichment
Enriched bread flour provides B vitamins like thiamine, riboflavin, and niacin. These support metabolism and nervous system health. The egg adds vitamin D and choline for brain function.
Low Fat Option
With only 4 tbsp butter in the entire recipe, each serving contains minimal saturated fat. This makes it a heart-healthier choice compared to many other bread products. The milk adds some fat but also valuable calcium.
Minimal Sugar
The 0.25 cup sugar serves mainly to feed the yeast. Most of it gets consumed during fermentation, resulting in just 2g per serving. This keeps the buns lightly sweet without being dessert-like.
Dietary Flexibility
You can easily adapt this for dietary needs. Swap dairy for plant-based alternatives or use gluten-free flour blends. Even with modifications, the buns maintain good nutritional value. I test these variations on David regularly. 🥗
Nutrition Facts
Frequently Asked Questions
What’s the ideal temperature for the water?
Use 110-115°F water to activate the yeast without killing it. Too hot will destroy the yeast, too cold won’t activate it properly. A kitchen thermometer ensures accuracy.
Can I use all-purpose flour instead?
Yes, but add 1 tbsp vital wheat gluten per cup to match bread flour’s protein content. This maintains the dough’s structure and soft texture. The result will be slightly less pillowy.
How do I know when the dough is properly kneaded?
The dough should be smooth, elastic, and slightly tacky but not sticky. Perform the windowpane test: stretch a small piece thinly—if it holds without tearing, it’s ready. This takes 8-10 minutes by hand.
Why did my buns turn out dense?
Overproofing or insufficient kneading are common culprits. Ensure the dough doubles in size during the first rise and knead until elastic. Also, check your yeast’s freshness—old yeast loses its rising power.

Trained in classic French technique but raised on slow-cooked ribs and spicy rubs, she blends culinary skill with smoke and soul.
- Recipe for Boneless Pork Chops in Cast Iron Skillet: Sear and Baste to Juicy Perfection - October 3, 2026
- Recipe for Boneless Cross Rib Roast: Slow-Roasted Beef with Herb Crust - October 3, 2026
- Hamburgers in Sauce Recipe Crock Pot: Slow-Cooked Savory Delight - October 3, 2026