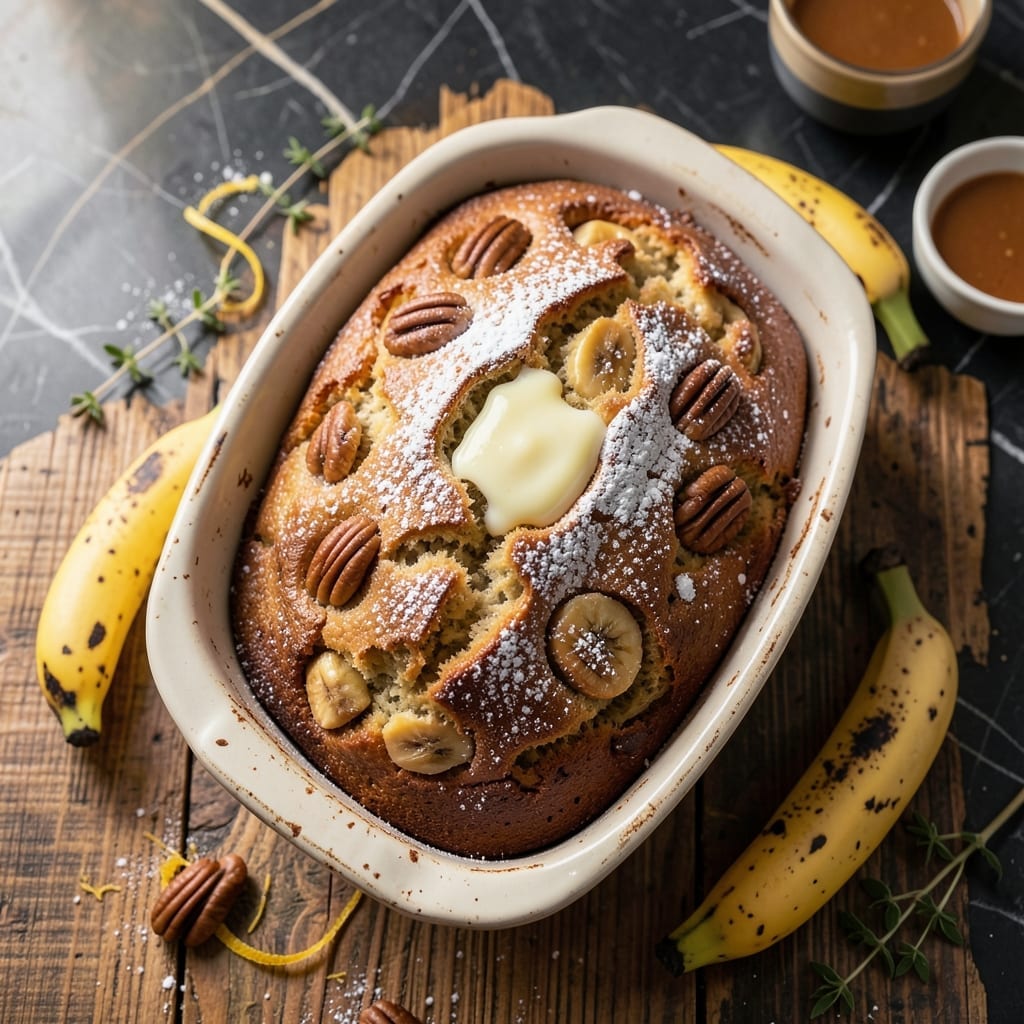
This classic banana bread delivers on its promise of moist texture and timeless flavor. The perfect balance of ripe bananas and crunchy walnuts makes it a reliable favorite.
With simple ingredients and straightforward steps, this recipe produces a tender loaf that stays moist for days. The walnuts add just the right amount of texture to every slice.
Ingredients for Betty Crocker’s Recipe for Banana Nut Bread
Simple ingredients create this classic moist banana bread with nutty crunch everyone loves.
| Ingredient | Amount | Notes |
|---|---|---|
| Ripe Bananas 🍌 | 1 ½ cups | Mashed, about 3 medium bananas |
| All-Purpose Flour 🌾 | 1 ½ cups | Sifted for even texture |
| Granulated Sugar 🍚 | ¾ cup | Fine grain for even distribution |
| Light Brown Sugar 🍯 | ½ cup | Packed firmly for moisture |
| Vegetable Oil 🫒 | ½ cup | Neutral flavor preferred |
| Large Eggs 🥚 | 2 whole | Room temperature for even mixing |
| Vanilla Extract 🌿 | 1 tsp | Pure vanilla for best flavor |
| Baking Soda 🧂 | 1 tsp | Ensures proper rise |
| Salt 🧂 | ½ tsp | Fine sea salt preferred |
| Ground Cinnamon 🌶️ | ½ tsp | Freshly ground for best aroma |
| Walnuts 🌰 | ½ cup | Chopped, for texture and crunch |
[recipe_ingredient_scaler]
The bananas are the foundation here—overripe with brown speckles (the spottier, the better) deliver maximum sweetness and moisture. All-purpose flour from King Arthur or Gold Medal ensures consistent results. For the walnuts, California-grown from Diamond of California offers reliable quality. Don’t skip the brown sugar; its molasses content keeps the loaf moist for days.
No walnuts? Pecans or almonds work equally well (toast them first for extra depth). Out of light brown sugar? Dark brown sugar at the same quantity adds a richer caramel note. For a vegan version, replace eggs with flax eggs (1 tbsp ground flax + 3 tbsp water per egg). The vanilla extract can be swapped for maple syrup in a pinch, though the flavor profile will shift slightly.
Store the loaf wrapped in plastic wrap or foil at room temperature for up to 3 days. For longer storage, refrigerate for up to 1 week or freeze slices for 3 months. Slice before freezing for easy single-serving portions.
Why You’ll Love This Recipe
- I’ll be real: those three sad, overripe bananas on my counter finally have a purpose beyond the trash.
- Mix & Bake: I just dump the sugars, oil, and mashed bananas in one bowl, stir, then fold in flour—no mixer, no fuss.
- Double Sugar Magic: The combo of granulated and light brown sugar gives it a deep caramel-like sweetness that plain sugar can’t touch.
- Breakfast or Dessert: Honestly, I slice it for rushed mornings with coffee or warm it with ice cream for an after-dinner treat.
Step-by-Step Instructions for Banana Nut Bread
This method ensures a perfectly moist loaf with ideal texture and walnut crunch.
Step 1: Prepare and Combine Wet Ingredients
In a large mixing bowl, mash the 1.5 cups Ripe Bananas until smooth with minimal lumps. The bananas should be very ripe—black spots on the peel ensure natural sweetness and moisture.
Add the 0.5 cup Light Brown Sugar (packed firmly), 0.75 cup Granulated Sugar, 0.5 cup Vegetable Oil, 2 whole Large Eggs, and 1 tsp Vanilla Extract. Whisk vigorously for 2 minutes until the mixture is fully emulsified and pale in color. This step develops the base structure for a tender crumb.
Step 2: Incorporate Dry Ingredients
In a separate bowl, sift together the 1.5 cups All-Purpose Flour, 1 tsp Baking Soda, 0.5 tsp Salt, and 0.5 tsp Ground Cinnamon. Sifting prevents lumps and ensures even distribution of leavening agents for consistent rise.
Gradually add the dry mixture to the wet ingredients, folding gently with a spatula just until combined. Avoid overmixing—stop as soon as you see no more flour streaks. Overworking the batter develops gluten, which would make the bread dense instead of tender.
Step 3: Fold in Walnuts and Prepare Pan
Gently fold in the 0.5 cup Walnuts (chopped) until evenly distributed. The walnuts add texture and crunch, so ensure they’re dispersed throughout the batter for consistent flavor in every slice.
Grease a 9×5-inch loaf pan thoroughly with butter or nonstick spray, then dust lightly with flour. This preparation prevents sticking and helps the bread release cleanly after baking. Pour the batter into the pan, smoothing the top with your spatula.
Step 4: Bake to Golden Perfection
Preheat your oven to 350°F. Bake the loaf on the center rack for 55-65 minutes, or until a toothpick inserted into the center comes out clean with only a few moist crumbs. Rotate the pan halfway through baking for even browning.
Watch for a deep golden brown color and a slight dome in the center—these are visual cues that the bread is fully baked. If the top browns too quickly, tent loosely with aluminum foil to prevent over-browning while the interior finishes cooking.
Step 5: Cool and Serve
Remove the pan from the oven and let the bread cool in the pan for 10 minutes. This brief rest allows the loaf to set without collapsing. Then, transfer it to a wire rack to cool completely—this prevents the bottom from becoming soggy.
Slice only after the bread has cooled for at least 1 hour. This patience ensures clean slices and allows the flavors to meld. Serve at room temperature for the best texture, with the walnuts providing a satisfying crunch in every bite.
Pro Tips For Making Betty Crocker’S Recipe For Banana Nut Bread
- Mash Bananas Well: I learned this the hard way—lumpy banana chunks don’t distribute evenly in the batter, so use a fork or potato masher until they’re mostly smooth.
- Test with Toothpick: Start checking at 50 minutes; if it comes out clean or with just a few moist crumbs, it’s done, even if the top looks pale.
- Use Very Ripe Bananas: The blacker the peel, the sweeter and more flavorful your bread will be, so resist using underripe ones.
- Swap Half the Oil: Replace half the vegetable oil with melted butter for a richer taste—sounds small, but it actually changes the outcome.
Essential Equipment for This Recipe
Loaf Pan Essentials
I always use a 9×5-inch loaf pan for this recipe—it’s the standard size that ensures even baking and the perfect dome. Look for heavy-gauge aluminum pans like those from USA Pan or Wilton for consistent heat distribution. Avoid dark nonstick pans, as they can cause over-browning.
Mixing Bowls
A set of nested stainless steel mixing bowls is my go-to for both wet and dry ingredients. I prefer bowls with non-slip bases and measurement markings, like those from Cuisinart. They make whisking and folding easier while keeping your workspace tidy.
Whisk and Spatula
A sturdy balloon whisk is essential for emulsifying the wet ingredients properly. I use a 10-inch whisk from OXO for comfortable grip. A silicone spatula with a flexible head helps scrape every last bit of batter from the bowl.
Measuring Tools
Accurate measurements matter for consistent results. I rely on dry measuring cups for flour and sugars, and liquid measuring cups for oil. A set of measuring spoons with both tablespoon and teaspoon sizes ensures precision for smaller quantities like baking soda and cinnamon.
Cooling Rack
Never skip the cooling rack—it’s crucial for preventing a soggy bottom. I use a wire cooling rack with a grid design, which allows air to circulate underneath the loaf. Transfer the bread after 10 minutes in the pan for optimal texture. 💡
Optional Extras
For convenience, a batter dispenser or ice cream scoop helps portion batter evenly into the pan. A toothpick or cake tester is also handy for checking doneness without over-baking. These small tools make the process smoother.
Nutrition Facts
Frequently Asked Questions
Can I use a different pan size?
For best results, stick to a 9×5-inch loaf pan. Using an 8×4-inch may require 10-15 extra minutes of baking. Avoid glass pans as they can cause uneven browning.
Why did my bread turn out dense?
Overmixing the batter is the most common cause. Fold just until flour disappears to avoid developing gluten. Also ensure your baking soda is fresh.
How do I know when it’s fully baked?
A toothpick inserted in the center should come out clean with only a few moist crumbs. Look for a deep golden brown color and slight dome.
Can I add chocolate chips?
Fold in 1/2 cup of chocolate chips with the walnuts. Semi-sweet pairs especially well with the banana flavor.

Trained in classic French technique but raised on slow-cooked ribs and spicy rubs, she blends culinary skill with smoke and soul.
- Recipe for Boneless Pork Chops in Cast Iron Skillet: Sear and Baste to Juicy Perfection - October 3, 2026
- Recipe for Boneless Cross Rib Roast: Slow-Roasted Beef with Herb Crust - October 3, 2026
- Hamburgers in Sauce Recipe Crock Pot: Slow-Cooked Savory Delight - October 3, 2026