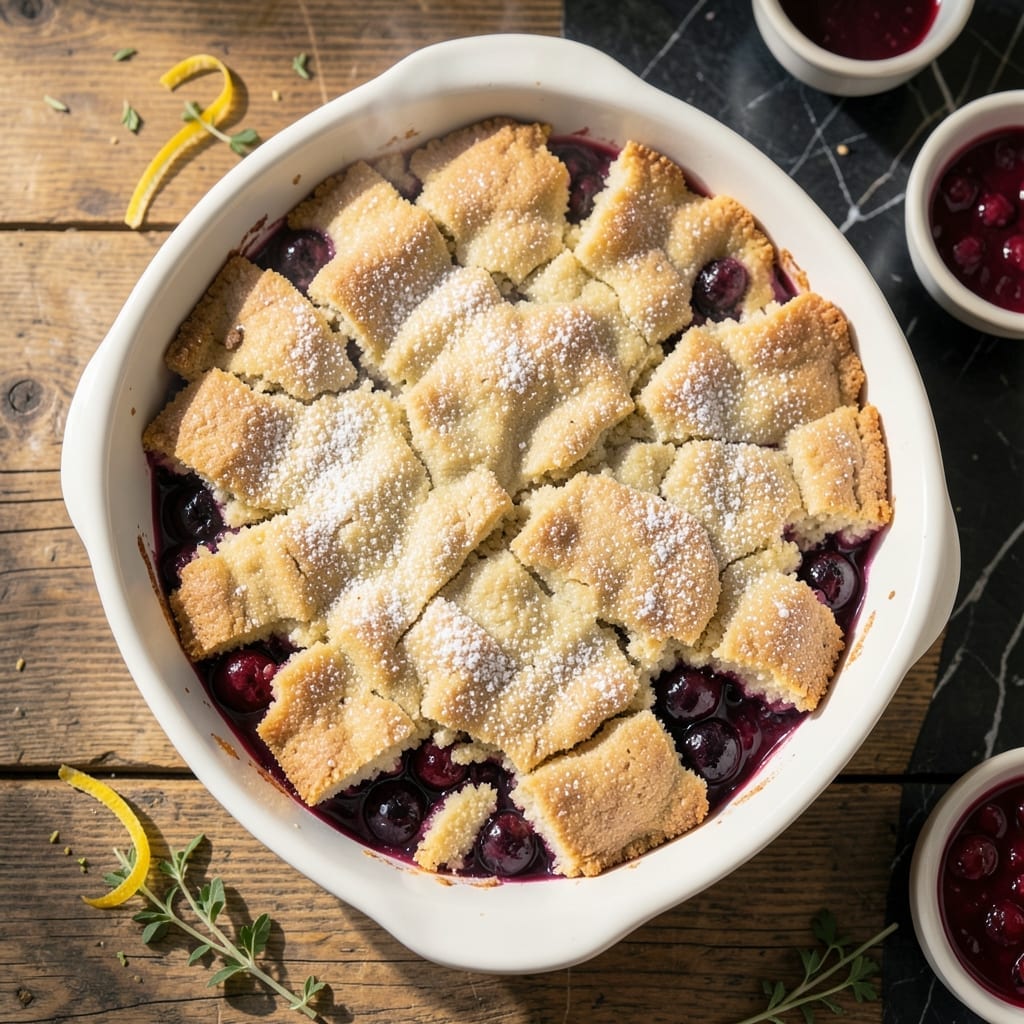
This recipe delivers warm berry filling under a golden biscuit topping with minimal effort. The Bisquick base ensures a foolproof, flaky crust every time.
Ready in under an hour, this dessert captures the essence of summer with juicy berries and a buttery, crisp top. It’s the ideal finish to any meal.
Ingredients for Bisquick Berry Cobbler
Bisquick, berries, and a few pantry staples make this warm dessert effortless.
| Ingredient | Amount | Notes |
|---|---|---|
| Bisquick Baking Mix 🥣 | 2 cups | Original or buttermilk variety |
| Granulated Sugar 🍚 | ¾ cup | Divided for filling and topping |
| Milk 🥛 | 0.666 cup | Whole or 2% preferred |
| Unsalted Butter 🧈 | ½ cup | Melted, for topping |
| Mixed Berries 🍓 | 4 cups | Fresh or frozen, unsweetened |
| Cornstarch 🌾 | 2 tbsp | For thickening berry filling |
| Lemon Juice 🍋 | 1 tbsp | Freshly squeezed preferred |
| Vanilla Extract 🌿 | 1 tsp | Pure extract for best flavor |
| Ground Cinnamon 🌶️ | ½ tsp | Optional for warmth in filling |
| Salt 🧂 | ¼ tsp | Balances sweetness in topping |
[recipe_ingredient_scaler]
The Bisquick is the shortcut here—general mills original is the gold standard but store brands work. For the berries, fresh in-season is ideal but frozen (thawed and drained) works just as well. If using frozen, don’t skip the cornstarch—it keeps the filling from getting soupy. The butter should be unsalted so you control the salt content in the topping.
Swap mixed berries for peaches, plums, or apples (about 4 cups diced). No cornstarch? All-purpose flour at the same amount works in a pinch. For a richer topping, half-and-half instead of milk adds a nice creaminess. The sugar can be reduced by a third if your berries are particularly sweet, but don’t omit it entirely from the topping.
Best served warm, straight from the oven. Leftovers keep 2-3 days at room temperature (covered) but are best reheated. The topping softens as it sits, so for maximum crispness, assemble and bake right before serving.
Why You’ll Love This Recipe
- One Bowl Wonder: I just dump the Bisquick, sugar, milk, and melted butter together—no mixer, no fuss.
- Warm Berry Bliss: The buttery crust with those juicy, jammy berries? Honestly, it’s the coziest bite of summer.
- Potluck Hero: I’ve brought this to BBQs, brunch, and even a Tuesday night—always disappears first.
- Pantry Friendly: Between us, I keep Bisquick on hand just for this. Uses what I’ve got, and leftovers (if any) reheat like a dream.
Step-by-Step Instructions for Bisquick Berry Cobbler
This method delivers a golden topping over saucy berries with minimal hands-on time.
Step 1: Prepare the Berry Filling
In a medium bowl, gently toss the 4 cups Mixed Berries with 2 tbsp Cornstarch, 0.25 cup Granulated Sugar, 1 tbsp Lemon Juice, and 0.5 tsp Ground Cinnamon until evenly coated. The berries will begin to release their juices immediately.
Let the mixture sit for 5-10 minutes to allow the cornstarch to start thickening the natural berry juices. This prevents a runny filling and ensures the sauce has the perfect consistency when baked. If using frozen berries, don’t thaw them first—add them directly to the mixture.
Step 2: Mix the Biscuit Topping
In a separate bowl, combine the 2 cups Bisquick Baking Mix, 0.5 cup Granulated Sugar, 0.666 cup Milk, and 1 tsp Vanilla Extract. Stir just until the dry ingredients are moistened and the batter is thick but pourable.
Don’t overmix—lumps are fine and will dissolve during baking. The batter should be slightly thicker than pancake batter. If it seems too stiff, add a splash more milk, but keep it minimal to maintain the cobbler’s signature texture.
Step 3: Assemble and Bake
Pour the berry mixture into a greased 8×8-inch or 9×9-inch baking dish, spreading it evenly. Dollop the batter over the berries in small mounds—it doesn’t need to cover completely, as it will spread during baking.
Drizzle the 0.5 cup Unsalted Butter (melted) evenly over the batter. This creates a rich, golden crust as it bakes. Sprinkle the remaining 0.25 tsp Salt lightly over the top to balance the sweetness.
Step 4: Bake Until Golden and Bubbly
Place the dish in a preheated 375°F oven and bake for 40-45 minutes, or until the biscuit topping is deep golden brown and the berry filling is bubbling around the edges.
Check for doneness by inserting a toothpick into the topping—it should come out clean or with a few moist crumbs. If the top browns too quickly, loosely tent with foil for the remaining time.
Let the cobbler rest for 10 minutes before serving to allow the filling to thicken slightly. Serve warm with a scoop of vanilla ice cream for the best experience.
Pro Tips For Making Bisquick Berry Cobbler
- Preheat the Pan: Drop the batter into a hot buttered pan—about 350°F—so the edges crisp while the center stays tender. I learned this the hard way after too many soggy bottoms.
- Toss the Berries: Lightly coat the mixed berries in 1-2 tablespoons of sugar before adding them to the pan to pull out their juices and prevent a dry filling.
- Skip Overmixing: Stir the Bisquick batter just until it comes together—lumps are fine. After burning three cobblers, I finally figured out that overmixing makes it tough, not fluffy.
- Melt Butter First: Use melted unsalted butter in the batter for a richer texture, and pour it hot into the pan for that golden crust—sounds weird, but it works.
Storing and Reheating Leftovers
Room Temperature Storage
Let your cobbler cool completely before covering with plastic wrap or transferring to an airtight container. It keeps well at room temperature for 1-2 days, though the topping will soften slightly as it sits. I often leave mine on the counter for next-day treats.
Refrigerator Storage
For longer storage, refrigerate in an airtight container for up to 4 days. The cold firm up the filling, making it easier to portion when reheating. Just bring it to room temperature for 30 minutes before serving for the best texture. ❄️
Microwave Reheating
Place a single portion on a microwave-safe plate and cover with a damp paper towel. Heat on 50% power for 30-45 seconds, then check and repeat in 15-second intervals until warm. This prevents the topping from getting soggy.
Oven Reheating
Preheat your oven to 350°F and place the cobbler in an oven-safe dish. Cover with foil and bake for 10-15 minutes, removing the foil for the last 2-3 minutes to crisp the topping. This method restores that fresh-baked texture.
Freezing for Later
While best enjoyed fresh, you can freeze portions in airtight containers for up to 2 months. Thaw overnight in the fridge before reheating using the oven method above. The berries may release more liquid, but the flavor stays delicious. 💡
Nutrition Facts
Frequently Asked Questions
What kind of berries work best?
Any fresh or frozen berries work beautifully. Try blueberries, blackberries, or a mix for varied flavors. If using frozen, don’t thaw first to prevent mushiness.
Can I use a different baking mix?
Yes, any biscuit or pancake mix can substitute for Bisquick. Just check that it contains baking powder for the proper rise.
How do I prevent a soggy topping?
Avoid overmixing the batter and ensure the oven is fully preheated to 375°F. Bake until deep golden brown for a crisp finish.
Can I make this ahead of time?
Assemble the cobbler but don’t bake until ready to serve. Refrigerate the unbaked dish for up to 2 hours, then bake as directed.

Trained in classic French technique but raised on slow-cooked ribs and spicy rubs, she blends culinary skill with smoke and soul.
- Recipe for Boneless Pork Chops in Cast Iron Skillet: Sear and Baste to Juicy Perfection - October 3, 2026
- Recipe for Boneless Cross Rib Roast: Slow-Roasted Beef with Herb Crust - October 3, 2026
- Hamburgers in Sauce Recipe Crock Pot: Slow-Cooked Savory Delight - October 3, 2026