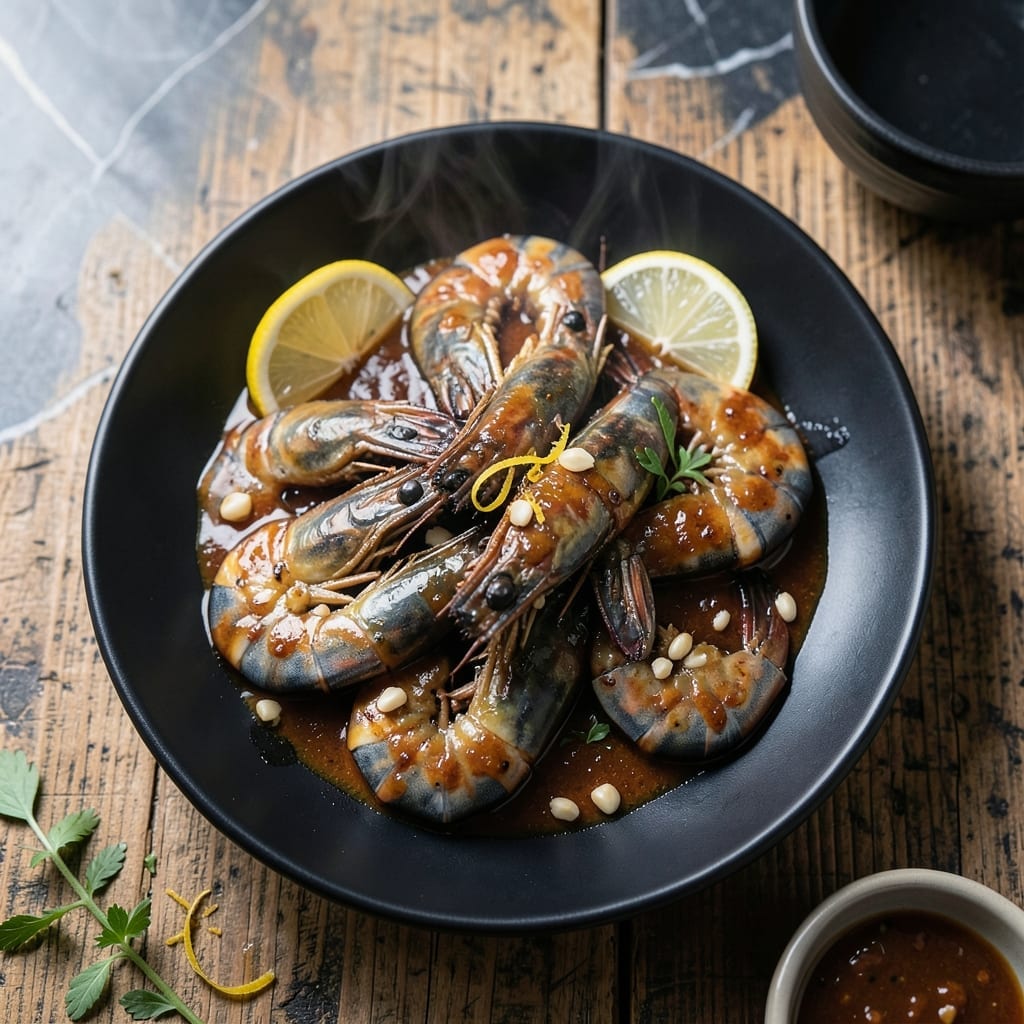
This recipe brings together black tiger shrimp and bold BBQ flavors for a dish that’s both elegant and packed with smoky depth.
I’ve perfected this method to ensure the shrimp stay tender while soaking up the rich, caramelized glaze. Serve with grilled corn or a crisp slaw for the ultimate meal.
Ingredients for Black Tiger Shrimp Bbq
Elegant shrimp meet smoky BBQ in this bold, caramelized dish with tender results.
| Ingredient | Amount | Notes |
|---|---|---|
| Black Tiger Shrimp 🍤 | 1 ½ lb | Peeled, deveined, tails on |
| BBQ Sauce 🍯 | 1 cup | Smoky variety preferred |
| Olive Oil 🫒 | 2 tbsp | Extra-virgin for richness |
| Garlic Cloves 🧄 | 3 cloves | Minced finely |
| Lemon Juice 🍋 | 1 tbsp | Freshly squeezed |
| Worcestershire Sauce 💧 | 1 tbsp | Vegan if needed |
| Brown Sugar 🍚 | 2 tbsp | Light or dark |
| Paprika 🌶️ | 1 tsp | Smoked for extra depth |
| Salt 🧂 | 1 tsp | Kosher or sea salt |
| Black Pepper 🌶️ | ½ tsp | Freshly ground preferred |
| Cayenne Pepper 🔥 | ¼ tsp | Optional for heat |
| Fresh Parsley 🌿 | ¼ cup | Chopped for garnish |
[recipe_ingredient_scaler]
The shrimp are the star here. Black tiger shrimp have a firmer texture than white shrimp, which holds up beautifully to grilling. Look for wild-caught if possible—Whole Foods or Trader Joe’s usually have good options. Fresh is ideal, but frozen works in a pinch (just thaw completely and pat dry before using). Avoid pre-cooked shrimp, as they’ll turn rubbery on the grill.
No smoky BBQ sauce? Mix regular BBQ sauce with half a teaspoon of liquid smoke. Out of Worcestershire? Soy sauce plus a dash of lemon juice gets you close. Brown sugar can be swapped for honey or maple syrup (use slightly less). If you don’t have smoked paprika, regular paprika plus a pinch of chipotle powder works. The lemon juice is flexible—bottled is fine if fresh isn’t available.
Marinate shrimp no longer than 30 minutes—the acid in the lemon and BBQ sauce can start to cook them. Cooked shrimp keep in the fridge for 2-3 days. Best served fresh, but leftovers reheat gently in a skillet. The sauce can be made ahead and stored separately for up to 1 week.
Why You’ll Love This Recipe
- Ready in 15: I can get these shrimp on the table faster than it takes to order takeout—just toss with olive oil, garlic, and BBQ sauce.
- Smoky-Sweet Bite: The Black Tiger shrimp soak up that BBQ sauce with a bright pop from the lemon juice.
- Weeknight MVP: Honestly, it’s my go-to for last-minute dinners when I need something impressive but effortless.
- Budget Luxury: Black Tiger shrimp feel fancy, but a little goes a long way—stretches to feed four with leftovers for lunch.
Step-by-Step Instructions for Black Tiger Shrimp BBQ
Here is the method for achieving perfectly charred, flavorful shrimp with minimal effort.
Step 1: Prepare the Shrimp Marinade
In a large bowl, whisk together the 2 tbsp Olive Oil, 1 tbsp Lemon Juice, 1 tbsp Worcestershire Sauce, 2 tbsp Brown Sugar, 1 tsp Paprika, 1 tsp Salt, 0.5 tsp Black Pepper, and 0.25 tsp Cayenne Pepper until the sugar dissolves. The mixture should be smooth and slightly thick from the brown sugar.
Add the 1.5 lb Black Tiger Shrimp and toss gently to coat evenly. I let this marinate for 15-20 minutes at room temperature—any longer and the acid in the lemon juice will start to “cook” the shrimp, turning them mushy.
Step 2: Skewer the Shrimp for Even Cooking
If using wooden skewers, soak them in water for 30 minutes to prevent burning. Thread the marinated shrimp onto the skewers, leaving a small gap between each piece for even heat circulation. This ensures each shrimp cooks uniformly and gets those beautiful grill marks.
Discard any remaining marinade that has touched raw shrimp—it’s unsafe to reuse. The shrimp should glisten from the marinade but not be swimming in it.
Step 3: Grill to Smoky Perfection
Preheat your grill to medium-high heat (about 375-400°F). Clean and oil the grates well to prevent sticking. Place the skewered shrimp on the grill and cook for 2-3 minutes per side until the shrimp turn opaque and develop light char marks.
Avoid overcrowding the grill—leave space between skewers so the heat circulates properly. The shrimp are done when they curl into a loose “C” shape and the flesh is no longer translucent.
Step 4: Glaze with BBQ Sauce and Finish
During the last 1-2 minutes of grilling, brush the shrimp generously with 1 cup BBQ Sauce. I use a smoky variety for depth of flavor. Flip the skewers and brush the other side, then close the grill lid to let the sauce caramelize slightly.
Watch closely to prevent burning—the sugars in the BBQ sauce can char quickly. The shrimp should have a glossy, sticky coating with a deep amber color when ready.
Step 5: Garnish and Serve Immediately
Transfer the skewers to a serving platter and let them rest for 2-3 minutes. Sprinkle with 0.25 cup Fresh Parsley for a pop of color and freshness. The parsley cuts through the richness of the BBQ sauce beautifully.
Serve while hot, with extra BBQ sauce on the side for dipping. The shrimp should be tender with a slight snap, and the sauce should have a balanced sweet and smoky flavor with a hint of spice from the cayenne.
Pro Tips For Making Black Tiger Shrimp Bbq
- Sear Shrimp First: Hit the shrimp in a screaming hot pan with olive oil for just 1-2 minutes per side before adding the sauce—I learned this the hard way after ending up with boiled shrimp instead of caramelized ones.
- Dry the Shrimp: Pat those black tiger shrimp bone-dry with paper towels first, or they’ll steam in their own juices instead of getting that perfect char.
- Skip Overcooking: Pull the shrimp off the heat the second they turn opaque and curl into a C shape—any longer and they turn rubbery, no matter how good your BBQ sauce is.
- Bloom the Garlic: Cook the minced garlic in olive oil for 30 seconds before adding shrimp, just until fragrant—sounds simple, but it actually changes the outcome by adding depth to every bite.
Storing and Reheating This Dish
Refrigerator Storage
Let your shrimp cool for no more than 2 hours before transferring to airtight containers. They’ll keep in the fridge at 40°F or below for up to 3 days. Honestly, they taste best fresh, but leftovers still pack great flavor. ❄️
Freezer Storage
For longer storage, freeze cooked shrimp in a single layer on a tray first, then transfer to freezer bags. They’ll stay good for 2-3 months. I like using quart-sized bags for easy portioning. Remove as much air as possible to prevent freezer burn.
Stovetop Reheating
Reheat gently in a skillet over medium-low heat for 3-4 minutes, stirring occasionally. Add a splash of water or 1 tbsp BBQ sauce to keep them moist. The shrimp will warm through without drying out. 🔥
Microwave Reheating
Place shrimp on a microwave-safe plate, cover with a damp paper towel, and heat on 50% power for 1-2 minutes. Stir and repeat in 30-second intervals until reaching 165°F. Avoid high power to prevent rubbery texture.
Serving Leftovers
Reheated shrimp work great in tacos, salads, or over rice. Drizzle with extra BBQ sauce and garnish with fresh parsley to refresh the flavors. I love turning leftovers into a quick shrimp po’boy.
Nutrition Facts

Trained in classic French technique but raised on slow-cooked ribs and spicy rubs, she blends culinary skill with smoke and soul.
- Recipe for Boneless Pork Chops in Cast Iron Skillet: Sear and Baste to Juicy Perfection - October 3, 2026
- Recipe for Boneless Cross Rib Roast: Slow-Roasted Beef with Herb Crust - October 3, 2026
- Hamburgers in Sauce Recipe Crock Pot: Slow-Cooked Savory Delight - October 3, 2026