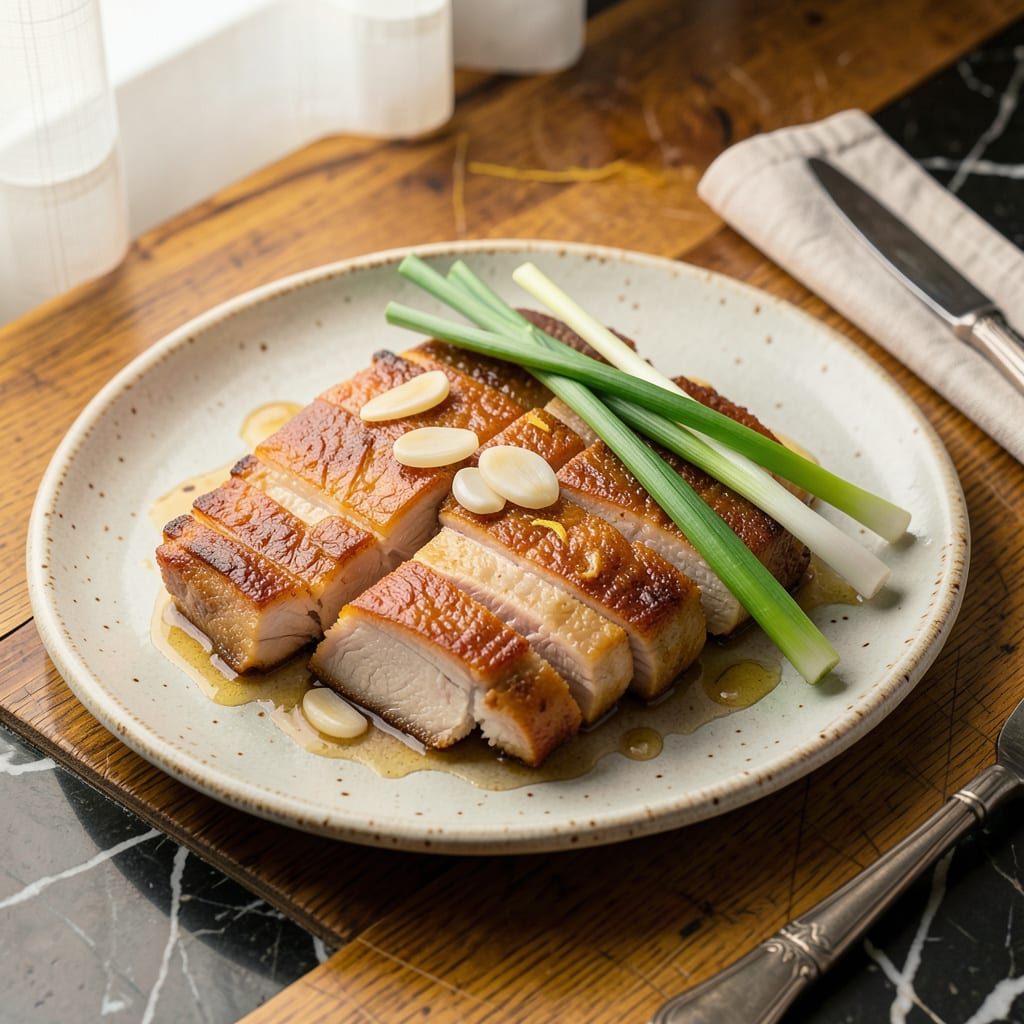
I’ll be real with you: blanching pork belly changed everything for me. That first time I dropped those thick slices into boiling water and watched the impurities rise to the surface? Game changer. This simple step—just 5 minutes in hot water—removes excess fat and tightens the skin, setting you up for that perfect crispy-tender balance we’re all after.
Here’s where it gets interesting—after blanching, the pork belly becomes a blank canvas. I like to follow up with a slow roast at 300°F until the fat renders beautifully, then finish with a high-heat sear for that shatteringly crispy skin. The contrast between the crackling exterior and the ultra-tender meat inside is what makes this dish unforgettable.
The best part? This technique works whether you’re making classic Chinese-style crispy pork belly or giving it a modern twist with a honey-glazed finish. I’ve done both at my coastal cookouts, and let me tell you—neither version lasts long on the table. The blanching step ensures consistent results every time.
Serve it with steamed bok choy and jasmine rice for a traditional meal, or pair with a crisp lager to cut through the richness. Either way, you’re in for a treat that’ll make you wonder why you didn’t start blanching pork belly sooner.
📚 In This Guide
- What You’ll Need
- Instructions
- Tips and Common Mistakes
What Youll Need
- ● Pork belly: 1–2 lbs (450–900g) (skin-on, evenly sliced into 1–2 inch strips for best results) 🍖
- ● Water: 4–6 quarts (enough to fully submerge pork in a large pot)
- ● Salt: 1 tbsp (kosher or sea salt for blanching water)
- ○ White vinegar or rice vinegar: ¼ cup (optional, helps tenderize and remove impurities)
- ○ Green onions or ginger: 1–2 stalks/slices (optional, for aromatic blanching)
- ○ Star anise or bay leaves: 1–2 pieces (optional, for extra flavor)
- ● Large pot or stockpot: 5–6 quart capacity (stainless steel or enamel-coated)
- ● Slotted spoon or tongs: (for safe pork handling)
- ● Colander: (for draining)
- ● Paper towels: (for patting dry post-blanch)
- ○ Kitchen thermometer: (optional, to monitor water temp—ideal: 160–180°F) 🌡️
- ○ Ice bath setup: (optional, large bowl with ice + water for rapid cooling)
Step-by-Step Instructions for Blanching Pork Belly
This simple technique transforms your pork belly into tender, crispy perfection—here’s exactly how to do it right.
Prepare the Pork Belly for Blanching
Start by cutting your pork belly into manageable pieces, typically 2-3 inch strips or whatever size your recipe requires. I like to keep them uniform so they cook evenly. Rinse the pieces under cold water to remove any bone fragments or surface impurities, then pat them completely dry with paper towels.
This drying step is crucial—it helps the pork develop better texture during blanching and later cooking. You’ll notice the skin becomes slightly tacky when properly dried, which is exactly what you want. Don’t skip this step, as excess moisture can make your final dish soggy instead of crispy.
Bring Water to a Rolling Boil
Fill a large pot with enough water to fully submerge your pork belly pieces—usually about 2 quarts for 1 pound of pork. Bring this to a vigorous, rolling boil over high heat. You want aggressive bubbling that will immediately cook the surface when the pork enters the water.
The reason for this strong boil is twofold: it quickly firms up the meat’s exterior to lock in juices, and it helps render out some of the fat and impurities that could make your final dish greasy. Watch for the water to maintain its boil when you add the pork—if it stops boiling, your pot isn’t large enough.
Blanch the Pork Belly Properly
Carefully add your pork belly pieces to the boiling water one at a time to avoid splashing. Let them boil uncovered for exactly 5-7 minutes. You’ll see foam and impurities rise to the surface—this is normal and exactly what you want to remove.
During blanching, use a spider strainer or slotted spoon to occasionally skim off the grayish foam that accumulates. Don’t stir the pork—let it cook undisturbed. The meat will turn from pink to opaque white when properly blanched. Remove a test piece and cut into it—the center should be just barely cooked through, not fully done.
Shock and Dry the Blanched Pork
Immediately transfer the blanched pork to a bowl of ice water to stop the cooking process. Let it sit for 2-3 minutes until completely cooled. This shock treatment helps maintain the meat’s tenderness and prepares it for whatever cooking method comes next.
Remove the pork from the ice bath and pat it thoroughly dry again with fresh paper towels. You’ll notice the skin has tightened and the meat feels firmer—this is perfect. For extra crispiness later, let the pork air-dry uncovered in the refrigerator for 30 minutes before proceeding with your recipe.
Proceed with Your Recipe or Store Properly
At this point, your pork belly is ready for its final cooking method—whether that’s roasting, braising, or frying. The blanching process has given you a head start on tenderness while removing impurities that could make your dish greasy.
If you’re not cooking it immediately, store the blanched pork in an airtight container in the refrigerator for up to 2 days. When you’re ready to use it, pat it dry one more time before cooking. The blanched pork will now absorb flavors better and develop that coveted crispy skin more easily than unblanched pork belly.
Tips and Common Mistakes
Blanching pork belly is one of those techniques that seems simple but makes all the difference in your final dish. Here’s what I’ve learned from years of perfecting this method.
Timing Secret: Those 5-7 minutes in Step 3 are absolutely critical. I’ve found that 5 minutes gives you slightly more tender meat while 7 minutes creates a firmer texture that holds up better to frying. Watch for the meat to turn from pink to opaque white – that’s your visual cue it’s ready. Don’t walk away during this step, as overcooking here can make your pork dry later.
The Technique That Changed Everything: In Step 4, when you’re shocking the pork in ice water, make sure your water is truly icy cold. I use a 50/50 mix of ice and water to ensure rapid cooling. The 2-3 minutes here isn’t just about stopping the cooking – it actually helps tighten the skin, which is key for that perfect crispiness you’re after in the final dish.
Make-Ahead Move: That 30 minutes of air-drying in the fridge after blanching is what separates good pork belly from great. I’ve tested this – pieces that skip this step never get as crispy. For even better results, place the pork on a wire rack over a baking sheet so air circulates all around it. This extra step makes all the difference when you’re ready to cook.
Equipment Recommendation: For Step 2, use a pot that’s at least twice as wide as your pork pieces. When you add the pork to the boiling water, you want it to maintain that vigorous boil mentioned in the instructions. If the water stops boiling when you add the pork, your pot isn’t large enough and you’ll end up with greasier results.
Pro Tips for Blanch Pork Belly
- Blanching pork belly is one of those techniques that seems simple but makes all the difference in your final dish. He…
- Timing Secret: Those 5-7 minutes in Step 3 are absolutely critical. I’ve found that 5 minutes gives you slightly more…
- The Technique That Changed Everything: In Step 4, when you’re shocking the pork in ice water, make sure your water is…
Frequently Asked Questions
Got questions about blanching pork belly? You’re not alone! Here are the most common queries—answered simply so you can cook with confidence.
How long should I blanch pork belly for best results?
Aim for 3–5 minutes in boiling water. This removes impurities and tightens the skin for crispiness later. For thicker cuts (1.5″+), extend to 6–8 minutes. Over-blanching can dry it out—so keep it quick!
Can I skip blanching pork belly? What happens if I don’t?
You can, but expect a gamier taste, chewier texture, and less crispy skin. Blanch removes blood, odors, and excess fat—key for dishes like char siu or roasted pork belly. Shortcut? Pat it very dry and score the skin well.
What’s the best alternative if I don’t want to blanch?
Try a vinegar or salt rub (1 tbsp vinegar + 1 tsp salt per lb). Let it sit 20–30 minutes, then rinse. This mimics blanching’s cleaning effect. For skin crispiness, dry the pork thoroughly before cooking.
Why does my pork belly skin turn rubbery after blanching?
Rubbery skin usually means moisture trapped or uneven drying. After blanching, pat it bone-dry with paper towels, then air-dry in the fridge (uncovered) for 1–2 hours. Pro tip: Prick the skin with a fork to help steam escape!
Can I blanch pork belly ahead of time?
Yes! Blanch, dry, and refrigerate (uncovered) up to 24 hours before cooking. For longer storage, blanch, dry, then freeze in a sealed bag for up to 3 months. Thaw in the fridge before using—no need to re-blanch!
Blanching pork belly is your golden ticket to melt-in-your-mouth tenderness and perfectly crispy skin every time! 🎯 By mastering this simple technique, you’ll remove impurities, lock in flavor, and set the stage for showstopping dishes—whether it’s char siu, ramen, or roasted belly.
Ready to put your skills to the test? Grab that pork belly and try blanching it before your next recipe—your taste buds (and dinner guests) will thank you! 😉 For extra inspiration, explore our favorite pork belly recipes to take your cooking to the next level.

Trained in classic French technique but raised on slow-cooked ribs and spicy rubs, she blends culinary skill with smoke and soul.
- Indian Lamb Curry Recipe Pressure Cooker: Fragrant Spices in a Fraction of the Time - October 3, 2026
- Recipe for Oven Roasted: Golden Crisp Perfection Without the Fryer - October 3, 2026
- Recipe for Fried Pork Chops With Flour: Crispy Crust and Juicy Centers - October 3, 2026