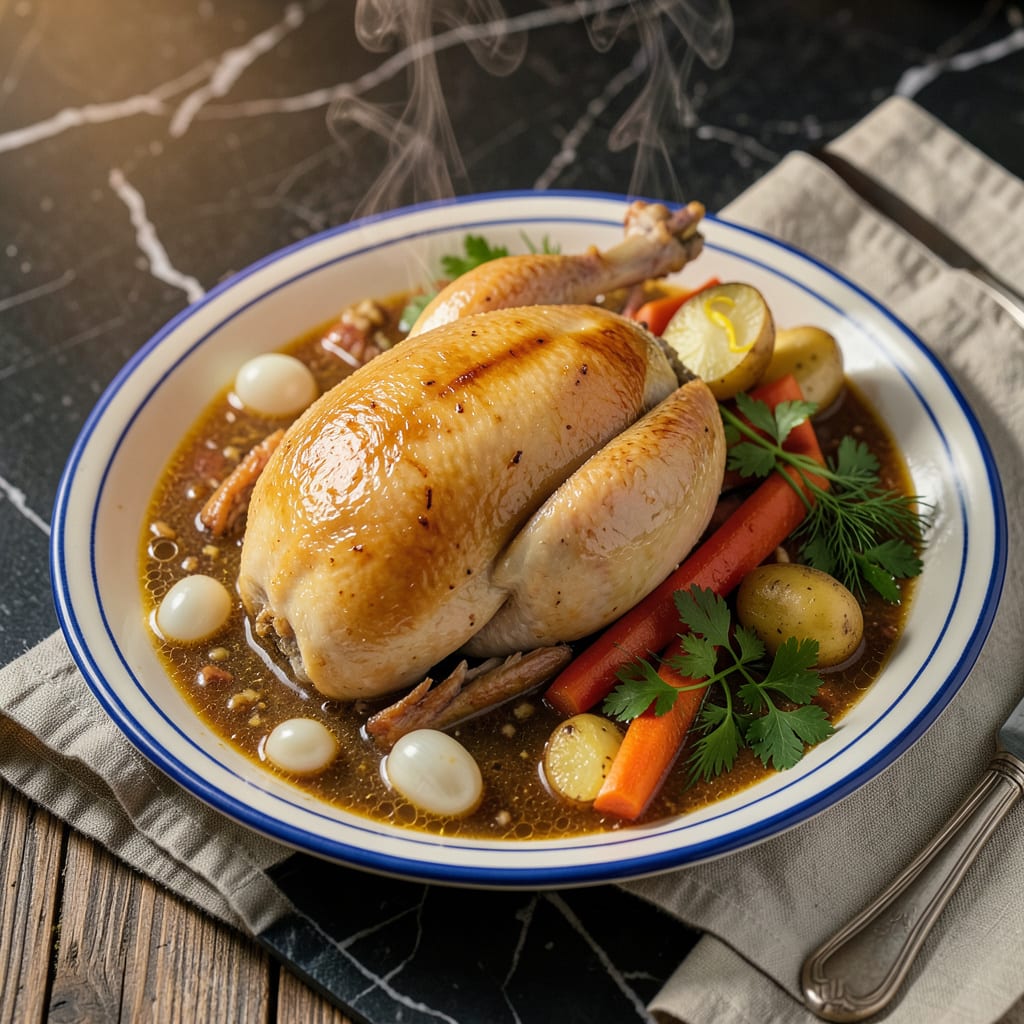
I’ll be real with you: boiling turkey might not sound exciting, but it’s one of the most versatile cooking methods you can master. This technique delivers juicy, tender meat every time while creating a rich broth that’s pure gold for soups and gravies. I learned this method during my French training, and it’s become my go-to for meal prep and family gatherings.
What makes this special is how simple ingredients transform into something extraordinary. A whole turkey, some aromatics, and about 2 hours is all you need. The secret? Starting with cold water and bringing it up to temperature slowly. This keeps the meat moist while extracting maximum flavor for your broth.
You’ll end up with fall-off-the-bone turkey that’s perfect for sandwiches, salads, or tacos. And that broth? It’s the foundation for the best soups you’ll ever make. I always keep some in my freezer for quick meals. The meat stays tender, never dry, when you follow this method.
Safety first though – always use a meat thermometer to hit that 165°F mark. Whether you’re feeding a crowd or meal prepping for the week, this technique delivers. Let’s get that pot on the stove!
📚 In This Guide
- What You’ll Need
- Instructions
- Tips and Common Mistakes
What Youll Need
- ● Whole turkey – 12–16 lbs (thawed if frozen; never boil a frozen turkey!) 🦃
- ● Large stockpot or Dutch oven – 8–12 quarts (big enough to fit the turkey + 2–3 inches of water)
- ● Water or broth – 3–4 quarts (enough to fully submerge the turkey; low-sodium chicken broth adds extra flavor)
- ● Aromatics (required for flavor!): 1 large onion, quartered (skin on for color)
- ● 3–4 carrots, chopped
- ● 3 celery stalks, chopped
- ● 5–6 garlic cloves, smashed
- ● 1 lemon, halved (or 2 tbsp vinegar for tenderness)
- ● Herbs & spices: 2 bay leaves
- ● 1 tbsp black peppercorns
- ● 1 tbsp salt (adjust to taste)
- ○ Optional: 1 tsp each dried thyme, rosemary, or sage
- ● Kitchen tools: Tongs or large slotted spoon (for safe turkey handling)
- ● Meat thermometer (to confirm 165°F internal temp)
- ● Fine-mesh strainer (for broth)
- ○ Optional: Cheesecloth (for easy herb removal)
- ○ Ice bath setup (optional but recommended): Large bowl + ice water (to cool turkey quickly for shredding)
Instructions
Here’s how to boil turkey perfectly—simple steps for tender meat and flavorful broth every time.
Prepare the Turkey and Aromatics
Start by selecting a turkey piece that fits your needs. For this method, I recommend using bone-in turkey breast or turkey legs—they stay juicy and add rich flavor to the broth. Rinse the turkey under cold water and pat it completely dry with paper towels. This helps remove any surface bacteria and ensures better browning if you choose to sear it first.
While the turkey comes to room temperature, gather your aromatics. You’ll want classic flavor builders like onions, carrots, celery, garlic, and fresh herbs (thyme, parsley, and bay leaves work beautifully). Cut the vegetables into large chunks—they’ll flavor the broth without turning to mush. Don’t peel the onions or garlic; just trim the ends and cut them in half. Those papery skins add wonderful color and depth to your broth.
Sear for Depth of Flavor (Optional but Recommended)
For the most flavorful results, I always sear the turkey first. Heat a large pot or Dutch oven over medium-high heat and add just enough neutral oil to coat the bottom. When the oil shimmers, carefully add the turkey pieces skin-side down. Let them cook undisturbed for 5-7 minutes until you develop a deep golden-brown crust.
The searing creates fond—those delicious browned bits stuck to the bottom of the pot—that will dissolve into your broth, adding incredible richness. Flip the turkey and sear the other side for 3-4 minutes. Remove the turkey and set it aside temporarily. If your vegetables are prepped, you can add them now to caramelize slightly, which builds even more flavor. Cook them for 3-4 minutes until they begin to soften and develop some color.
Simmer Gently for Tender Meat and Rich Broth
Return the turkey to the pot and add enough cold water to cover everything by about 2 inches. The water should come up over the turkey but not fill the pot completely—you want room for the broth to bubble without boiling over. Bring the liquid to a boil over high heat, then immediately reduce to a gentle simmer. You’re aiming for small bubbles breaking the surface occasionally, not a rolling boil.
A vigorous boil will make the turkey tough and cloud your broth. Instead, maintain that gentle simmer and partially cover the pot. For bone-in turkey breast, cook for 1 to 1½ hours; for turkey legs, plan on 1½ to 2 hours. You’ll know it’s done when the meat reaches an internal temperature of 165°F and pulls away easily from the bone. Skim off any foam that rises to the surface during cooking—this keeps your broth clear and clean-tasting.
Rest the Meat and Strain the Broth
When the turkey is fully cooked, use tongs to transfer it to a cutting board. Let it rest for 10-15 minutes before carving—this allows the juices to redistribute throughout the meat instead of running out when you slice it. While the turkey rests, strain the broth through a fine-mesh sieve into a clean pot or large bowl. Press gently on the solids to extract all the flavorful liquid, but don’t force it or your broth will become cloudy.
At this point, you can use the broth immediately or let it cool before refrigerating or freezing. If you’re using it right away, skim off any fat that rises to the surface with a large spoon. For future use, I like to portion the broth into 2-cup containers—this makes it easy to grab just what I need for soups, gravies, or cooking rice. The broth will keep in the refrigerator for 3-4 days or in the freezer for up to 3 months.
Carve and Serve the Turkey
Carve the turkey against the grain into ¼-inch thick slices for sandwiches or slightly thicker pieces if serving as a main dish. The meat should be tender and juicy, with a clean turkey flavor that isn’t watered down. For the best texture, I recommend using the meat within 2-3 days—it’s perfect for sandwiches, salads, or adding to casseroles.
To serve, you can simply arrange the sliced turkey on a platter with some of the warm broth on the side for dipping. Or, use the meat and broth immediately to make turkey noodle soup—just add cooked egg noodles and your favorite vegetables to the strained broth, simmer until heated through, and top with the sliced turkey. The possibilities are endless, and you’ve just created the foundation for countless delicious meals.
Tips and Common Mistakes
Let me share what I’ve learned through years of perfecting this method—these small details make all the difference between good and extraordinary results.
The Searing Secret: Don’t rush the 5-7 minutes when searing in Step 2. That golden-brown crust isn’t just for color—it creates fond that dissolves into your broth, building layers of flavor. I always let the turkey develop a deep crust before flipping, and I never skip searing the vegetables for those extra 3-4 minutes. The caramelization adds complexity you can’t get from raw aromatics.
Simmer Control: Maintaining that gentle simmer in Step 3 is crucial. You want just enough movement to keep the liquid circulating without boiling—think small bubbles breaking the surface occasionally. I partially cover the pot to prevent too much evaporation while still allowing steam to escape. For bone-in turkey breast, start checking at the 1-hour mark, and for turkey legs, begin testing at 1½ hours. The meat should pull away from the bone effortlessly when done.
Resting Matters: Those 10-15 minutes of resting time in Step 4 aren’t optional. I learned this the hard way after carving too soon and watching all the juices run out. Let the turkey rest tented loosely with foil—this keeps it warm while allowing the juices to redistribute. While it rests, strain your broth immediately to prevent overcooking the meat in the hot liquid.
Broth Storage: When portioning your broth into 2-cup containers, leave about ½ inch of headspace if freezing. This prevents the containers from cracking as the liquid expands. I also label everything with the date—broth keeps its best flavor within 3 months in the freezer. For refrigerator storage, use it within 3-4 days for peak freshness in your soups and sauces.
Pro Tips for Boil Turkey
- Let me share what I’ve learned through years of perfecting this method—these small details make all the difference be…
- The Searing Secret: Don’t rush the 5-7 minutes when searing in Step 2. That golden-brown crust isn’t just for color—i…
- Simmer Control: Maintaining that gentle simmer in Step 3 is crucial. You want just enough movement to keep the liquid…
Frequently Asked Questions
How long should I boil a turkey to keep it juicy?
Boil a whole turkey for 30–45 minutes per pound on medium-low heat ( ~180°F). For boneless breasts or legs, 20–30 minutes per pound works best. Overboiling dries it out—use a meat thermometer (165°F in the thickest part) for perfect doneness!
Can I boil a frozen turkey, or should I thaw it first?
Always thaw first! Boiling a frozen turkey leads to uneven cooking and potential bacteria risks. Thaw it in the fridge (24 hours per 4–5 lbs) or use the cold-water method (30 mins per pound, changing water every 30 mins). Safety first! Turn bland into bold! Add aromatics like onions, garlic, celery, bay leaves, peppercorns, and herbs (thyme, rosemary). For depth, toss in a splash of apple cider vinegar or lemon juice—it tenderizes too! Pro tip: Save the broth for soups or gravy. Dry turkey = overcooking or high heat. Try these fixes:
Are there quicker alternatives to boiling a whole turkey? Short on time? Try these:
What’s the best way to flavor the boiling water for extra-tasty turkey?
My boiled turkey turned out dry—how can I fix it next time?
Boiling turkey is a simple yet rewarding way to create tender, juicy meat and a flavor-packed broth for soups, stews, or sandwiches. Whether you’re prepping for a holiday feast or a cozy weeknight meal, this method ensures delicious results with minimal effort. 🍲
Now that you’ve mastered the basics, why not put your new skills to the test? Try using your boiled turkey in a hearty turkey noodle soup or shred it for tacos—your taste buds will thank you! Check out our recipe ideas for more inspiration.

Trained in classic French technique but raised on slow-cooked ribs and spicy rubs, she blends culinary skill with smoke and soul.
- Recipe for Boneless Pork Chops in Cast Iron Skillet: Sear and Baste to Juicy Perfection - October 3, 2026
- Recipe for Boneless Cross Rib Roast: Slow-Roasted Beef with Herb Crust - October 3, 2026
- Hamburgers in Sauce Recipe Crock Pot: Slow-Cooked Savory Delight - October 3, 2026