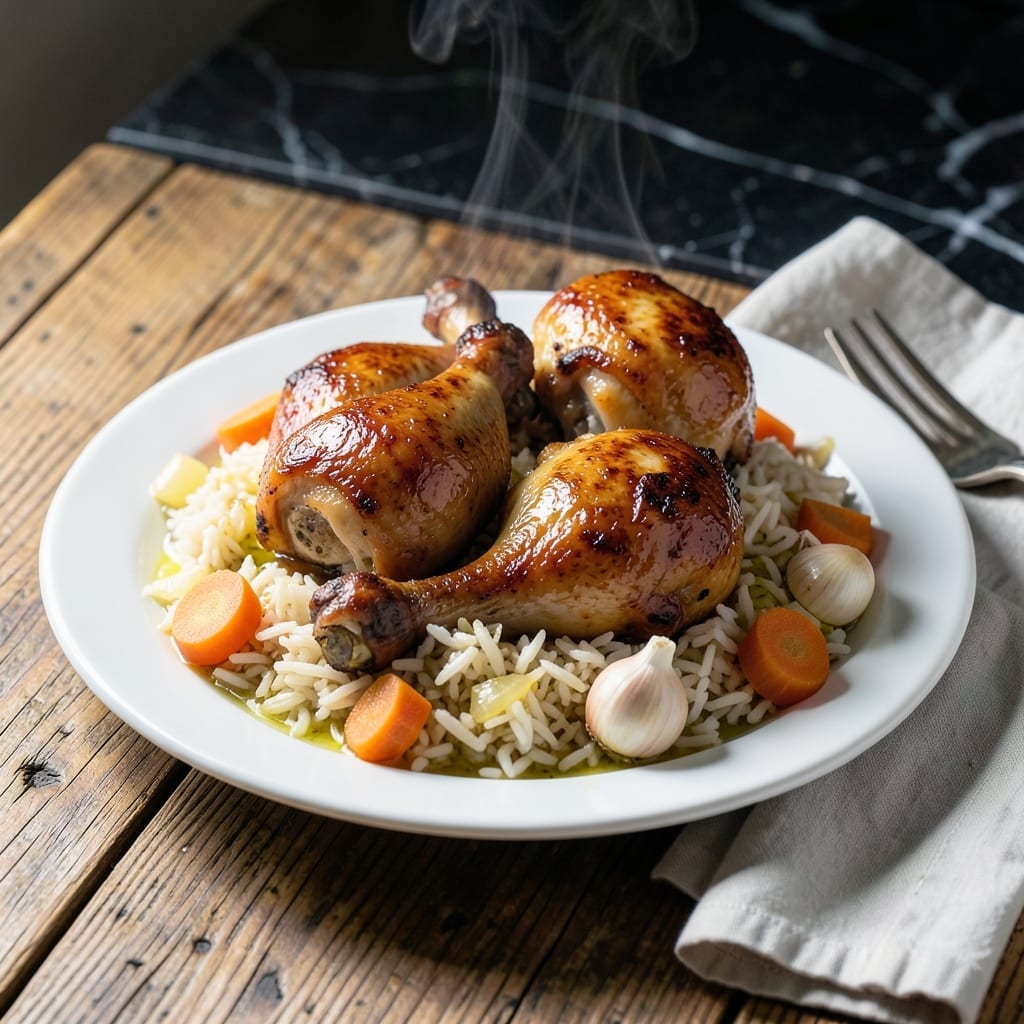
This one-pot meal delivers simple comfort food at its finest. Tender chicken legs and fluffy rice cook together, absorbing rich flavors into every bite.
I developed this method for busy weeknights when you need dinner ready with minimal effort. The chicken simmers until fall-off-the-bone tender, while the rice soaks up the savory broth.
The beauty lies in its one-pot simplicity—just season, combine, and let it cook. No complicated techniques, just honest, satisfying food that warms the soul.
Serve steaming hot for a meal that feels like home. Here’s how to make this comfort classic perfectly every time.
Ingredients for Boiled Chicken Legs and Rice
Pantry staples meet minimal effort for this soul-warming one-pot meal.
| Ingredient | Amount | Notes |
|---|---|---|
| Chicken Legs 🍗 | 4 pieces | Bone-in, skin-on preferred |
| Long-Grain White Rice 🍚 | 1 ½ cups | Rinsed until water runs clear |
| Chicken Broth 🥣 | 4 cups | Low-sodium preferred |
| Yellow Onion 🧅 | 1 whole | Medium-sized, diced |
| Garlic Cloves 🧄 | 4 cloves | Minced for depth |
| Carrots 🥕 | 2 whole | Peeled, sliced into rounds |
| Celery Stalks 🌿 | 2 whole | Trimmed, diced |
| Bay Leaf 🍃 | 1 whole | Dried, for aroma |
| Dried Thyme 🌿 | 1 tsp | Crushed between fingers |
| Kosher Salt 🧂 | 1 ½ tsp | Diamond Crystal preferred |
| Black Pepper 🌶️ | 1 tsp | Freshly ground |
| Olive Oil 🫒 | 2 tbsp | Extra-virgin for richness |
| Fresh Parsley 🌿 | ¼ cup | Chopped, for garnish |
[recipe_ingredient_scaler]
The chicken legs are the star here. Bone-in, skin-on gives the best flavor and keeps the meat juicy during simmering. I grab mine from Whole Foods or Costco—both have reliable quality. For the rice, any long-grain works (jasmine or basmati if you want it fragrant), but avoid instant—it gets mushy. Rinse it well to remove excess starch (worth the extra minute).
No chicken legs? Thighs work perfectly—same cook time, even more flavor. Short on broth? Water plus bouillon cubes gets you there. Out of fresh veggies? Frozen mirepoix (that onion-carrot-celery mix) saves the day. The herbs can be swapped too—dried rosemary or sage instead of thyme. Just use half the amount for dried.
This keeps beautifully for 4-5 days in the fridge. The flavors actually deepen overnight. Freezes for up to 3 months—portion into containers for easy reheating. Leftovers make great fried rice (skip the broth, use less water).
Why You’ll Love This Recipe
- One Pot Meal: I love that everything cooks together—just dump the chicken legs, rice, and broth in one pot and walk away.
- Garlic-Infused Comfort: The garlic and onion simmer right into the broth, making every bite of rice and chicken ridiculously flavorful.
- Weeknight Hero: Honestly, this is my go-to when I need dinner on the table fast with zero fuss.
- Budget Stretcher: A pack of chicken legs and a bag of rice feed my family for days, and the leftovers taste even better.
Step-by-Step Instructions for Boiled Chicken Legs and Rice
This one-pot method keeps things simple while delivering maximum flavor in every bite.
Step 1: Sear the Chicken Legs for Depth
Heat the 2 tbsp olive oil in a large, heavy pot or Dutch oven over medium-high heat. Pat the 4 pieces Chicken Legs dry with paper towels—this ensures a good sear. Season them generously with half the 1.5 tsp Kosher Salt and all the 1 tsp Black Pepper.
Add the chicken legs, skin-side down, and sear undisturbed for 4-5 minutes until the skin turns deep golden brown. Flip and sear the other side for another 3-4 minutes. This step builds a flavor foundation that infuses the entire dish. Remove the chicken and set aside.
Step 2: Sauté the Aromatics
In the same pot, add the diced 1 whole Yellow Onion, sliced 2 whole Carrots, and diced 2 whole Celery Stalks. Cook over medium heat for 5-6 minutes, stirring occasionally, until the vegetables soften and the onion becomes translucent.
Add the minced 4 cloves Garlic Cloves and cook for 30 seconds until fragrant. Stir in the 1 tsp Dried Thyme and 1 whole Bay Leaf, toasting them briefly to release their oils. This aromatic base will permeate the rice and chicken as everything simmers together.
Step 3: Combine and Simmer
Pour in the 1.5 cups Long-Grain White Rice and stir to coat the grains in the oil and aromatics for 1 minute. This step enhances the rice’s ability to absorb flavor. Then, pour in the 4 cups Chicken Broth and the remaining Kosher Salt.
Return the chicken legs to the pot, nestling them into the rice and liquid. Bring to a boil, then reduce the heat to low, cover, and let it simmer for 25-30 minutes. Resist the urge to peek—the steam trapped inside is what cooks the rice evenly.
Step 4: Rest and Serve
Once the rice is tender and has absorbed most of the liquid, turn off the heat and let the pot sit covered for 10 minutes. This resting period allows the rice to steam and the flavors to meld together.
Discard the bay leaf, then fluff the rice gently with a fork. Garnish with the 0.25 cup Fresh Parsley before serving. The chicken should fall off the bone, and the rice will be infused with the rich, savory essence of the broth and vegetables.
Pro Tips For Making Boiled Chicken Legs And Rice
- Simmer, Don’t Boil: Keep the heat at a gentle simmer—rolling boils make chicken tough and turn rice to mush. I learned this the hard way after ending up with dry legs and a starchy pot.
- Brown the Legs: Sear the chicken legs in the pot first, skin-side down for 3-4 minutes. Sounds like an extra step, but it adds depth to the broth that plain boiling can’t match.
- Use Cold Broth: Start the legs in cold broth, not hot—this guarantees even cooking and prevents the outside from seizing up before the inside’s done. My grandmother swore by this, and she was right.
- Rest Before Serving: Let the chicken legs sit in the broth off heat for 10 minutes after cooking. Skipping this makes the meat cling to the bone—annoying when you’re hungry.
Dietary Considerations for This Dish
Gluten-Free Friendly
This dish is naturally gluten-free, making it perfect for those with celiac disease or gluten sensitivity. All ingredients—chicken, rice, vegetables, and broth—contain no gluten. Just double-check your chicken broth label to ensure it’s certified gluten-free, as some brands may contain hidden gluten. 💪
Low-Fat Option
For a lighter version, use skinless chicken legs instead of skin-on. This reduces the fat content significantly while keeping the meat tender. You can also trim any visible fat before cooking. The dish will still be flavorful thanks to the aromatic vegetables and herbs.
Dairy-Free and Nut-Free
This recipe is inherently dairy-free and nut-free, so it’s safe for those with lactose intolerance or nut allergies. No substitutions are needed—just follow the recipe as written. It’s a worry-free meal for families with these common allergies.
Lower Sodium Adjustments
To reduce sodium, use low-sodium chicken broth and cut the Kosher Salt in half. You can also boost flavor with extra herbs like fresh rosemary or sage to compensate. Taste as you go and adjust seasoning at the end.
Protein Boost
For extra protein, add 1 can of white beans (drained and rinsed) to the pot when you add the rice. This bumps up the protein content without changing the dish’s character. It’s a simple way to make this meal even more satisfying.
Diabetic Considerations
This dish can fit into a diabetic meal plan. Use brown rice instead of white for a lower glycemic index. Monitor portion sizes, and pair with a side of steamed green vegetables to balance the meal. 💡
Nutrition Facts
Frequently Asked Questions
What kind of rice works best?
Long-grain white rice is ideal, but jasmine or basmati add nice fragrance. Avoid instant rice as it turns mushy. Rinse until water runs clear to remove excess starch.
Can I use chicken thighs instead?
Bone-in thighs work perfectly with the same 25-30 minutes cook time. They may even stay juicier. Adjust seasoning to taste.
How do I prevent the rice from burning?
Ensure you have enough liquid (4 cups broth). Keep heat at low after boiling, and resist peeking to trap steam. Stirring isn’t needed.
How long can I store leftovers?
Store in airtight containers for 4-5 days in the fridge. For longer storage, freeze for up to 3 months. Reheat gently with a splash of water.

Trained in classic French technique but raised on slow-cooked ribs and spicy rubs, she blends culinary skill with smoke and soul.
- Recipe for Boneless Pork Chops in Cast Iron Skillet: Sear and Baste to Juicy Perfection - October 3, 2026
- Recipe for Boneless Cross Rib Roast: Slow-Roasted Beef with Herb Crust - October 3, 2026
- Hamburgers in Sauce Recipe Crock Pot: Slow-Cooked Savory Delight - October 3, 2026