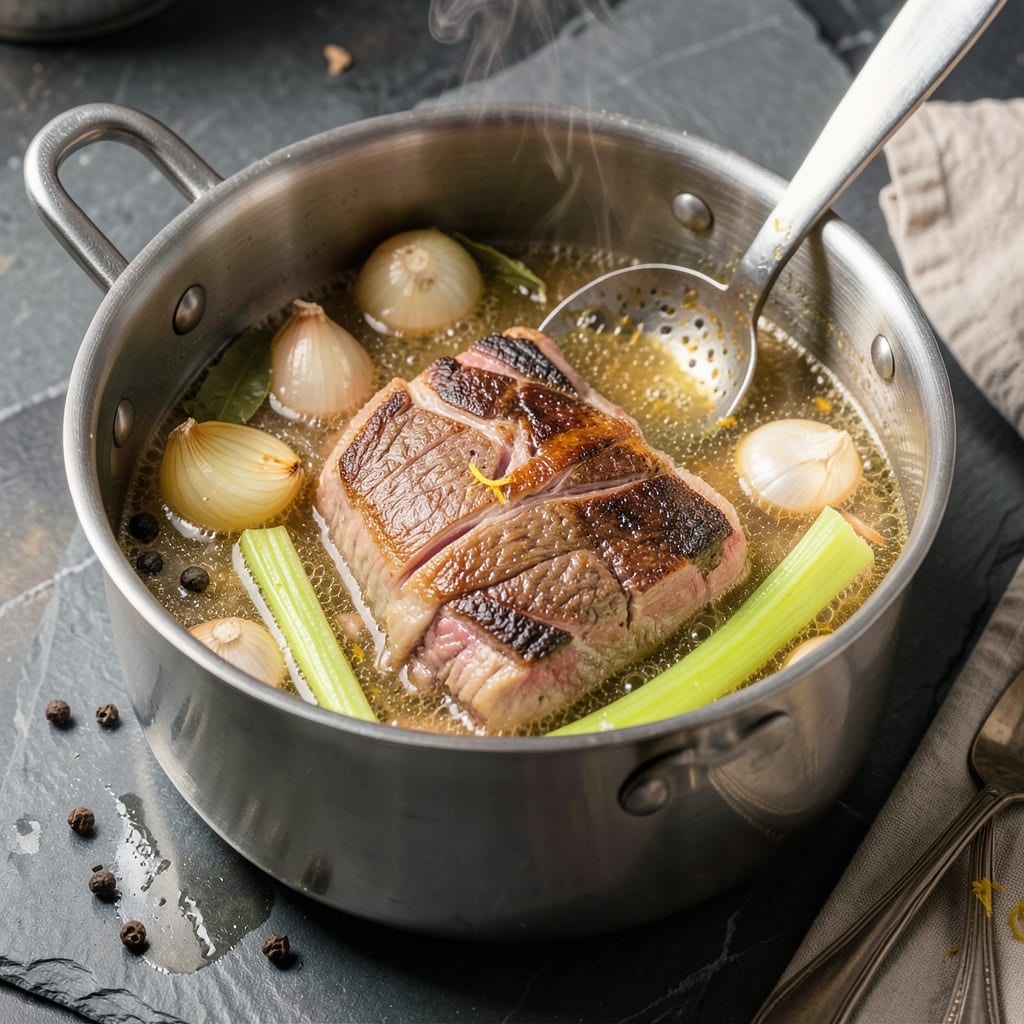
I’ll be real with you—boiling meat sounds boring until you taste the results. That first time I pulled perfectly tender beef from a simmering pot, I realized this simple technique unlocks flavors you can’t get from grilling or frying. We’re talking fall-apart tender meat that stays juicy, ready for soups, tacos, or straight from the pot.
Here’s the thing—most people overcook or under-season when boiling meat. I’ve ruined my share of brisket before learning the right water ratio, simmer time, and when to add salt. The secret? Low and slow with just enough liquid to cover the meat, plus a few aromatics for depth. Chicken thighs, beef shank, or pork shoulder all transform with this method.
What you end up with is tender, juicy meat that shreds effortlessly and soaks up whatever flavors you add. I use this technique weekly for everything from pho broth to carnitas. The best part? It’s nearly impossible to mess up once you know the basics.
Whether you’re prepping for meal prep or making a quick weeknight dinner, this method delivers consistent results. No fancy equipment needed—just a pot, water, and about an hour of mostly hands-off cooking. Let’s break down exactly how to do it right.
📚 In This Guide
- What You’ll Need
- Instructions
- Tips and Common Mistakes
What Youll Need
- ● Meat: 1–2 lbs (450–900g) of your choice (beef, chicken, pork, or lamb). For best results, pick cuts like chuck roast, chicken thighs, or pork shoulder—they stay juicy! 🥩
- ● Water: Enough to fully submerge the meat (about 4–6 cups for 1 lb of meat). Use cold, filtered water for cleaner flavor.
- ● Large pot or Dutch oven: A 3–5 quart pot with a tight-fitting lid to retain heat and moisture.
- ● Salt: 1–2 tbsp (adjust to taste). Kosher or sea salt works best for even seasoning.
- ○ Aromatics (optional but recommended): 1 medium onion, quartered
- ● 2–3 garlic cloves, smashed
- ● 1 carrot or celery stalk, chopped
- ● Herbs like bay leaves, thyme, or parsley
- ● Fat skimmer or spoon: To remove foam or impurities that rise during boiling.
- ○ Meat thermometer (optional): Ensures perfect doneness—165°F (74°C) for poultry, 145°F (63°C) for pork/beef.
- ● Tongs or slotted spoon: For safely removing meat from hot water.
- ○ Broth or stock (optional): Replace 1–2 cups of water with broth for extra depth of flavor.
Step-by-Step Instructions for Boiling Meat
This simple method transforms tough cuts into fall-apart tender meat with minimal effort.
Choose and Prepare the Right Cut
Select a cut with good marbling and connective tissue—these break down beautifully during boiling. I prefer beef chuck, pork shoulder, or chicken thighs for this method. Trim any large pieces of fat or silver skin, but leave some fat intact for flavor and moisture.
Cut the meat into uniform pieces about 2-3 inches in size. This ensures even cooking and prevents smaller pieces from overcooking while waiting for larger ones to become tender. Rinse the pieces under cold water and pat them dry with paper towels.
Start with Cold Water and Build Flavor
Place your meat in a large pot and cover it completely with cold water by about 2 inches. Starting with cold water allows the meat to heat gradually, which helps prevent toughness. I always add 1 teaspoon of salt per quart of water right away—this seasons the meat throughout cooking.
Bring the water to a gentle boil over medium-high heat, then immediately reduce to low heat to maintain a bare simmer. You’ll see small bubbles breaking the surface occasionally—that’s perfect. At this point, add aromatics like onions, garlic, bay leaves, or peppercorns to infuse flavor into the meat as it cooks.
Maintain the Perfect Simmer
Keep the pot partially covered with a lid and maintain that gentle simmer for 1.5-2 hours for beef or pork, or 45-60 minutes for chicken. You’ll know it’s working when you see the meat’s color change from red to brown and the connective tissue starting to soften.
Resist the urge to stir or poke the meat—this can break up the pieces and release juices prematurely. Instead, use a spoon to occasionally skim off any foam or fat that rises to the surface. This keeps your broth clean while allowing the meat to become incredibly tender.
Test for Doneness and Rest
Check for doneness by piercing the meat with a fork—it should slide in and out with no resistance. For beef or pork, the meat should easily pull apart with gentle pressure. Chicken should reach an internal temperature of 165°F when tested with a meat thermometer.
Once done, turn off the heat and let the meat rest in the warm broth for 10-15 minutes. This resting period allows the juices to redistribute throughout the meat instead of running out when you cut into it. The result will be perfectly tender, juicy meat that practically falls apart at the touch.
Serve or Store for Later Use
Remove the meat from the broth using a slotted spoon or tongs. You can serve it immediately with some of the cooking liquid spooned over, or shred it for tacos, sandwiches, or salads. The broth makes an excellent base for soups or gravies—don’t let it go to waste!
If storing, place the meat in an airtight container with some broth to keep it moist. It will stay tender and flavorful in the refrigerator for up to 4 days, or you can freeze it for up to 3 months. The flavor actually deepens over time as the meat absorbs more of the cooking liquid.
Tips and Common Mistakes
Mastering this technique is all about patience and attention to detail—here’s what I’ve learned from years of perfecting tender, juicy results.
Temperature Control: The transition from medium-high to low heat in Step 2 is crucial. When you see that first gentle boil, immediately reduce to low heat—you want just a few small bubbles breaking the surface. This bare simmer over 1.5-2 hours for beef/pork or 45-60 minutes for chicken breaks down connective tissue without drying out the meat. Trust me, a rolling boil will make your meat tough.
Water Level Wisdom: In Step 2, covering meat with 2 inches of cold water isn’t arbitrary. As meat cooks, it releases juices and contracts—starting with extra water ensures it stays submerged throughout cooking. I always check halfway through and add more hot water if needed to maintain that 2-inch coverage.
Resting Period Secret: Those 10-15 minutes of resting in Step 4 make all the difference. I learned this the hard way after serving dry meat too many times. The resting time lets juices redistribute throughout the meat instead of pouring out when cut. The broth stays warm enough to keep cooking gently while the meat relaxes.
Fat Skimming Technique: During the simmer, skim off foam and fat as it rises. This keeps your broth clean and flavorful. I use a large spoon and tilt the pot slightly to gather the fat at one edge—makes removal much easier. Don’t stir the meat though; let it cook undisturbed for maximum tenderness.
Pro Tips for Boiling Meat In Water
- Mastering this technique is all about patience and attention to detail—here’s what I’ve learned from years of perfect…
- Temperature Control: The transition from medium-high to low heat in Step 2 is crucial. When you see that first gentle…
- Water Level Wisdom: In Step 2, covering meat with 2 inches of cold water isn’t arbitrary. As meat cooks, it releases …
Frequently Asked Questions
Got questions about boiling meat to perfection? You’re not alone! Here are the most common queries—and quick answers—to help you nail this simple but powerful technique.
How long should I boil meat to keep it tender?
Timing depends on the cut! Chicken breasts need 12–15 minutes, beef chunks (like stew meat) take 1–2 hours, and pork ribs may need 45–60 minutes. Always simmer (not boil vigorously) and check doneness with a meat thermometer (165°F for poultry, 145°F for pork/beef). Overcooking = tough meat!
Can I boil frozen meat directly in water?
Technically yes, but it’s risky! Frozen meat boils unevenly, leading to dry edges and raw centers. Thaw overnight in the fridge for best results. If in a rush, use the cold-water thawing method: Seal meat in a bag, submerge in cold water (change every 30 mins), then boil.
What’s the best alternative to plain water for boiling meat?
Boost flavor with broth, stock, or aromatics! Try chicken/beef broth, bay leaves, garlic, onions, or a splash of soy sauce. For Asian dishes, add ginger and star anise. Even a pinch of salt and pepper makes a difference. Pro tip: Save the flavored liquid for soups or gravy!
Why does my boiled meat turn out dry or rubbery?
Two likely culprits: boiling too hard (stick to a gentle simmer) or overcooking. Tough cuts (like chuck roast) need low-and-slow heat to break down collagen. For lean meats (chicken breast), pull them just as they hit safe temps. Rest 5–10 minutes before slicing to retain juices.
Is boiled meat healthy? Do nutrients leak into the water?
Boiling can reduce some B vitamins (by ~30–60%) as they dissolve in water, but it’s still a low-fat, high-protein cooking method. To retain nutrients, use the broth in dishes (like stews) or opt for poaching (gentler, shorter cook times). Balance it with veggies for a nutrient-packed meal!
Boiling meat in water doesn’t have to be boring—it’s a simple, foolproof way to lock in flavor and tenderness! Whether you’re prepping for soups, shredded tacos, or a hearty stew, mastering this technique ensures juicy results every time. Now that you’ve got the basics, why not put it to the test? Grab a pot, pick your favorite cut, and start experimenting with herbs, spices, or broths for extra depth. Your next perfectly boiled dish is just one simmer away! 🍲✨

Trained in classic French technique but raised on slow-cooked ribs and spicy rubs, she blends culinary skill with smoke and soul.
- Recipe for Boneless Pork Chops in Cast Iron Skillet: Sear and Baste to Juicy Perfection - October 3, 2026
- Recipe for Boneless Cross Rib Roast: Slow-Roasted Beef with Herb Crust - October 3, 2026
- Hamburgers in Sauce Recipe Crock Pot: Slow-Cooked Savory Delight - October 3, 2026