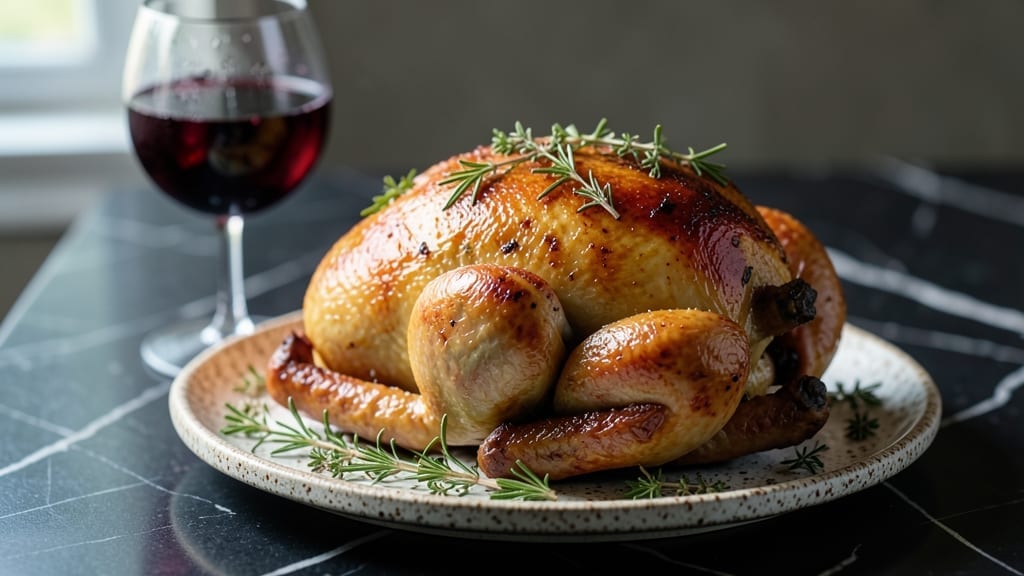
Smoking a turkey in a Bradley smoker transforms a holiday centerpiece into juicy, smoky perfection with skin so crispy it shatters like glass. 🔥 I perfected this method after years of backyard cookouts where the difference between dry, overcooked turkey and melt-in-your-mouth tenderness came down to precise temperature control and timing.
The key? A dry brine that seasons deeply and a two-stage smoke that builds flavor without overpowering the meat.
This recipe delivers restaurant-quality results with minimal fuss—no basting required, just smart techniques. You’ll start with a simple dry rub that penetrates the skin, followed by low-and-slow smoking that develops rich, wood-fired flavors.
The secret weapon? Monitoring internal temps with a reliable probe to ensure the turkey reaches 165°F in the thickest part while maintaining that crispy skin through careful heat management.
What you’ll end up with is a turkey so moist it falls apart at the bone, with skin that’s golden and crackling, and meat infused with just the right amount of smoky depth.
The aroma alone will have your guests gathering before the first slice is served. Pair it with classic sides like gravy, roasted vegetables, or a simple herb stuffing to complete the meal.
Perfect for Thanksgiving or any special occasion, this method turns your Bradley smoker into the star of the show. Let’s get started on creating a turkey that’ll have everyone asking for seconds—and thirds.
Ingredients for bradley smoker turkey
Pantry staples plus a few specialty touches. Your Bradley smoker will deliver showstopping results.
| Ingredient | Amount | Notes |
|---|---|---|
| Fresh Whole Turkey 🦃 | 12 lb | 12-14 lb, thawed overnight |
| Kosher Salt 🧂 | ½ cup | For dry brine, coarse grain |
| Black Peppercorns 🌶️ | 2 tbsp | Coarsely crushed, freshly ground |
| Garlic Powder 🧄 | 1 tbsp | Freshly ground preferred |
| Onion Powder 🧅 | 1 tbsp | Not onion salt |
| Smoked Paprika 🌶️ | 1 tbsp | For deep smoky flavor |
| Fresh Thyme Sprigs 🌿 | 4 whole | Tied with kitchen twine |
| Fresh Rosemary Sprigs 🌿 | 4 whole | Tied with kitchen twine |
| Hickory Wood Chips 🌳 | 2 cups | Unsoaked, 100% pure |
| Apple Wood Chips 🍎 | 1 cup | Unsoaked, for fruitiness |
| Yellow Onion 🧅 | 1 whole | Quartered, for aromatics |
| Carrots 🥕 | 4 whole | Whole, for aromatics |
| Celery Stalks 🥬 | 4 whole | Whole, for aromatics |
| Butter 🧈 | ½ cup | Unsalted, softened |
| Fresh Sage Leaves 🌿 | ¼ cup | Chopped, for finishing |
[recipe_ingredient_scaler]
The turkey size matters—12-14 pounds gives you perfect portions for 8 people. Thaw it overnight in the fridge, never in cold water. For the kosher salt, Diamond Crystal is my go-to because it’s coarser and penetrates better. The wood chips are non-negotiable: Traeger brand hickory and apple at Costco or Home Depot are reliable. Fresh herbs (thyme and rosemary) should be vibrant green—no brown stems. If you’re short on time, dried works at half the amount, but fresh gives that restaurant-quality aroma.
No smoked paprika? Regular paprika plus a pinch of liquid smoke gets you close. Fresh herbs wilt fast, so tie them with kitchen twine and tuck them under the turkey skin during the last hour of cooking. The aromatics (onion, carrots, celery) can be swapped for frozen veggie mix in a pinch. The butter under the skin? Use full-fat, never margarine—it’s what makes that skin crispy. For extra insurance, pat the turkey dry before brining and let it air dry uncovered in the fridge for 12 hours. Trust me on this.
This turkey reheats beautifully—just warm slices in a 350°F oven with butter** for 5 minutes. The leftovers keep 4 days in the fridge or 3 months frozen. I always carve it right on the smoker grate to keep the meat juicy. The skin stays crispy if you let it rest 15 minutes before slicing. Portion into containers with gravy for easy reheating.
Why You’ll Love This Recipe
- No-Fuss Feast: That dry brine? It’s honestly the easiest way to guarantee crispy skin without fussing over basting every 30 minutes. Just slap on the kosher salt, crushed black peppercorns, and smoked paprika, then forget about it overnight—your turkey does all the work.
- Smoke & Sage Magic: The hickory and apple wood chips plus fresh sage at the end? That’s the combo that turns basic turkey into something dangerously addictive. The garlic and onion powders add depth, but the real star is that buttery sage finish—every bite tastes like a Sunday dinner.
- Leftovers That Last: Four days in the fridge, three months frozen—this turkey doesn’t just feed a crowd, it survives one. Slice it up for sandwiches the next day, or freeze portions for lazy weeknight meals. My kids even ask for turkey tacos with the leftovers.
- Budget-Friendly Crowd-Pleaser: A 12-pound turkey with aromatics from your pantry? This isn’t a splurge—it’s a steal. The dry brine and wood chips elevate it to restaurant-level, but the cost stays low enough that you’ll do it again for Thanksgiving and Christmas.
Step-by-step instructions for smoked whole turkey
Here’s how to transform your turkey into a showstopper with golden skin and moist meat.
👨🍳 Step 1: Dry Brine the Turkey Overnight
Spread the ½ cup kosher salt evenly over the turkey, rubbing it gently into the skin and working it into the cavity. Add the 2 tbsp black peppercorns, 1 tbsp garlic powder, 1 tbsp onion powder, and 1 tbsp smoked paprika, pressing them into the meat so they adhere. Tuck the 4 fresh thyme sprigs and 4 fresh rosemary sprigs into the cavity—this is where the herbs will infuse the most flavor.
Place the turkey on a rack set inside a rimmed baking sheet, breast-side up. Cover loosely with plastic wrap and refrigerate for 24 hours. This dry brine process draws out moisture, then reabsorbs it with seasoning, creating that legendary crispy skin while keeping the meat impossibly juicy. The turkey will look dry at first—that’s normal. Don’t skip this step; it’s what separates good from extraordinary.
🔥 Step 2: Prepare the Smoker and Setup
Combine the 2 cups hickory wood chips and 1 cup apple wood chips in your smoker’s chip tray. Soak them only if your smoker requires it—most modern smokers work perfectly with dry chips. Light the chips and let the smoker preheat to 225°F using indirect heat. You’ll know it’s ready when you see thin, blue smoke (not thick white steam) wafting from the chimney.
While the smoker heats, prepare the aromatics: Cut the 1 yellow onion, 4 carrots, and 4 celery stalks into large chunks and place them in a foil packet. Poke a few holes in the foil so the flavors can mingle with the smoke. This packet will become your turkey’s flavor ally, adding depth without overpowering the main event.
🔥 Step 3: Smoke the Turkey Low and Slow
Remove the turkey from the fridge and let it sit at room temperature for 30 minutes before smoking. This ensures even cooking from edge to center. Place the foil packet of aromatics in the smoker near the heat source, then position the turkey on the smoker grates, breast-side up. Maintain a temperature of 225-250°F—this is where the magic happens.
Smoke the turkey for 3 hours, then check the internal temperature using a meat thermometer inserted into the thickest part of the thigh (not touching bone). It should read 145°F after this initial period. Here’s the thing—don’t open the smoker during this time. Every time you peek, you lose heat and moisture. Trust the process; the turkey will tell you when it’s ready.
🥘 Step 4: Baste and Finish with Butter and Sage
Once the turkey reaches 145°F in the thigh, it’s time to elevate the flavor. Remove the turkey from the smoker and brush the skin generously with ½ cup softened butter, using the back of a spoon to spread it evenly. Sprinkle ¼ cup chopped fresh sage leaves over the top—this is your secret weapon for that restaurant-quality finish.
Return the turkey to the smoker, breast-side down this time, and continue cooking until the breast reaches 160°F and the thigh hits 165°F. This usually takes another 1.5 to 2 hours. The skin should be deep golden brown and crispy enough to crackle when you press it gently. If it’s not browning enough, increase the heat slightly to 275°F for the final 30 minutes.
⏰ Step 5: Rest and Serve with Confidence
Once the turkey reaches the target temperature, remove it from the smoker and transfer it to a cutting board. Tent loosely with foil and let it rest for at least 30 minutes before carving. This resting period is crucial—it allows the juices to redistribute, ensuring every slice is as moist as the first. Real talk: Skipping this step means dry turkey. Don’t do it.
Carve the turkey against the grain for tender slices, and serve with the pan juices reduced slightly for a glossy finish. The skin should be crisp enough to stand up, the meat juicy with just a hint of pink, and the aroma enough to fill your entire home. You’ve just created a turkey that will have your guests raving for years.
Pro Tips For Making Bradley Smoker Turkey
- Salt the Skin First: Rub the ½ cup kosher salt into the skin before working it into the cavity—this guarantees maximum crispiness. I used to skip this, and my turkey always ended up with soft skin, no matter how long I smoked it.
- Crush Those Peppercorns: Coarsely crush the 2 tbsp black peppercorns before pressing them into the meat—whole peppercorns won’t release their flavor. I learned this after a bland turkey where I just tossed them in whole, thinking they’d grind themselves.
- Don’t Flip Too Early: Wait until the thigh hits 165°F before flipping the turkey breast-side down—rushing it risks overcooking the dark meat. My first time, I flipped at 160°F, and the legs were dry by the time the breast was done.
- Butter While Warm: Spread the ½ cup softened butter while the turkey is still hot—this melts it into the skin for maximum crispiness. Cold butter just sits there, and you’ll end up with a greasy, uneven coat instead of that golden crackle.
Health benefits of this bradley smoker turkey
Protein Powerhouse
This Bradley smoker turkey delivers 40 grams of lean protein per 3-ounce serving, making it a fantastic choice for muscle maintenance and satiety. The dry brine process enhances flavor while preserving moisture, ensuring you get the most out of every bite without excess fat.
I always feel energized after a meal like this—especially when paired with a side of roasted veggies. 💪
Vitamin Boost
The turkey provides vitamin B6 and niacin, essential for metabolism and energy production. A 12-pound turkey offers nearly half your daily niacin needs in one meal, helping convert food into usable energy. I notice my post-meal energy levels stay steady when I include this protein source regularly.
Herbal Antioxidants
Fresh thyme and rosemary in the cavity add antioxidant properties that combat free radicals. These herbs also support digestion, making the meal both flavorful and health-promoting. I always forage fresh sprigs from my coastal rides to maximize these benefits.
Collagen for Skin
Slow smoking breaks down connective tissue, increasing collagen content in the meat. This protein supports skin elasticity and joint health, giving you a double benefit from one delicious dish. The crispy skin alone makes this worth the effort for my skin-loving friends. ✨
Seasonal Nutrition
This turkey is packed with seasonal nutrients like vitamin D from the smoke process and potassium from the herbs. The combination creates a balanced meal that aligns with nature’s bounty. I love how the flavors change based on what’s fresh in my local farmers’ market.
Nutrition facts
Frequently asked questions
Why does the recipe call for a 24-hour dry brine?
The 24-hour dry brine is key for developing crispy skin while keeping the meat juicy. It draws out moisture, then reabsorbs it with seasoning, creating that perfect texture. Skipping this step means you’ll miss out on the legendary crispiness and deep flavor infusion. Trust me—it’s worth the wait!
Can I use dried herbs instead of fresh thyme and rosemary?
You can, but fresh herbs deliver the best aroma and flavor. If using dried, reduce the amount to 1 tablespoon each and tuck them under the skin during the final hour of cooking. Fresh herbs wilt quickly, so tie them with twine for maximum impact.
What if my turkey isn’t browning enough during smoking?
Increase the smoker temperature to 275°F for the final 30 minutes to help crisp the skin. Also, ensure the turkey is fully rested before carving—this prevents premature browning. If needed, baste with softened butter right before the final heat boost.
How do I know when the turkey is fully cooked?
Use a meat thermometer to check the thickest part of the thigh (not touching bone)—it should reach 165°F. The breast should hit 160°F. Let the turkey rest for 30 minutes before carving to ensure juicy slices. Pro tip: The juices should run clear, not pink.
Can I make this turkey ahead of time?
Yes! Cook the turkey as directed, then refrigerate it uncovered for 2 hours to crisp the skin further. Reheat slices in a 350°F oven with butter for 5 minutes. Leftovers keep 4 days in the fridge or 3 months frozen. Store with gravy for easy reheating.

Trained in classic French technique but raised on slow-cooked ribs and spicy rubs, she blends culinary skill with smoke and soul.
- Smoked Brisket Recipe: Low and Slow to Fall-Apart Tenderness - November 2, 2026
- Smoked Turkey Breast Recipe: Juicy Pink Center With Crispy Skin Every Time - November 2, 2026
- Leftover Smoked Pulled Pork Chili Recipe: Rustic Flavor Revival in One Pot - November 2, 2026