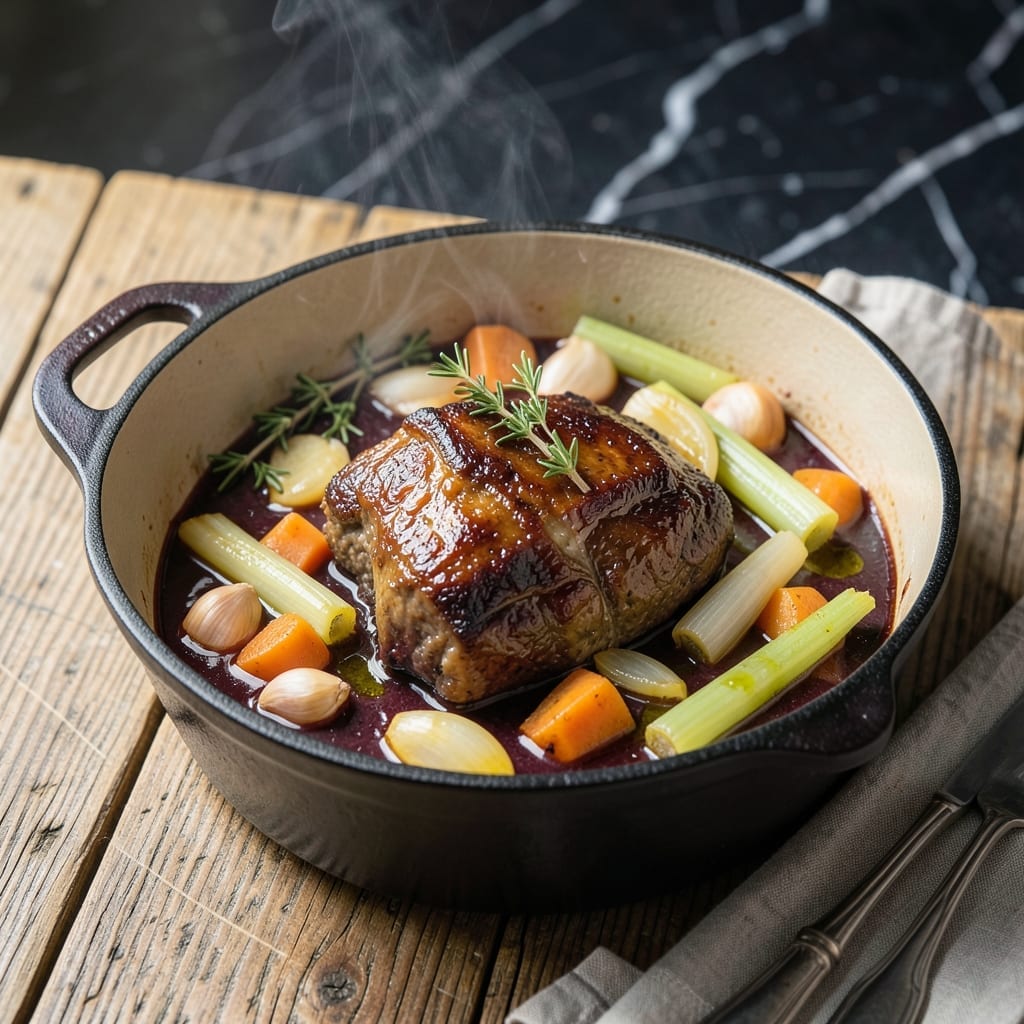
I’ll be real with you: beef cheeks sound intimidating, but they’re actually foolproof when cooked low and slow. This cut transforms tough meat into melt-in-your-mouth tenderness with minimal effort.
Between you and me, the secret is patience. A long braise in rich liquid breaks down the collagen until it’s fork-tender, creating a depth of flavor that’s hard to beat.
What you’ll get is a dish that feels fancy but is surprisingly simple—just time and a little attention. The meat becomes so tender it nearly falls apart, soaking up every bit of the braising liquid.
Perfect for a cozy dinner that impresses without the stress. Here’s how to make it happen.
Ingredients for Braised Beef Cheeks
Low and slow transforms these humble cuts into something extraordinary. Nothing exotic, just time.
| Ingredient | Amount | Notes |
|---|---|---|
| Beef Cheeks 🥩 | 2 lb | Trimmed of excess fat |
| Olive Oil 🫒 | 2 tbsp | Divided for searing |
| Yellow Onion 🧅 | 1 whole | Large, finely diced |
| Carrots 🥕 | 2 whole | Medium, chopped |
| Celery Stalks 🌿 | 2 whole | Chopped for base |
| Garlic Cloves 🧄 | 4 cloves | Minced for depth |
| Red Wine 🍷 | 2 cups | Dry, full-bodied variety |
| Beef Stock 🥣 | 2 cups | Low-sodium preferred |
| Tomato Paste 🍅 | 2 tbsp | For umami richness |
| Fresh Thyme Sprigs 🌿 | 3 whole | Plus extra for garnish |
| Bay Leaves 🍃 | 2 whole | Dried, for aroma |
| Kosher Salt 🧂 | 1 ½ tsp | Diamond Crystal preferred |
| Black Pepper 🌶️ | 1 tsp | Freshly cracked for best flavor |
| All-Purpose Flour 🌾 | ¼ cup | For dredging cheeks |
[recipe_ingredient_scaler]
The beef cheeks are the star—ask your butcher to trim them if you’re not comfortable doing it yourself (or grab them pre-trimmed at Whole Foods if you’re lucky). Look for good marbling; that fat renders down into pure flavor during the braise. I’ve had the best luck with cheeks from Snake River Farms when I’m splurging, but standard grocery store beef works just fine for a weeknight version.
Swap the red wine for extra beef stock plus a splash of balsamic vinegar if you’re cooking for someone who avoids alcohol. Fresh thyme can be replaced with dried at one-third the amount, but honestly? The fresh stuff is worth the effort here. No beef stock on hand? Better Than Bouillon beef base is my go-to backup—just as rich as the homemade version.
Braised beef cheeks taste even better the next day once all those flavors meld together. Store leftovers in the fridge for up to 4 days or freeze for 3 months (that’s if they last that long). Reheat gently on the stove with a splash of water to loosen the sauce.
Why You’ll Love This Recipe
- I’ll be real: this is my go-to for Sunday family dinners, and there’s always enough for seconds.
- One Pot Wonder: I love how everything—beef cheeks, onions, carrots, celery—simmers together in one pot while I do other things.
- Feeds a Crowd: I’ll be real: this is my go-to for Sunday family dinners, and there’s always enough for seconds.
- Leftovers for Days: Between us, it tastes even better the next day, and I always have extra for quick lunches.
Step-by-Step Instructions for Braised Beef Cheeks
Here’s the method. Straightforward, tested, works every time.
Step 1: Sear the Beef Cheeks to Lock in Flavor
Pat the 2 lb beef cheeks dry with paper towels and season both sides with the 1.5 tsp kosher salt and 1 tsp black pepper. This ensures a good crust forms. Heat 1 tbsp olive oil in a large Dutch oven over medium-high heat until shimmering.
Dredge each cheek lightly in the 0.25 cup all-purpose flour, shaking off any excess. Sear the beef cheeks for 3-4 minutes per side until deeply browned and a rich crust forms. Work in batches if needed to avoid crowding the pan, adding the remaining 1 tbsp olive oil as necessary. Transfer the seared beef cheeks to a plate and set aside.
Step 2: Build the Aromatic Base
In the same pot, reduce heat to medium and add the finely diced yellow onion, chopped 2 whole carrots, and chopped 2 whole celery stalks. Cook, stirring occasionally, for 5-6 minutes until the vegetables soften and the onion turns translucent.
Add the 4 cloves minced garlic cloves and cook for 1 minute until fragrant. Stir in the 2 tbsp tomato paste and cook for another 1-2 minutes, allowing it to caramelize slightly. This deepens the flavor and prevents a raw tomato taste in the finished dish.
Step 3: Deglaze and Add Liquids
Pour in the 2 cups red wine, scraping the bottom of the pot with a wooden spoon to release all the browned bits. This step is crucial for building layers of flavor. Bring the mixture to a simmer and let it cook for 5 minutes to reduce slightly.
Add the 2 cups beef stock, 3 whole fresh thyme sprigs, and 2 whole bay leaves. Stir to combine, then return the seared beef cheeks to the pot along with any accumulated juices. The liquid should just cover the beef cheeks—if not, add a splash of water or additional stock.
Step 4: Braise Low and Slow Until Tender
Cover the pot and transfer it to a preheated 325°F oven. Braise the beef cheeks for 2.5 to 3 hours, turning them halfway through the cooking time. You’ll know it’s done when the meat is fork-tender and easily pulls apart with minimal resistance.
Alternatively, keep the pot on the stovetop over low heat, maintaining a gentle simmer. Check occasionally to ensure the liquid hasn’t reduced too much—add a splash of water or stock if needed. The low and slow method breaks down the connective tissue, transforming the beef cheeks into a melt-in-your-mouth texture.
Step 5: Skim, Reduce, and Serve
Once the beef cheeks are tender, remove them from the pot and set aside. Skim any excess fat from the surface of the braising liquid, then bring it to a boil over medium-high heat. Cook for 5-10 minutes until the sauce thickens slightly and coats the back of a spoon.
Return the beef cheeks to the pot to warm through in the reduced sauce. Taste and adjust seasoning if needed. Serve hot, spooning the rich, velvety sauce over the top. Garnish with extra fresh thyme for a pop of color and aroma.
Pro Tips For Making Braised Beef Cheeks
- Sear the Cheeks Hard: Get your pan screaming hot before adding the cheeks—about 2 minutes per side until deeply browned. I learned this the hard way: under-seared cheeks give bland braising liquid.
- Trim the Fat Cap: Peel off that thick fat layer on the cheeks first; it won’t render and just turns greasy. Sounds tedious, but it actually changes the outcome.
- Skip the Small Dice: Cut your onion, carrots, and celery into 2-inch chunks. They’ll melt into the sauce but still hold shape after 3 hours of braising.
- Use a Heavy Pot: A Dutch oven or heavy lidded pot keeps the heat even and prevents hot spots that can dry out the cheeks. My grandmother swore by this, and she was right.
Dietary Considerations for These Flavors
Gluten-Free Option
Swap the 0.25 cup all-purpose flour for cornstarch or a gluten-free flour blend. I use Bob’s Red Mill 1:1 with great results—just dredge the beef cheeks as usual. The sauce will still thicken beautifully during the braise. 💪
Low-Sodium Approach
Use low-sodium beef stock and reduce the 1.5 tsp kosher salt to ½ tsp. Boost flavor with fresh herbs—extra thyme or rosemary from my coastal foraging spots works wonders. Taste before serving and adjust with a pinch of salt if needed.
Dairy-Free and Nut-Free
This dish is naturally free of dairy and nuts, so no substitutions are needed. Just double-check your beef stock label—some brands contain trace amounts. I always grab Imagine Foods stock for peace of mind.
Wine Substitute
Replace the 2 cups red wine with 2 cups beef stock plus 2 tbsp balsamic vinegar. This maintains the acidity and depth without alcohol. The vinegar adds that tangy brightness I love in the finished sauce.
Low-FODMAP Adaptation
Omit the yellow onion and garlic, replacing them with 2 tbsp garlic-infused olive oil and the green parts of 2 scallions. The dish keeps its rich flavor while being gentler on sensitive digestive systems.
Keto-Friendly Version
Skip the flour dredge entirely—it’s not essential for flavor. The beef cheeks will still develop a beautiful crust from the sear. This reduces carbs to nearly zero while keeping all that melt-in-your-mouth richness. 🔥
Nutrition Facts
Frequently Asked Questions
How do I know when they’re done?
They’re ready when a fork slides in with zero resistance. Expect 2.5-3 hours at 325°F. The meat will pull apart effortlessly when fully tender.
Can I make this on the stovetop?
Use low heat and maintain a gentle simmer. Check occasionally and add liquid if needed. The result is identical to oven braising.
What sides pair well?
Creamy polenta or mashed potatoes soak up the rich sauce beautifully. Roasted root vegetables add earthy balance to the tender meat.
Can I use a slow cooker?
Yes, but sear first on the stovetop. Then cook on low for 6-8 hours or high for 4-5 hours. The flavor develops best with the initial browning.

Trained in classic French technique but raised on slow-cooked ribs and spicy rubs, she blends culinary skill with smoke and soul.
- Recipe for Boneless Pork Chops in Cast Iron Skillet: Sear and Baste to Juicy Perfection - October 3, 2026
- Recipe for Boneless Cross Rib Roast: Slow-Roasted Beef with Herb Crust - October 3, 2026
- Hamburgers in Sauce Recipe Crock Pot: Slow-Cooked Savory Delight - October 3, 2026