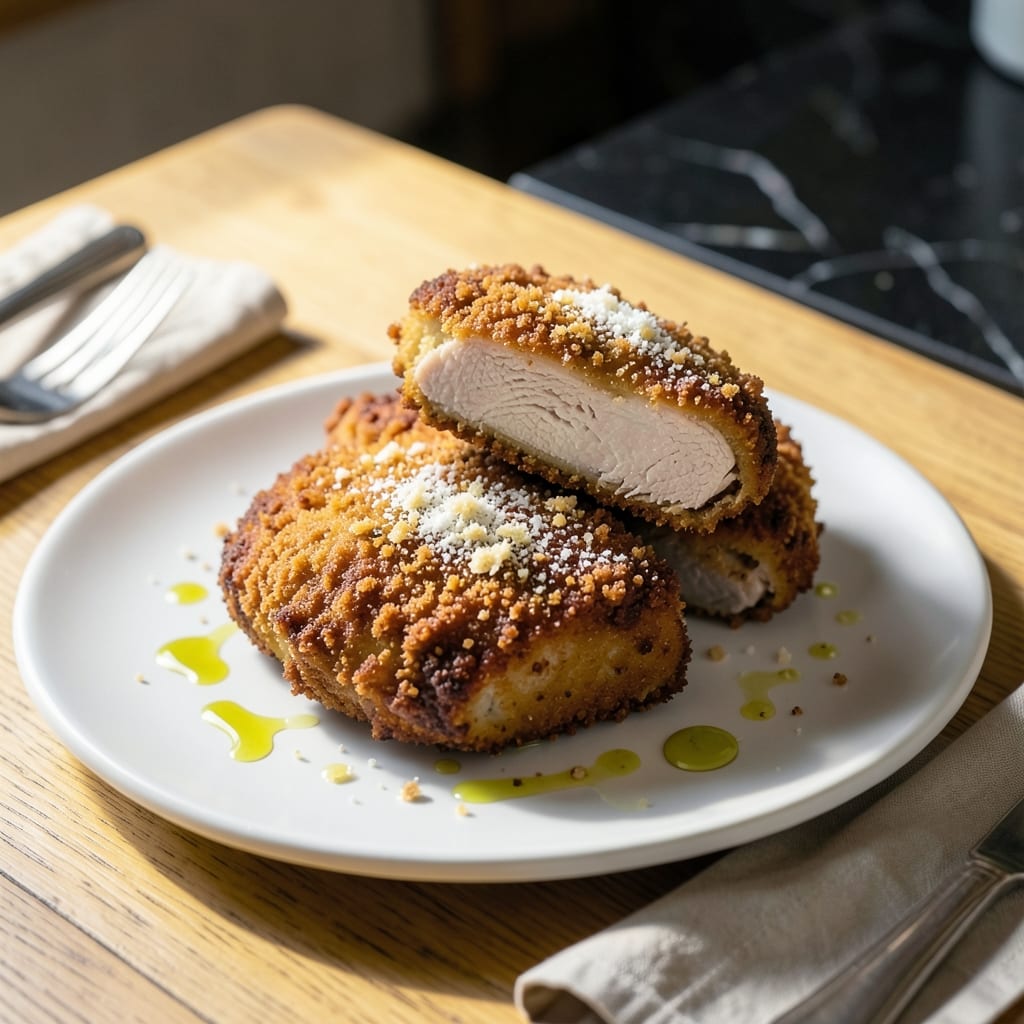
This breaded veal cutlet delivers a crispy golden exterior with meat so tender it nearly melts in your mouth. I developed this method through trial and error in my tiny Boston kitchen.
The secret lies in a three-step breading process with a rest between dredging and frying. This ensures the coating adheres perfectly and browns evenly without absorbing excess oil.
Each bite offers a satisfying crunch that gives way to juicy, delicate veal. The technique works equally well for chicken or pork if you want to vary the protein.
Serve immediately with lemon wedges or your favorite marinara for dipping. The contrast between the crisp coating and soft meat is what makes this dish unforgettable.
Ingredients for Breaded Veal Cutlet
Pantry staples and fresh veal come together for that perfect crispy-tender contrast.
| Ingredient | Amount | Notes |
|---|---|---|
| Veal Cutlets 🥩 | 1 ½ lb | Pounded to 1/4-inch thickness |
| All-Purpose Flour 🌾 | 1 cup | For initial dredging |
| Large Eggs 🥚 | 2 whole | Beaten for egg wash |
| Italian Breadcrumbs 🍞 | 2 cups | Panko for extra crispiness |
| Parmesan Cheese 🧀 | ½ cup | Freshly grated from block |
| Garlic Powder 🧄 | 1 tsp | For seasoning breadcrumbs |
| Dried Oregano 🌿 | 1 tsp | For seasoning breadcrumbs |
| Salt 🧂 | 1 tsp | Kosher or sea salt |
| Black Pepper 🌶️ | ½ tsp | Freshly ground preferred |
| Olive Oil 🫒 | 1 cup | For frying, divided |
| Lemon Wedges 🍋 | 4 pieces | For serving |
| Marinara Sauce 🍅 | 1 cup | For dipping, optional |
[recipe_ingredient_scaler]
The veal is everything here. Ask your butcher for pre-cut cutlets or buy a small veal shoulder to slice yourself—pound them thin (about 1/4-inch) for even cooking. Whole Foods or a good Italian market will have what you need. Look for cutlets that are pale pink with a fine texture (that’s the good stuff). If you can’t find veal, thin chicken cutlets work in a pinch.
No Italian breadcrumbs? Panko plus a pinch of Italian seasoning actually gives a crispier crust. Fresh out of Parmesan? Pecorino Romano has a sharper bite that works well here. The olive oil can be any neutral oil if that’s what you’ve got, but olive oil adds better flavor. Skip the pre-grated cheese—it doesn’t melt as well. The three-step breading (flour, egg, crumbs) is non-negotiable though—it’s what makes that perfect crust.
Fry these in batches so you don’t crowd the pan (they’ll steam instead of brown). Keeps 2-3 days in the fridge, but honestly they’re best eaten fresh. Reheat in the oven at 375°F for 10 minutes to keep them crispy. Leftovers make a mean sandwich the next day.
Why You’ll Love This Recipe
- Three Step Magic: I just dip, coat, and fry—no fancy techniques or hours in the kitchen.
- Crispy Parmesan Bite: That crunch from the breadcrumbs and Parmesan with the tender veal inside? Ridiculously good.
- Dinner or Lunch: Honestly, it works for a fancy dinner or a quick lunch with leftovers that reheat beautifully.
- Budget Stretcher: Veal cutlets go further than you’d think, and a little Parmesan adds big flavor without breaking the bank.
Step-by-Step Instructions for Breaded Veal Cutlets
Here’s how I achieve that perfect crispy crust while keeping the veal incredibly tender.
Step 1: Prep and Season the Breading Station
Set up three shallow dishes in a row. Add the 1 cup all-purpose flour to the first dish, mixing in 1 tsp salt and 0.5 tsp black pepper. In the second dish, beat the 2 whole large eggs until smooth. For the third, combine the 2 cups Italian breadcrumbs, 0.5 cup Parmesan cheese, 1 tsp garlic powder, and 1 tsp dried oregano.
This three-step dredging process ensures maximum crunch and flavor in every bite. I like to use Panko breadcrumbs for extra crispiness, but traditional Italian breadcrumbs work beautifully too.
Step 2: Bread the Veal Cutlets
Pat the 1.5 lb veal cutlets dry with paper towels—they should already be pounded to 1/4-inch thickness. Working with one cutlet at a time, dredge it in the flour mixture, shaking off any excess. Then dip it into the beaten eggs, letting any excess drip off. Finally, press it firmly into the breadcrumb mixture, coating both sides completely.
Here’s the thing—I always let the breaded cutlets rest for 5-10 minutes before frying. This helps the coating adhere better and prevents it from falling off during cooking. Place them on a plate or wire rack while you heat the oil.
Step 3: Fry to Golden Perfection
Heat 1/2 cup olive oil in a large skillet over medium-high heat until shimmering. To test if it’s ready, drop in a pinch of breadcrumbs—if it sizzles immediately, you’re good to go. Carefully place 2-3 breaded cutlets in the pan, being careful not to overcrowd it. Fry for 3-4 minutes per side until deep golden brown.
Don’t flip too early. When the cutlet is ready to turn, it’ll release easily from the pan. If it sticks, give it another 30 seconds. Transfer the cooked cutlets to a paper towel-lined plate to drain any excess oil.
Step 4: Serve Immediately with Lemon and Marinara
While the cutlets are still hot, squeeze fresh lemon wedges over them for a bright, zesty finish. Serve immediately with 1 cup marinara sauce on the side for dipping, if desired. The acidity from the lemon cuts through the richness of the fried veal beautifully.
Real talk: these are best eaten right away while the coating is at its crispiest. If you need to keep them warm, place them on a wire rack in a 200°F oven for up to 10 minutes. Any longer, and they’ll lose that perfect crunch.
Pro Tips For Making Breaded Veal Cutlet
- Pound Evenly First: Use a meat mallet to pound the veal cutlets to 1/4-inch thickness—I learned this the hard way after ending up with chewy spots where the meat was thicker.
- Grate Fresh Parmesan: Skip the pre-grated stuff and use freshly grated Parmesan in your breadcrumb mix; the texture clings better and actually changes the outcome.
- Rest Before Frying: Let the breaded cutlets rest for 5-10 minutes after dredging so the coating sets—my grandmother swore by this, and she was right.
- Double Fry for Crisp: Fry once at 350°F for 2 minutes, rest, then fry again at 375°F for 1-2 minutes to get that golden, shatteringly crisp crust.
Troubleshooting This Recipe
Coating Falling Off
The most common issue I see is the breading separating from the meat. This usually happens if you skip the 5-10 minute rest after breading. The rest period lets the egg wash dry slightly, creating a better bond. Also, pat the veal very dry before dredging—any moisture prevents adhesion. 💡
Oil Temperature Problems
If your cutlets are absorbing too much oil instead of browning, your oil isn’t hot enough. Use medium-high heat and test with a breadcrumb—it should sizzle immediately. If it browns too fast, your heat is too high. Adjust to 350-375°F for perfect results.
Uneven Cooking
Pounding the veal to 1/4-inch thickness is crucial. If some pieces are thicker, they’ll cook unevenly. Use a meat mallet or rolling pin between plastic wrap. Also, don’t overcrowd the pan—fry in batches with 2-3 cutlets at a time.
Soggy Coating
This happens when you cover the cutlets after frying. Steam builds up and softens the crust. Instead, place them on a wire rack in a 200°F oven if you need to keep them warm. The rack allows air circulation to maintain crispiness.
Dry Veal
Veal cooks quickly—3-4 minutes per side is all it needs. Overcooking is the main culprit for dry meat. Use a meat thermometer to check for 145°F internal temperature. Remove from heat immediately when done, as the temperature will rise another 5°F while resting. 🔥
Bland Flavor
Don’t skimp on seasoning each breading layer. I add salt and pepper to the flour, and garlic powder and oregano to the breadcrumbs. The Parmesan in the breading adds umami depth. Taste your breadcrumb mixture before using—it should be flavorful on its own.
Nutrition Facts
Frequently Asked Questions
Can I use chicken instead of veal?
Thin chicken cutlets work beautifully with the same method. Pound them to 1/4-inch thickness and follow the recipe exactly. Chicken may cook slightly faster, so check for 165°F internal temperature.
Why does my breading fall off during frying?
This usually means the cutlets weren’t dry enough before breading. Pat them very dry with paper towels, and don’t skip the 5-10 minute rest after breading. This helps the coating adhere properly.
How do I keep them crispy if serving a crowd?
Place finished cutlets on a wire rack in a 200°F oven. The rack lets air circulate, preventing steam from making the coating soggy. They’ll stay crisp for up to 10 minutes.

Trained in classic French technique but raised on slow-cooked ribs and spicy rubs, she blends culinary skill with smoke and soul.
- Recipe for Boneless Pork Chops in Cast Iron Skillet: Sear and Baste to Juicy Perfection - October 3, 2026
- Recipe for Boneless Cross Rib Roast: Slow-Roasted Beef with Herb Crust - October 3, 2026
- Hamburgers in Sauce Recipe Crock Pot: Slow-Cooked Savory Delight - October 3, 2026