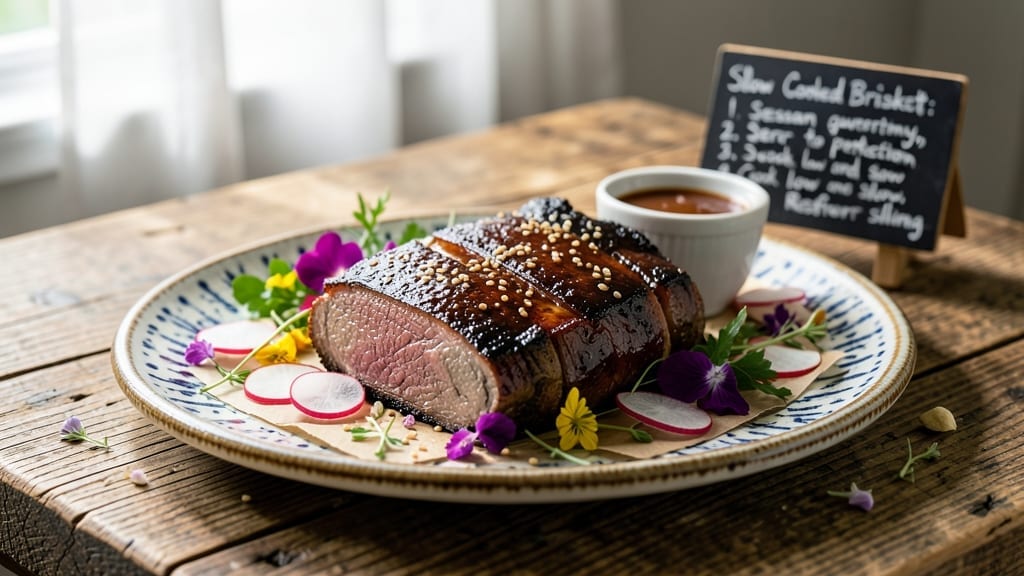
Unlock these brisket cooking recipe tips to turn tough cuts into irresistible, crowd-pleasing melt-in-your-mouth perfection. After years of test-kitchen experiments—including the infamous time I nearly set off my apartment fire alarm—I’ve refined a foolproof low-and-slow method that delivers fall-apart tenderness every time.
The secret lies in patience: slow heat, precise temperature control, and knowing exactly when to intervene with foil or paper to lock in moisture.
This recipe starts with proper prep: trimming excess fat (but leaving enough for flavor), applying a dry rub of smoked paprika and brown sugar, and choosing the right wood—hickory for bold smoke or oak for a cleaner profile.
The cooking process itself is where the magic happens: maintaining 225°F in your smoker or oven, monitoring for the “stall” (a natural pause in temperature rise), and wrapping the brisket when it hits 165°F to push it to 195°F—the only temperature that guarantees that signature texture.
What you’ll end up with is a brisket so tender it practically shreds at a touch, with a dark, crackling bark that’s worth the wait. The aroma alone—smoky, sweet, and deeply satisfying—will have everyone gathered around your table.
Serve it sliced thin over toasted buns, piled high on a platter with baked beans, or repurposed into sandwiches for days of leftovers.
Here’s where the real confidence comes in: this method works whether you’re using a smoker, oven, or even a slow cooker. The key is understanding the science behind the smoke, the stall, and the wrap—so you can troubleshoot like a pro. Let’s get started on your most impressive brisket yet.
📚 In This Guide
- What you need
- Instructions
- Tips and common mistakes
- Wrapping up and next steps
What you need
- ● Brisket: 4–6 lbs (packer cut preferred, flat + point intact for even cooking).
- ● Wood: 1–2 lbs of hickory, oak, or pecan (avoid fruitwoods like cherry for brisket).
- ● Smoker/Grill: Pellet, offset, electric, or charcoal smoker (maintain 225–250°F consistently).
- ● Butcher Paper or Aluminum Foil: Heavy-duty butcher paper (for wrapping) or double-thick foil (for insulation).
- ● Meat Thermometer: Instant-read or probe-style (critical for 203°F internal temp).
- ● Basting Brush: Silicone or heat-resistant brush for mop sauce.
- ● Mop Sauce: 1 cup apple juice + ½ cup beef broth + 2 tbsp brown sugar + 1 tbsp Worcestershire sauce.
- ● Trimmed Fat Cap: Leave ¼-inch fat on top for flavor and moisture.
- ● Dry Rub: 2 tbsp coarse salt, 1 tbsp black pepper, 1 tbsp brown sugar, 1 tsp garlic powder, 1 tsp smoked paprika.
- ● Spritz Bottle: For mid-cook moisture boosts (50/50 apple juice + beef broth).
- ● Cork or Wooden Board: To elevate brisket off the grill for even smoke circulation.
- ● Meat Resting Tray: Foil-lined tray to catch juices while resting (30–60 mins post-cook!).
- ● Heat-Resistant Gloves: For safe handling of hot foil or smoker tools.
Step-by-step instructions for brisket cooking
Mastering brisket means understanding patience and precision—here’s how to achieve that legendary tenderness.
Prepare the Brisket for Even Cooking
Begin by trimming the brisket to remove any large pockets of fat, leaving a thin, even layer of fat cap. I like to keep about ¼-inch of fat—this protects the meat during the long cook while still allowing smoke penetration. Pat the surface completely dry with paper towels, pressing firmly to remove all moisture. This step is critical because moisture on the surface creates steam instead of the crisp bark we want.
Next, apply a generous layer of your chosen dry rub all over the brisket, pressing it into the meat so it adheres well. I recommend using about 2 tablespoons of rub for a 4-pound brisket, covering every inch including the cavity. Let the brisket sit at room temperature for 1 hour before cooking—this allows the rub to penetrate and the meat to cook more evenly from edge to center.
Set Up Your Smoker for Low-and-Slow Success
Preheat your smoker to 225°F using hardwood like oak or hickory—these woods provide that classic brisket flavor without overpowering the meat. Place a water pan in the smoker to maintain moisture throughout the cook, which helps prevent the bark from becoming too tough. When the smoker reaches temperature and you see clean, thin blue smoke (not thick white smoke), it’s ready for the brisket.
Position the brisket fat-side up on the smoker grates. The fat will render slowly and baste the meat as it cooks, creating that perfect balance of moisture and crust. Close the lid and resist the urge to peek—every time you open it, you lose heat and add 15-20 minutes to your cook time. This is where true low-and-slow magic happens.
Monitor the Cook and Handle the Stall
Cook the brisket undisturbed until the internal temperature reaches 165-170°F, which typically takes 6-8 hours. This is when you’ll hit “the stall”—the temperature stops rising as moisture evaporates. Don’t panic; this is normal and expected. The key is to let it ride through this phase without wrapping or adjusting the heat.
Once the brisket hits the stall, wrap it tightly in butcher paper (not foil—paper breathes better and preserves the bark). This technique, called the “Texas crutch,” helps power through the stall while maintaining that crispy exterior. Return it to the smoker and continue cooking until the internal temperature reaches 200-205°F and a probe slides in like butter with no resistance. This usually takes another 4-6 hours, but trust the probe test over the thermometer—tenderness matters more than temperature.
Rest and Slice for Maximum Juiciness
Remove the brisket from the smoker and let it rest in the butcher paper for at least 1 hour (I prefer 2 hours wrapped in towels in a cooler). This resting period allows the juices to redistribute throughout the meat, ensuring every slice is moist and flavorful. Skipping this step means dry, tough slices—don’t rush it.
Unwrap the brisket and locate the grain direction—you’ll see lines running through the meat. Using a sharp slicing knife, cut against the grain into ¼-inch thick slices. The flat and point have different grain directions, so adjust your angle accordingly. Serve immediately while still warm, and you’ll be rewarded with slices that are tender enough to pull apart with a gentle tug, not so soft they fall apart, and not tough or chewy.
Tips & tricks for perfect brisket cooking
Low-and-slow brisket transforms tough cuts into melt-in-your-mouth perfection—but only if you respect the process. Here’s how to elevate your cook every time.
The Rub Penetration Secret: When applying that 2 tablespoons of rub to your 4-pound brisket, don’t just sprinkle—press it into every crevice, especially the cavity. The key is letting it sit uncovered at room temperature for the full 1 hour before cooking. This isn’t just about temperature equilibrium; it’s about letting those spices infuse deeply into the meat fibers. I’ve seen beginners skip this step and end up with flavor only on the surface. Trust me, the difference is night and day when you slice into that tender, well-seasoned meat.
Smoke Management at 225°F: Maintaining that precise 225°F temperature is where most home cooks struggle. Invest in a good smoker thermometer and place it away from direct heat to get an accurate reading. If your temperature fluctuates above 250°F, you risk drying out the meat prematurely. The 6-8 hour cook time at this temperature is non-negotiable for proper collagen breakdown—what gives brisket its legendary tenderness. I’ve learned this the hard way after ruining three batches by letting the temperature creep up during refueling.
Handling the Stall with Precision: When you hit that 165-170°F stall, resist every urge to wrap immediately. Let it ride for at least 30 minutes first—this is where the magic happens as the meat reabsorbs its own moisture. The Texas crutch of butcher paper wrapping works wonders, but timing matters: wrap when the temperature has stalled for 30-45 minutes, not the moment you first notice it. This extra patience pays off with that perfect balance of bark and moisture when you reach 200-205°F.
Resting Technique That Changes Everything: That 1-2 hour rest in the cooler isn’t optional—it’s the final step in creating fall-apart tenderness. The juices need this time to redistribute throughout the meat fibers. I’ve seen people slice too soon and end up with dry, stringy results. Pro tip: Wrap the brisket in clean kitchen towels before placing it in the cooler. This helps maintain even temperature while resting, ensuring those juices stay where they belong—in the meat, not on your cutting board.
Pro Tips for Brisket Cooking Recipe Tips
- Low-and-slow brisket transforms tough cuts into melt-in-your-mouth perfection—but only if you respect the process.
- The Rub Penetration Secret: When applying that 2 tablespoons of rub to your 4-pound brisket, don’t just sprinkle—press it into every crevice, especially the cavity.
- Smoke Management at 225°F: Maintaining that precise 225°F temperature is where most home cooks struggle.
Frequently asked questions
Got questions about mastering the perfect brisket? You’re not alone—this cut can be tricky, but with the right answers, you’ll be serving up restaurant-quality meat in no time. Here are some of the most common queries (and their solutions) to help you cook brisket like a pro.
How long does brisket need to cook?
Brisket thrives on patience! For a 10-pound brisket, plan for 12–14 hours at 225–250°F (107–121°C) in a smoker or slow cooker. A general rule: 1 hour per pound at 250°F (adjust for higher temps). Use a meat thermometer—aim for 195–203°F (90–95°C) for tender, juicy results. Pro tip: Don’t rush it!
Can I cook brisket without a smoker?
You can slow-cook brisket in an oven (275°F for 4–5 hours), a slow cooker (low for 8–10 hours), or even a grill (covered with indirect heat). Just keep the temp steady and add wood chips or smoke pellets for that classic BBQ flavor. Oven method: Wrap the brisket in foil or butcher paper for moisture retention.
Why is my brisket dry or tough?
Dry brisket usually means it wasn’t cooked low-and-slow enough or rested improperly. Here’s how to fix it:
- Check the temp: Never let it exceed 203°F (95°C)—overcooking dries it out.
- Rest it: Let the brisket rest 1–2 hours under foil before slicing to redistribute juices.
- Trim fat cap: Leave a thin layer (¼ inch) for flavor but trim excess to avoid grease buildup.
What’s the best wood for brisket?
For smoky, savory brisket, stick with hardwoods like:
- Oak (classic, versatile)
- Hickory (bold, smoky flavor)
- Pecan or Mesquite (sweet, intense smoke—use sparingly!)
How do I slice brisket against the grain?
Slicing against the grain is key for tenderness! Here’s how:
- Identify the grain: Look for the muscle fibers running horizontally across the flat. The point cut (thinner end) has a tighter grain than the flat cut (thicker end).
- Use a sharp knife: A serrated knife works best for clean cuts.
- Slice thinly: Cut ¼-inch slices perpendicular to the grain—this shortens the muscle fibers for a melt-in-your-mouth texture.
Wrapping up and next steps
Mastering the art of brisket is all about patience, precision, and passion—but once you nail these low-and-slow secrets, the rewards are unmatched. 🎯 Whether you’re trimming fat like a pro, wrapping for moisture, or perfecting your bark, every step brings you closer to that fall-apart perfection.
Don’t let the process intimidate you; embrace the journey, and soon you’ll be the grill master your friends (and taste buds) will rave about.
Ready to take the next step? Fire up that smoker, grab your favorite recipe, and start experimenting! 🔥 And if you’re hungry for more tips, dive into our guide on brisket resting techniques—because even the best cook can’t rush greatness.

Trained in classic French technique but raised on slow-cooked ribs and spicy rubs, she blends culinary skill with smoke and soul.
- Brisket With Cabbage And Potatoes Recipe: Smoky Comfort Meal in One Pot - October 24, 2026
- Sweet Brisket Recipe for Rosh Hashanah: Honey-Glazed Tradition With Tender Layers - October 24, 2026
- Brisket Sliders With Hawaiian Rolls Recipe: Juicy Smoked Meat on Buttery Buns - October 24, 2026