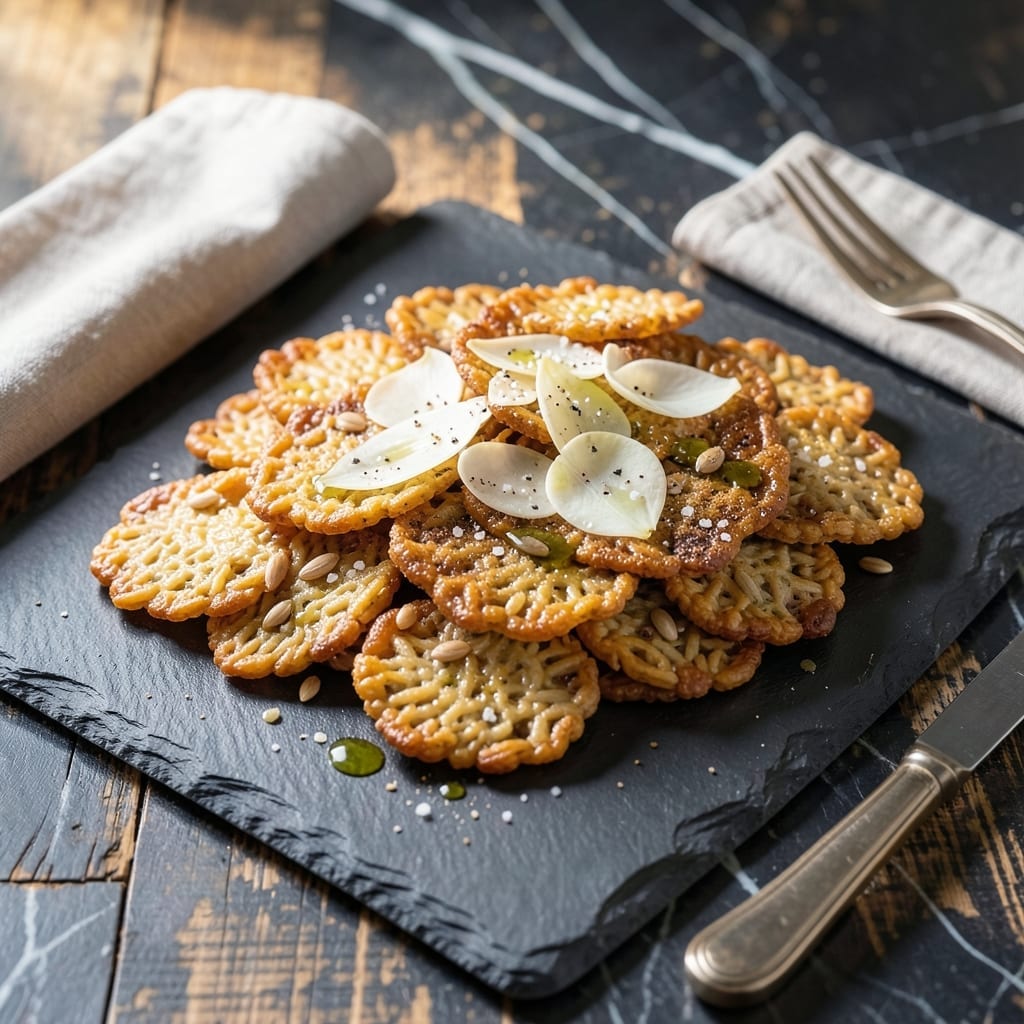
I’ve perfected a method for making crispy, gluten-free crackers at home using simple brown rice. This approach delivers a satisfying crunch and light texture without any specialty flours.
The process is straightforward: cook, blend, roll, and bake. The result is a clean, flavorful snack that rivals store-bought versions, with full control over ingredients and seasoning.
Ingredients for Brown Rice Crackers
Simple pantry ingredients transform into crispy, gluten-free crackers with satisfying crunch.
| Ingredient | Amount | Notes |
|---|---|---|
| Brown Rice 🌾 | 1 cup | Uncooked, short or medium grain |
| Water 💧 | 2 ½ cups | For cooking rice |
| Olive Oil 🫒 | 2 tbsp | Extra-virgin for richness |
| Sea Salt 🧂 | ½ tsp | Fine grain for even distribution |
| Garlic Powder 🧄 | ¼ tsp | Optional for savory flavor |
| Onion Powder 🧅 | ¼ tsp | Complements garlic well |
| Dried Rosemary 🌿 | ½ tsp | Crushed for better flavor release |
| Smoked Paprika 🌶️ | ¼ tsp | Adds depth and color |
| Black Pepper 🌶️ | ¼ tsp | Freshly ground preferred |
| Sesame Seeds 🌰 | 1 tbsp | Optional topping for texture |
| Flaxseeds 🌿 | 1 tbsp | Optional for binding and nutrition |
[recipe_ingredient_scaler]
The brown rice is the foundation. Short or medium grain varieties yield the best texture—avoid long-grain as it can be too dry. Organic brown rice from Whole Foods or your local co-op ensures quality and consistent cooking. Cook it slightly underdone (al dente) to prevent the crackers from becoming brittle. The water-to-rice ratio is critical: too much water makes the dough sticky, too little results in dry, crumbly crackers.
No dried rosemary? Fresh thyme or oregano work beautifully—use half the amount since fresh herbs are more potent. For a spicier kick, swap smoked paprika with cayenne pepper (start with 1/8 tsp). Olive oil can be replaced with melted coconut oil for a different flavor profile. If avoiding seeds, omit them entirely or add 1 tsp nutritional yeast for a cheesy, umami note.
Store cooked rice in the fridge for up to 3 days before making crackers. The dough keeps 2 days refrigerated, or freeze for 1 month. Baked crackers stay crisp in an airtight container for 5 days—if they soften, revive in a 300°F oven for 5 minutes (worth the extra minute).
Why You’ll Love This Recipe
- One Bowl Wonder: I love that I only need to mix brown rice, water, olive oil, and seasonings in one bowl—no fancy equipment.
- Garlic Crisp Perfection: The garlic powder and sea salt give these crackers a savory depth that’s hard to resist.
- Snack or Side: They’re my go-to for lunchboxes, cheese boards, or just munching straight from the jar.
- Pantry Staples: Honestly, I always have these ingredients on hand, so I can bake a batch anytime.
Step-by-Step Instructions for Brown Rice Crackers
This method ensures perfectly crisp, gluten-free crackers with minimal effort and maximum flavor.
Step 1: Cook and Season the Brown Rice
Combine 1 cup Brown Rice and 2.5 cups Water in a saucepan. Bring to a boil, then reduce heat to low, cover, and simmer for 40-45 minutes until the water is absorbed and the rice is tender.
Transfer the cooked rice to a bowl and let it cool slightly. Stir in 2 tbsp Olive Oil, 0.5 tsp Sea Salt, 0.25 tsp Garlic Powder, 0.25 tsp Onion Powder, 0.5 tsp Dried Rosemary, 0.25 tsp Smoked Paprika, and 0.25 tsp Black Pepper. The rice should be sticky and well-seasoned.
Step 2: Blend and Incorporate Seeds
Transfer half of the seasoned rice to a food processor and pulse until it forms a thick, dough-like consistency. Return it to the bowl with the remaining rice. Add 1 tbsp Flaxseeds and 1 tbsp Sesame Seeds, mixing until fully combined.
The flaxseeds act as a binder, while the sesame seeds add texture. If the mixture feels too dry, add a splash of water. The dough should hold together when pressed but not stick to your fingers excessively.
Step 3: Roll and Shape the Dough
Preheat your oven to 350°F. Place the dough between two sheets of parchment paper and roll it out to ⅛-inch thickness or less. The thinner the dough, the crispier your crackers will be.
Use a knife or pizza cutter to score the dough into squares or rectangles. Prick each piece with a fork to prevent puffing during baking. This ensures even cooking and a uniform texture.
Step 4: Bake to Crisp Perfection
Transfer the scored dough (still on parchment) to a baking sheet. Bake for 25-30 minutes until the edges turn golden brown and the centers are dry to the touch.
Rotate the baking sheet halfway through for even cooking. The crackers should be firm and crisp when fully baked. If any pieces aren’t crisp, return them to the oven for 5-minute increments until done.
Step 5: Cool and Break into Serving Pieces
Remove the crackers from the oven and let them cool completely on a wire rack. As they cool, they’ll crisp further. Once cooled, break them along the scored lines into individual pieces.
Store in an airtight container at room temperature for up to 1 week. These crackers are best enjoyed fresh but retain their crunch if kept dry. Serve as a snack or with your favorite dips.
Pro Tips For Making Brown Rice Crackers
- Soak the Rice: Give the brown rice a 4-6 hour soak before blending—I learned this the hard way when my first batch turned out gritty instead of crisp.
- Roll Them Thin: Aim for paper-thin sheets when rolling the dough, about 1/8 inch or less, otherwise they’ll bake up chewy instead of crackly.
- Watch the Oven: Bake at 350°F but start checking at 12 minutes—after burning two batches, I finally figured out they go from golden to bitter fast.
- Press, Don’t Pat: Use a rolling pin or wine bottle to press the dough flat on the tray—sounds weird, but it works better than spreading with your hands.
Dietary Considerations for These Flavors
Gluten-Free Friendly
These crackers are naturally gluten-free, making them perfect for anyone with celiac disease or gluten sensitivity. Brown rice provides a safe, nutritious base without any risk of cross-contamination from wheat or other gluten-containing grains. 💪
Vegan and Plant-Based
With just brown rice, olive oil, and seeds, this recipe fits seamlessly into vegan and plant-based diets. No animal products are used, and the ingredients align with most ethical eating choices.
Nut-Free Option
This recipe avoids all nuts, making it safe for those with nut allergies. Simply ensure your flaxseeds and sesame seeds are processed in a nut-free facility if severe allergies are a concern.
Low Sodium Control
You can easily adjust the sea salt to meet dietary needs. Reduce to ¼ tsp or omit entirely for a low-sodium version. The herbs and spices still provide plenty of flavor without excessive salt.
Allergen-Free Baking
Since these crackers contain no dairy, eggs, or soy, they’re a great option for many common allergies. Always double-check your olive oil and seasoning blends to ensure they’re free from hidden allergens. ✨
Whole Grain Goodness
Brown rice retains its bran and germ, offering more fiber and nutrients than refined grains. Each serving provides complex carbohydrates and essential minerals like magnesium and selenium.
Nutrition Facts
Frequently Asked Questions
Can I use white rice instead of brown?
Yes, but texture will differ. White rice makes lighter, less hearty crackers since it lacks the fiber and bran of brown rice. Stick with short or medium grain for best results.
Why did my crackers turn out soft?
They likely needed more baking time or thinner rolling. Ensure dough is ⅛-inch thick and bake until fully golden brown. Store in an airtight container once completely cooled.
How do I make them extra crispy?
Roll the dough as thin as possible and bake at 325°F for 30-35 minutes. Rotate the tray halfway and check for even browning. Prick with a fork before baking to prevent puffing.

Trained in classic French technique but raised on slow-cooked ribs and spicy rubs, she blends culinary skill with smoke and soul.
- Recipe for Boneless Pork Chops in Cast Iron Skillet: Sear and Baste to Juicy Perfection - October 3, 2026
- Recipe for Boneless Cross Rib Roast: Slow-Roasted Beef with Herb Crust - October 3, 2026
- Hamburgers in Sauce Recipe Crock Pot: Slow-Cooked Savory Delight - October 3, 2026