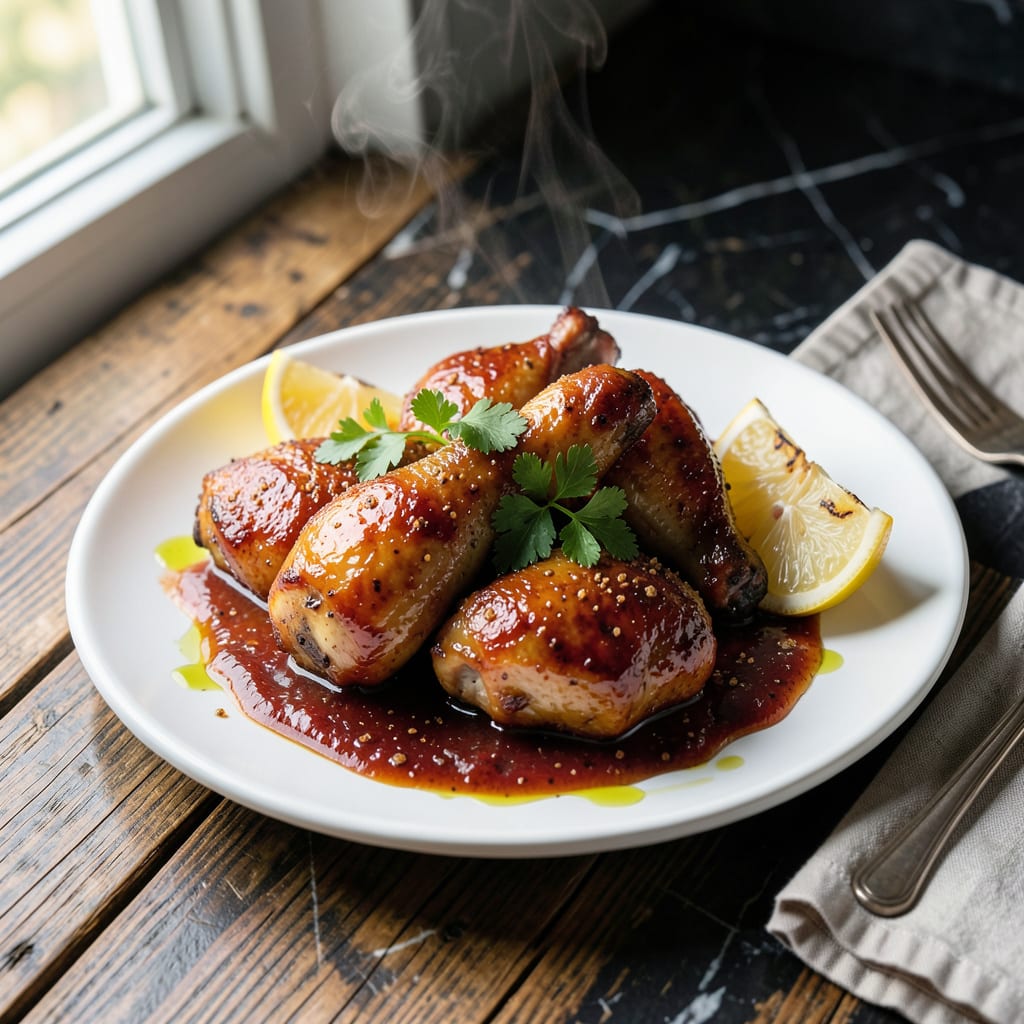
Getting my first whiff of hickory smoke at a family cookout inspired this approach. The brown sugar creates a caramelized crust that locks in juices.
This method blends French precision with backyard tradition. The result is tender chicken with a sticky, smoky-sweet glaze that’s hard to resist.
Ingredients for Brown Sugar Bbq Chicken
Quality ingredients deliver that smoky-sweet glaze and tender chicken every time.
| Ingredient | Amount | Notes |
|---|---|---|
| Chicken Thighs 🍗 | 2 ½ lb | Boneless, skin-on preferred |
| Light Brown Sugar 🍚 | ¾ cup | Packed for caramelization |
| Ketchup 🍅 | 1 cup | High-quality for depth of flavor |
| Apple Cider Vinegar 🍏 | 2 tbsp | Balances sweetness with acidity |
| Worcestershire Sauce 🫒 | 1 tbsp | Adds umami complexity |
| Dijon Mustard 🟡 | 1 tbsp | Sharp flavor enhances glaze |
| Smoked Paprika 🌶️ | 1 tsp | Delivers signature smokiness |
| Garlic Powder 🧄 | 1 tsp | Uniform distribution in sauce |
| Onion Powder 🧅 | 1 tsp | Complements sweet and smoky notes |
| Kosher Salt 🧂 | 1 tsp | Diamond Crystal preferred |
| Ground Black Pepper 🌶️ | ½ tsp | Freshly ground for best results |
| Hickory Wood Chips 🪵 | 1 cup | Soaked for 30 minutes |
| Olive Oil 🫒 | 1 tbsp | For brushing chicken |
[recipe_ingredient_scaler]
The chicken is non-negotiable here—bone-in, skin-on thighs provide the juiciest results, though boneless will work in a pinch. Whole Foods or ButcherBox offer excellent quality, but most supermarkets carry suitable options. For the brown sugar, light brown is ideal (its subtle molasses notes shine), and Domino or C&H are reliable brands. Hickory wood chips are essential for authentic smoke flavor—Weber makes a solid pre-soaked variety.
Need to swap something? Chicken breasts can replace thighs (but watch cooking time—they dry out faster). Short on ketchup? Use tomato paste thinned with water. No smoked paprika? Regular paprika plus a drop of liquid smoke works. For vinegar, red wine or white vinegar are fine at one-to-one. The Worcestershire can be omitted, though it adds depth worth keeping.
The glaze keeps in an airtight container for up to 1 week in the fridge. Chicken is best cooked fresh but leftovers hold well for 3-4 days. Freeze the sauce for up to 3 months (thaw before using). Soak wood chips the night before for deeper smoke penetration.
Why You’ll Love This Recipe
- One Pan Wonder: I toss everything in a baking dish and let the oven do the work—no fancy techniques, just juicy thighs and a sticky-sweet glaze.
- Sweet & Tangy: The brown sugar caramelizes with the vinegar’s bite, and that Worcestershire depth? It’s the kind of sauce I could drink with a spoon.
- Feeds a Crowd: I make a double batch for Sunday dinner, and it’s just as good reheated in tacos or on a salad the next day.
- Budget Hero: Chicken thighs stay cheap, and the pantry staples for the sauce mean I’m not buying special ingredients I’ll never use again.
Step-by-Step Instructions for Brown Sugar BBQ Chicken
Here’s the method. Straightforward, tested, works every time.
Step 1: Prepare the Chicken and Soak Wood Chips
Pat the 2.5 lb Chicken Thighs dry with paper towels and season both sides evenly with 1 tsp Kosher Salt and 0.5 tsp Ground Black Pepper. This simple seasoning enhances the natural flavor of the meat without overpowering the glaze. I prefer skin-on thighs for that extra crispy texture.
Place the 1 cup Hickory Wood Chips in a bowl of water to soak for 30 minutes. Soaking prevents the chips from burning too quickly on the grill, ensuring a steady stream of smoke throughout cooking.
Step 2: Create the Brown Sugar BBQ Glaze
In a medium saucepan, combine 0.75 cup Light Brown Sugar, 1 cup Ketchup, 2 tbsp Apple Cider Vinegar, 1 tbsp Worcestershire Sauce, and 1 tbsp Dijon Mustard. Whisk until the mixture is smooth and the brown sugar begins to dissolve.
Add 1 tsp Smoked Paprika, 1 tsp Garlic Powder, and 1 tsp Onion Powder. Stir well and bring the mixture to a gentle simmer over medium heat. Reduce the heat to low and let it cook for 10-12 minutes until the glaze thickens slightly and coats the back of a spoon.
Step 3: Grill the Chicken to Perfection
Preheat your grill to medium-high heat (about 375-400°F). If using a charcoal grill, bank the coals to one side for indirect cooking. Drain the soaked hickory wood chips and scatter them over the coals, or place them in a smoker box if using a gas grill.
Brush the chicken thighs lightly with 1 tbsp Olive Oil to prevent sticking. Place the thighs skin-side down on the grill grates. Close the lid and cook for 6-7 minutes until the skin is golden brown and slightly crispy. Flip the thighs and cook for another 6-7 minutes with the lid closed.
Step 4: Glaze and Finish
During the last 5 minutes of grilling, begin brushing the chicken thighs generously with the brown sugar BBQ glaze. Flip the thighs and brush the other side, repeating the process 2-3 times to build layers of flavor. Each layer should caramelize slightly, creating a sticky, glossy finish.
Remove the chicken from the grill when the internal temperature reaches 165°F and the juices run clear. Transfer the thighs to a serving platter and let them rest for 5 minutes before serving. This resting period allows the juices to redistribute, ensuring moist, tender meat.
Pro Tips For Making Brown Sugar Bbq Chicken
- Sear the Thighs First: Get a good crust on those chicken thighs in a hot pan before adding the sauce—this keeps them from stewing and gives you that sticky, caramelized edge.
- Bloom the Sugar: I learned this the hard way—melt the brown sugar into the ketchup and vinegar for 2-3 minutes on medium heat so it dissolves completely and doesn’t leave gritty bits in your sauce.
- Skip the Over-Saucing: Resist the urge to drown the chicken in sauce early; baste it on during the last 10 minutes of cooking so it thickens instead of burning.
- Use Bone-In Skin-On: Sounds obvious, but bone-in, skin-on thighs stay juicier and handle the sweet-tangy sauce better than boneless—plus, the skin crisps up like a dream.
Storing and Reheating Leftovers
Refrigerator Storage
Let your chicken cool for no more than 2 hours before transferring to airtight containers. I use glass Pyrex with snap-on lids for easy stacking. This dish keeps beautifully at 40°F or below for up to 4 days. 🌡️
Freezer Storage
For longer storage, freeze individual portions in quart-sized freezer bags. Squeeze out excess air to prevent freezer burn and label with the date. The chicken stays flavorful for up to 3 months without losing texture.
Stovetop Reheating
This is my preferred method for maintaining that sticky glaze. Warm in a skillet over medium-low heat with 2 tbsp water or chicken broth for 5-7 minutes, covered. Stir occasionally to prevent sticking.
Microwave Reheating
For quick meals, microwave individual portions covered with a damp paper towel. Heat on 70% power for 2-3 minutes, then check temperature. Add 1 tsp water if the sauce looks dry. 🔥
Glaze Storage
Extra glaze keeps in a sealed jar in the fridge for up to 1 week. I often make a double batch just to have on hand. Freeze in ice cube trays for up to 3 months—perfect for quick meals.
Nutrition Facts

Trained in classic French technique but raised on slow-cooked ribs and spicy rubs, she blends culinary skill with smoke and soul.
- Recipe for Boneless Pork Chops in Cast Iron Skillet: Sear and Baste to Juicy Perfection - October 3, 2026
- Recipe for Boneless Cross Rib Roast: Slow-Roasted Beef with Herb Crust - October 3, 2026
- Hamburgers in Sauce Recipe Crock Pot: Slow-Cooked Savory Delight - October 3, 2026