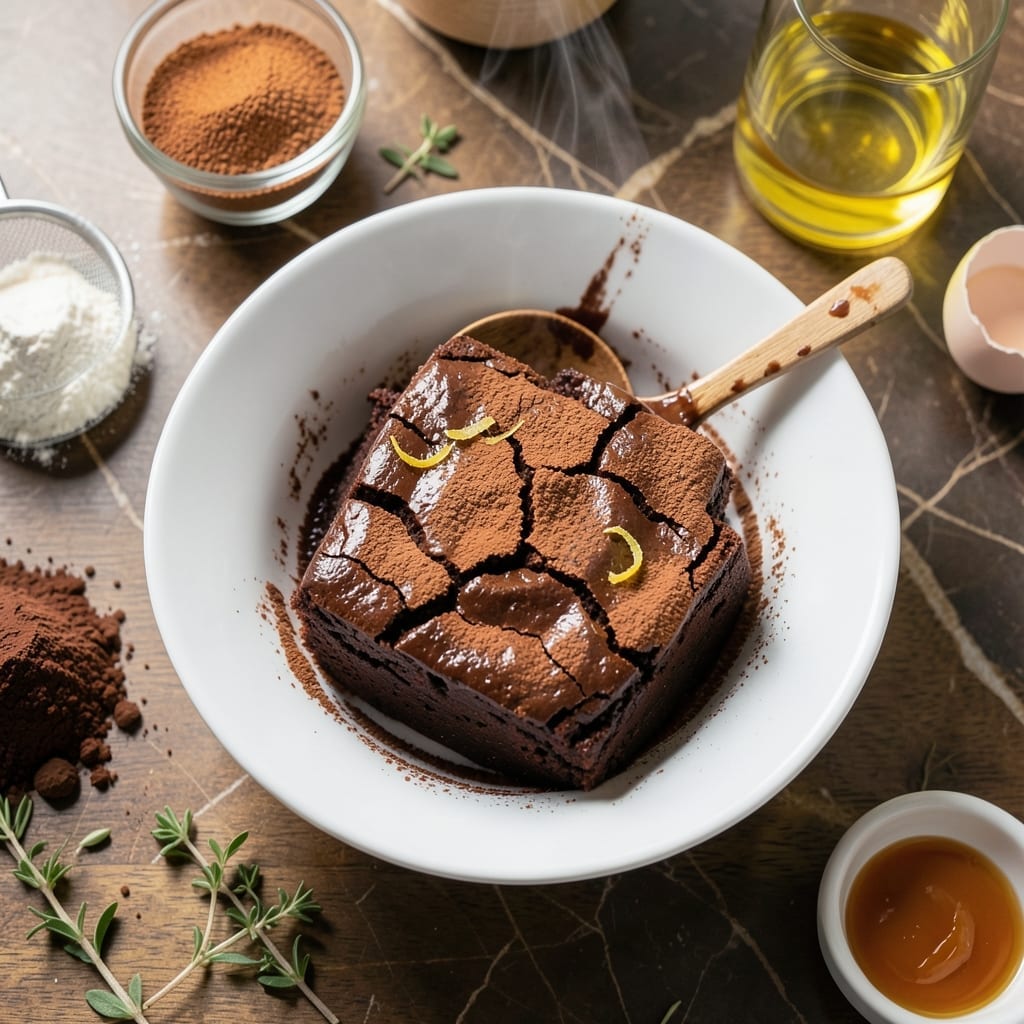
When you need a chocolate fix in minutes, this microwave brownie delivers fudgy richness without the wait. A simple batter comes together quickly in one bowl.
In just 5 minutes of cooking time, you’ll have dense, moist brownies with a crackly top. The results rival any oven-baked version, with none of the fuss.
Ingredients for Brownie Recipe in Microwave Oven
Pantry staples plus chocolate—this is what fudgy dreams are made of.
| Ingredient | Amount | Notes |
|---|---|---|
| All-Purpose Flour 🌾 | ¾ cup | Sifted for even texture |
| Granulated Sugar 🍚 | 1 cup | Fine white sugar preferred |
| Unsweetened Cocoa Powder 🍫 | ½ cup | Dutch-process for richness |
| Large Eggs 🥚 | 2 whole | Room temperature for best rise |
| Vegetable Oil 🫒 | ½ cup | Neutral flavor like canola |
| Vanilla Extract 🌿 | 1 tsp | Pure extract for best flavor |
| Salt 🧂 | ¼ tsp | Fine grain for even distribution |
| Baking Powder 🧂 | ½ tsp | Ensures proper rise in microwave |
| Semi-Sweet Chocolate Chips 🍫 | ½ cup | Optional for extra richness |
| Chopped Walnuts 🌰 | ½ cup | Toasted for crunch (optional) |
[recipe_ingredient_scaler]
The cocoa powder makes all the difference here. Hershey’s Special Dark or Ghirardelli Dutch-process are my go-tos for that deep, rich flavor. If you’re at the store, look for the unsweetened kind—sweetened versions throw off the balance. Most supermarkets keep it in the baking aisle. I always grab a new container if mine’s been open more than 6 months (it loses potency fast).
No Dutch-process? Regular unsweetened cocoa works fine, but add an extra 1 tbsp to compensate. Out of chocolate chips? Chop up a chocolate bar—same effect. For the oil, any neutral kind works (vegetable, canola, even melted coconut). Want it nut-free? Skip the walnuts or swap for butterscotch chips for a twist.
Mix dry ingredients first to avoid lumps. Batter keeps in the fridge for 24 hours if you want to prep ahead. Leftover brownies? They’ll stay fresh in an airtight container for 3-4 days—if they last that long.
Why You’ll Love This Recipe
- 5-Minute Fix: I mix the cocoa, sugar, and eggs right in the mug—no bowls, no fuss.
- Fudgy Perfection: That rich cocoa flavor with a crackly top? Exactly like my grandma’s, just faster.
- Midnight Craving: I’ve made these at 2 a.m. in my pajamas and no one judge me.
- Budget Friendly: Five pantry staples and a microwave—cheaper than a coffee shop brownie and twice as good.
Step-by-Step Instructions for Brownie Recipe in Microwave Oven
This method delivers rich, fudgy results with minimal effort and maximum speed.
Step 1: Combine Dry Ingredients
In a medium bowl, whisk together the 0.75 cup All-Purpose Flour, 0.5 cup Unsweetened Cocoa Powder, 0.25 tsp Salt, and 0.5 tsp Baking Powder until no lumps remain. Sifting the flour first ensures a smooth, even texture in your finished brownies.
This step creates the structural base. The cocoa powder provides deep chocolate flavor, while the baking powder gives just enough lift to prevent a dense, gummy result in the microwave.
Step 2: Mix Wet Ingredients Thoroughly
In a separate large bowl, combine the 1 cup Granulated Sugar, 0.5 cup Vegetable Oil, 2 whole Large Eggs, and 1 tsp Vanilla Extract. Whisk vigorously for 1-2 minutes until the mixture is pale and slightly thickened.
The sugar and oil create a glossy emulsion that traps air, contributing to a tender crumb. Room temperature eggs incorporate more evenly, preventing streaks in the batter.
Step 3: Combine Wet and Dry Mixtures
Gradually pour the dry ingredients into the wet mixture while folding gently with a silicone spatula. Stop mixing as soon as the flour disappears—overworking develops gluten, which makes brownies tough. The batter should be thick and glossy.
Fold in the 0.5 cup Semi-Sweet Chocolate Chips and 0.5 cup Chopped Walnuts if using. These add pockets of melted chocolate and a satisfying crunch to every bite.
Step 4: Microwave in Short Bursts
Pour the batter into a microwave-safe 8×8-inch dish lined with parchment paper. Smooth the top with the spatula. Microwave on high power for 4 minutes, then check the center.
If the top looks wet or a toothpick inserted in the center comes out with wet batter, continue microwaving in 30-second intervals until the edges pull slightly away from the dish and the center is just set. Total time typically ranges from 4½ to 6 minutes depending on your microwave’s wattage.
Step 5: Cool and Slice
Let the brownies cool in the dish for 10 minutes before lifting them out using the parchment paper. This resting period allows the structure to set properly. Cut into squares while still slightly warm for clean edges.
Serve warm for gooey texture or at room temperature for firmer, fudgier slices. The top should have a thin, paper-like crust, while the interior remains dense and moist with a rich chocolate flavor throughout.
Pro Tips For Making Brownie Recipe In Microwave Oven
- Use 60-Second Bursts: Microwave in 60-second intervals on high, checking after each—I learned this the hard way after pulling out a rubbery mess from overcooking. The edges should look set but the center still slightly soft.
- Sift the Cocoa: Always sift the unsweetened cocoa powder first, because those little clumps never fully dissolve in the batter. It takes 30 seconds and guarantees a smooth texture.
- Skip the Metal Bowl: Use a glass or ceramic dish, never metal, or you’ll get uneven cooking and possibly sparks. A 8×8-inch dish works perfectly for most microwave sizes.
- Add a Pinch of Salt: Throw in ¼ teaspoon of salt to balance the sweetness—sounds small, but it actually changes the outcome. My first batch without it tasted flat, and I never forgot it.
Pro Cooking Tips for brownie recipe in microwave oven
Dish Selection Matters
Always use an 8×8-inch microwave-safe dish—glass or ceramic works best. Avoid metal or dishes with metallic trim. I line mine with parchment paper for easy removal and cleanup.
Power Level Control
Most microwaves default to high power, which is ideal here. If yours has adjustable settings, stick with full power for even cooking. Lower wattage microwaves may need an extra 1-2 minutes. 🔥
Even Cooking Trick
Rotate the dish 180 degrees halfway through cooking to prevent hot spots. My first few attempts had uneven edges until I started doing this consistently.
Don’t Overmix
Fold wet and dry ingredients just until combined. Overmixing develops gluten, leading to cakey rather than fudgy results. The batter should look slightly lumpy—that’s perfect.
Testing Doneness
Insert a toothpick in the center after 4 minutes. It should come out with moist crumbs, not wet batter. If underdone, continue in 30-second bursts.
Resting is Key
Let your creation cool for 10 minutes before slicing. This allows the structure to set. Cutting too soon results in a gummy texture rather than clean, fudgy squares.
Nutrition Facts
Frequently Asked Questions
What dish size works best?
An 8×8-inch microwave-safe dish is ideal. Glass or ceramic distributes heat evenly. Always line with parchment for easy removal.
Why rotate the dish halfway?
Microwaves have hot spots. Rotating 180 degrees ensures even cooking and prevents burnt edges while the center stays undercooked.
How do I know when they’re done?
Insert a toothpick after 4 minutes. It should come out with moist crumbs, not wet batter. Add time in 30-second bursts if needed.
Can I use a different pan size?
Avoid it—smaller pans make thick, gummy centers while larger ones yield thin, dry results. Stick to 8×8-inch for perfect texture.

Trained in classic French technique but raised on slow-cooked ribs and spicy rubs, she blends culinary skill with smoke and soul.
- Recipe for Boneless Pork Chops in Cast Iron Skillet: Sear and Baste to Juicy Perfection - October 3, 2026
- Recipe for Boneless Cross Rib Roast: Slow-Roasted Beef with Herb Crust - October 3, 2026
- Hamburgers in Sauce Recipe Crock Pot: Slow-Cooked Savory Delight - October 3, 2026