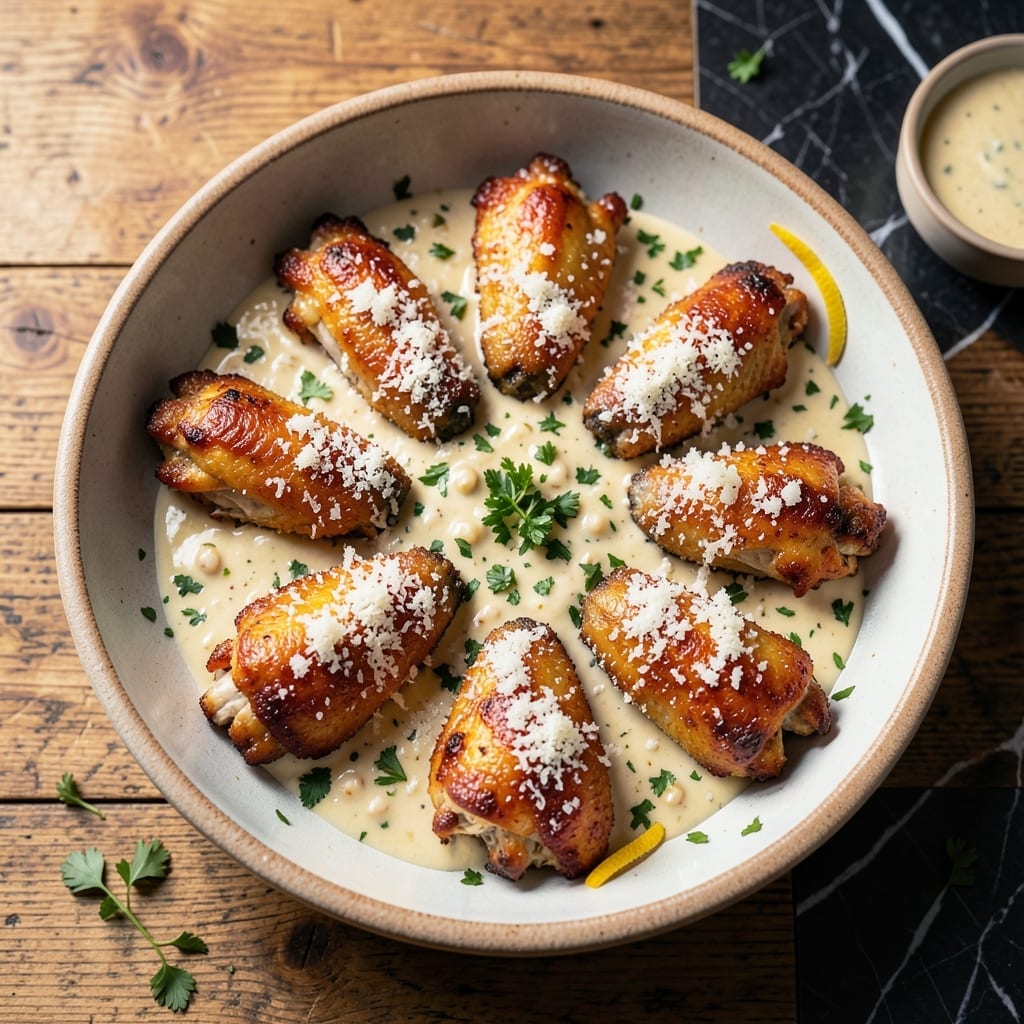
This restaurant-style chicken delivers the crispy texture and bold flavors you’d expect from a professional kitchen. I developed this method after years of perfecting my wing techniques at local BBQ competitions.
The secret lies in a two-step coating process that ensures maximum crunch and even seasoning. Each bite offers the perfect balance of parmesan richness and garlic intensity, just like your favorite wings joint.
You’ll achieve restaurant-quality results with simple ingredients and precise timing. The chicken emerges golden and crunchy on the outside, tender and juicy inside—exactly what you’re looking for.
Serve these as appetizers or a main dish with your favorite dipping sauces. The technique works for both wings and tenders.
Ingredients for Buffalo Wild Wings Parmesan Garlic Chicken
Pantry staples plus chicken wings make this restaurant-style dish shine with every crispy bite.
| Ingredient | Amount | Notes |
|---|---|---|
| Chicken Wings 🍗 | 2 lb | Split into drumettes and flats |
| Buttermilk 🥛 | 1 cup | Full-fat for tenderness |
| All-Purpose Flour 🌾 | 1 ½ cups | For initial dredge |
| Cornstarch 🌾 | ¼ cup | For extra crispiness |
| Garlic Powder 🧄 | 2 tbsp | Freshly ground preferred |
| Parmesan Cheese 🧀 | 1 cup | Freshly grated from block |
| Dried Parsley 🍃 | 2 tbsp | For coating color |
| Salt 🧂 | 1 ½ tsp | Kosher or sea salt |
| Black Pepper 🌶️ | 1 tsp | Freshly ground preferred |
| Paprika 🌶️ | 1 tsp | Smoked or sweet variety |
| Cayenne Pepper 🔥 | ¼ tsp | Adjust for heat preference |
| Unsalted Butter 🧈 | 6 tbsp | For sauce base |
| Minced Garlic 🧄 | 4 cloves | Freshly minced for sauce |
| Vegetable Oil 🫒 | 3 cups | For deep frying |
[recipe_ingredient_scaler]
The chicken is everything here. Air-chilled wings from Whole Foods give the crispiest skin, but any fresh wings work. Buttermilk is non-negotiable—full-fat for maximum tenderness (trust me on the full-fat version). For the Parmesan, grab a wedge from the deli and grate it fresh. Pre-grated gets clumpy and doesn’t melt right. The cornstarch is the secret to that competition-level crunch.
No buttermilk? Whole milk plus 1 tbsp lemon juice gets you close. Swap cornstarch for arrowroot powder at the same amount. Fresh out of Parmesan? Pecorino Romano at one-third the amount works. The cayenne can be skipped if you’re sensitive to heat, but the paprika is essential for that signature color. Trader Joe’s has great prices on spices if you’re restocking.
Fry the wings in batches—don’t crowd the pot. Keeps in the fridge for 3-4 days, but honestly they’re best straight out of the fryer. Reheat in a 400°F oven for 10 minutes to restore crispiness. The Parmesan wedge? Wrap in parchment, then foil. Good for weeks.
Why You’ll Love This Recipe
- No-Fuss Coating: The buttermilk dip and flour-cornstarch dredge come together fast—no fancy steps, just crispy results every time.
- Garlic Lover’s Dream: That parmesan-garlic dusting clings to each wing like it was made for it. Honestly, I lick my fingers before the first batch is even done.
- Feeds the Crew: I’ve served these at game nights and Sunday suppers alike. Even the picky eaters reach for seconds.
- Leftovers? Still Good: Cold wings keep their crunch, and a quick air-fryer zap brings them back to life—I’ll be real, they barely last that long.
Step-by-Step Instructions for Parmesan Garlic Chicken Wings
Here’s how to make restaurant-quality wings with crunchy coating and irresistible parmesan garlic flavor at home.
Step 1: Marinate the Chicken Wings in Buttermilk
Place the 2 lb Chicken Wings in a large bowl and pour over the 1 cup Buttermilk. I use full-fat buttermilk for maximum tenderness. Make sure all pieces are fully coated and submerged as much as possible.
Let the wings marinate in the refrigerator for at least 1 hour, or up to 4 hours for deeper flavor penetration. The buttermilk’s acidity breaks down proteins in the chicken, ensuring juicy, tender meat. Don’t skip this step—it’s the secret to that perfect texture.
Step 2: Create the Crispy Coating Mixture
In a large, shallow dish, whisk together the 1.5 cups All-Purpose Flour, 0.25 cup Cornstarch, 2 tbsp Garlic Powder, 1 cup Parmesan Cheese, 2 tbsp Dried Parsley, 1.5 tsp Salt, 1 tsp Black Pepper, 1 tsp Paprika, and 0.25 tsp Cayenne Pepper.
The cornstarch is what gives these wings their extra-crispy texture, while the parmesan adds that signature savory depth. I use freshly grated parmesan from a block for the best melt and flavor. The mixture should look like coarse sand with visible parmesan flecks.
Step 3: Dredge and Double-Coat the Wings
Remove the wings from the buttermilk, letting excess drip off for a moment, then dredge each piece thoroughly in the flour mixture. Press gently to ensure the coating adheres completely. Place the coated wings on a wire rack set over a baking sheet.
For maximum crispiness, I repeat the process: dip back in buttermilk, then back in the flour mixture for a second coat. This double-dredging creates that thick, craggy crust that stays crispy even after saucing. Let the coated wings rest for 10 minutes to help the coating set before frying.
Step 4: Deep-Fry to Golden Perfection
Heat the 3 cups Vegetable Oil in a large, heavy pot or deep fryer to 350°F. Use a thermometer for accuracy—this temperature ensures even cooking without burning the coating. Fry the wings in batches to avoid crowding, which would lower the oil temperature.
Fry for 8-10 minutes, turning occasionally, until the wings are deep golden brown and the internal temperature reaches 165°F. The coating should be crispy and the meat should pull away from the bone slightly. Drain on a wire rack or paper towels to maintain crispiness.
Step 5: Toss in Garlic Butter Sauce
In a large bowl, melt the 6 tbsp Unsalted Butter in the microwave or a small saucepan. Stir in the 4 cloves Minced Garlic and let it steep for 1-2 minutes until fragrant. The garlic should sizzle gently but not brown.
Add the hot wings to the garlic butter and toss thoroughly to coat every piece completely. The parmesan in the coating will soften slightly from the heat, creating a beautiful, flavorful crust. Serve immediately while hot and crispy, with extra parmesan and parsley for garnish if desired.
Pro Tips For Making Buffalo Wild Wings Parmesan Garlic Chicken
- Double Dredge Wings: After the buttermilk soak, dredge the wings in the flour-cornstarch mix, let them rest 5 minutes, then dredge again—this builds a thicker, crispier crust that holds the parmesan garlic coating better.
- Chill the Buttermilk: I learned this the hard way—using cold buttermilk (straight from the fridge) makes the coating cling tighter to the wings, so you get more of that garlicky crunch in every bite.
- Skip Crowded Frying: Resist the urge to dump all the wings in the oil at once; frying in batches at 375°F keeps the temperature steady and stops them from steaming into soggy disappointments.
- Toast the Garlic: Before tossing the wings, cook the garlic powder in the melted butter for 30 seconds—sounds weird, but it deepens the flavor and kills any raw bite in the seasoning.
Common Mistakes When Making Perfect Results
Skipping the Buttermilk Marinade
The buttermilk isn’t just for flavor—it tenderizes the meat and helps the coating adhere. I’ve seen people skip this step and end up with dry, bland chicken. Even 30 minutes makes a difference, but 1-4 hours is ideal for that competition-level juiciness. 💪
Overcrowding the Fryer
Frying too many wings at once lowers the oil temperature, leading to greasy, soggy results. I fry in batches with at least 2 inches of space between pieces. Use a deep-fry thermometer to maintain 350°F—this ensures even cooking and maximum crispiness.
Using Pre-Grated Parmesan
Pre-grated cheese contains anti-caking agents that prevent proper melting. I always grate 1 cup Parmesan fresh from a block for the best texture and flavor. The difference is night and day—fresh parmesan creates that perfect, gooey crust when combined with the garlic butter.
Skipping the Double-Dredge
That thick, craggy coating you love comes from double-dredging. I press the wings firmly into the flour mixture during both dips to ensure full coverage. The 10-minute rest after coating helps the crust set, preventing it from sliding off during frying.
Not Draining Properly
Draining on paper towels can make the wings soggy. I use a wire rack set over a baking sheet to allow air circulation on all sides. This keeps the coating crispy while excess oil drips away. The rack also makes it easier to transfer wings to the garlic butter sauce.
Burning the Garlic
Garlic burns easily and turns bitter. I melt the 6 tbsp Unsalted Butter first, then add the 4 cloves Minced Garlic off the heat. Let it steep for 1-2 minutes until fragrant but not browned. This preserves the sweet, aromatic flavor that makes this dish special.
Nutrition Facts
Frequently Asked Questions
Can I bake these instead of frying?
Yes! Bake at 400°F for 40-45 minutes, flipping halfway. Use a wire rack on a baking sheet for crispiness. The texture won’t be identical to frying but still delicious.
Why use both buttermilk and a flour coating?
The buttermilk tenderizes the meat while the flour creates a crispy crust. Together, they ensure juicy interior and crunchy exterior in every bite.
How do I keep the coating from falling off?
Double-dredge and let rest for 10 minutes before cooking. Press the coating firmly onto each piece. This helps it adhere during frying or baking.
Can I make this ahead of time?
Coat the wings the night before and refrigerate. Fry just before serving for best results. Reheated wings lose crispiness but still taste great.

Trained in classic French technique but raised on slow-cooked ribs and spicy rubs, she blends culinary skill with smoke and soul.
- Recipe for Boneless Pork Chops in Cast Iron Skillet: Sear and Baste to Juicy Perfection - October 3, 2026
- Recipe for Boneless Cross Rib Roast: Slow-Roasted Beef with Herb Crust - October 3, 2026
- Hamburgers in Sauce Recipe Crock Pot: Slow-Cooked Savory Delight - October 3, 2026