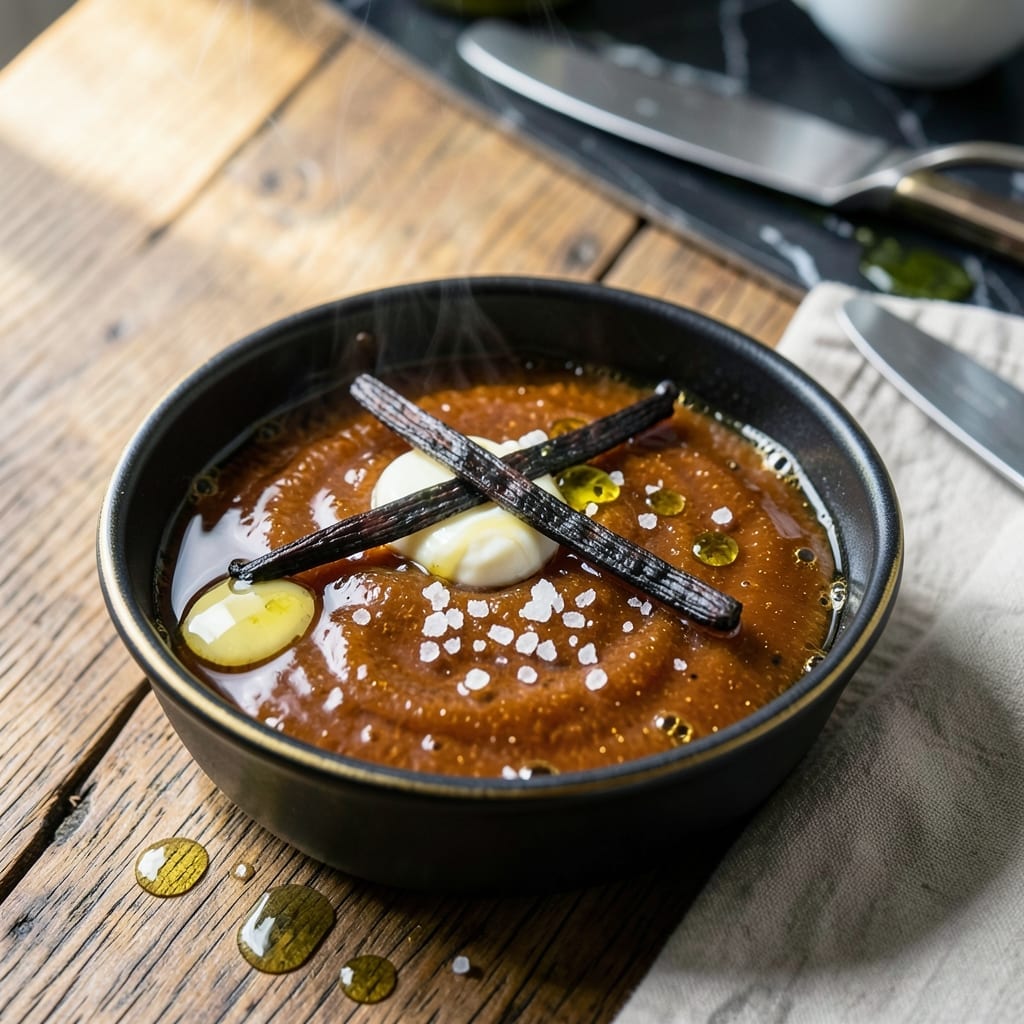
This burnt honey recipe transforms ordinary honey into a deeply complex, caramelized sauce with minimal effort. The process intensifies natural sweetness while adding smoky, bittersweet notes that elevate both sweet and savory dishes.
I developed this method after discovering how controlled heat could unlock new dimensions in honey’s flavor profile. The key is patience—allowing the honey to darken gradually without burning creates that perfect balance of caramelized richness.
Use this versatile condiment to glaze meats, drizzle over cheeses, or enhance desserts. Its concentrated flavor means a little goes a long way, making it a valuable addition to any cook’s repertoire.
Store in an airtight container at room temperature for up to a month. The flavor deepens slightly over time, becoming even more nuanced.
Ingredients for Burnt Honey
Eight ingredients transform honey into a complex, caramelized sauce for any dish.
| Ingredient | Amount | Notes |
|---|---|---|
| Raw Honey 🍯 | 1 cup | Unfiltered, local preferred |
| Unsalted Butter 🧈 | 2 tbsp | European-style for richness |
| Baking Soda 🧂 | ¼ tsp | Balances acidity and deepens color |
| Vanilla Bean 🌿 | 1 whole | Split and scraped (or 1 tsp extract) |
| Sea Salt 🧂 | ½ tsp | Flaky variety preferred |
| Lemon Juice 🍋 | 1 tsp | Freshly squeezed for brightness |
| Heavy Cream 🥛 | ¼ cup | Optional, for creamier texture |
| Black Pepper 🌶️ | ¼ tsp | Freshly cracked for depth |
[recipe_ingredient_scaler]
The honey quality is non-negotiable here. Local raw honey from farmers markets offers the most nuanced flavor, but any unfiltered variety works. Avoid pasteurized supermarket honey—it lacks depth. The butter should be European-style (higher fat content) for a richer finish. Plugrá or Kerrygold are excellent choices if available.
No vanilla bean? Pure vanilla extract at one-third the amount works, but the seeds add visual appeal. Skip the cream for a dairy-free version (the honey caramelizes beautifully alone). If you’re worried about crystallization, a pinch of corn syrup (1 tsp) can help stabilize it. The lemon juice isn’t just for acidity—it prevents the honey from seizing up as it darkens.
This keeps 1 month at room temperature in a sealed jar. The flavor evolves—deeper and more complex after a week. If it thickens too much, warm the jar in a bowl of hot water (don’t microwave).
Why You’ll Love This Recipe
- 5-Minute Magic: I can make this while my coffee brews—just melt, stir, and let the honey caramelize into something extraordinary.
- Deep Caramel Notes: The burnt honey and vanilla bean create this rich, toasty sweetness that’s way more complex than regular caramel.
- Drizzle or Dip: Honestly, I’ve used it on everything from ice cream to roasted veggies to my morning toast.
- Pantry Staples: No special trips to the store—just honey, butter, and a few things I always have on hand.
Step-by-Step Instructions for Burnt Honey
Master this controlled caramelization process for complex, bittersweet depth in your cooking.
Step 1: Combine and Heat the Base Ingredients
In a heavy-bottomed saucepan, combine the 1 cup Raw Honey with the 2 tbsp Unsalted Butter over medium heat. Choose a pan slightly larger than needed to prevent boiling over as the mixture expands.
The butter will melt first, creating a glossy surface. Stir frequently with a silicone spatula to distribute heat evenly. You’ll notice the honey begin to darken at the edges first—this is your visual cue that caramelization has started.
Step 2: Introduce Aromatics and Acidity
Once the mixture reaches a deep amber color (after about 8-10 minutes), add the 1 tsp Lemon Juice and the seeds from the 1 whole Vanilla Bean (or 1 tsp extract). The lemon juice will cause vigorous bubbling as it reacts with the hot sugar.
Stir constantly now to prevent hot spots from burning. The vanilla seeds will infuse the honey with floral depth, while the acidity from the lemon juice balances the sweetness and accelerates the caramelization process.
Step 3: Deepen Color and Flavor with Baking Soda
When the mixture turns a rich copper color (about 2-3 minutes after adding the lemon juice), sprinkle in the 0.25 tsp Baking Soda. This will cause immediate foaming as carbon dioxide is released—this reaction creates a lighter, more complex structure in the finished product.
Continue stirring as the foam subsides and the color deepens to a dark mahogany. The baking soda also helps neutralize some of the honey’s natural acidity, creating a more rounded flavor profile.
Step 4: Finish with Cream and Seasonings
Remove the pan from heat and carefully stir in the 0.25 cup Heavy Cream. The mixture will bubble vigorously again as the cold liquid meets the hot caramel. Return to low heat and stir until smooth.
Add the 0.5 tsp Sea Salt and 0.25 tsp Black Pepper, stirring to incorporate. The salt enhances all the caramelized flavors, while the pepper adds a subtle warmth that complements the honey’s depth.
Cook for an additional 1-2 minutes until slightly thickened. The finished sauce should coat the back of a spoon with a glossy sheen.
Step 5: Cool and Store
Transfer the burnt honey to a heatproof jar or bowl and let cool to room temperature. The mixture will thicken slightly as it cools, developing a luxurious, pourable consistency perfect for drizzling or glazing.
Store in an airtight container in the refrigerator for up to 2 weeks. The flavors will continue to develop over time, becoming more complex and nuanced with each passing day.
Pro Tips For Making Burnt Honey
- Watch the Caramel: Burnt honey goes from golden to bitter in seconds—pull it off the heat the moment it hits a deep amber, around 3-4 minutes on medium-high.
- Use Raw Honey: I learned this the hard way—processed honey burns unevenly and lacks depth; raw honey caramelizes better and adds complexity.
- Skip the Stirring: Resist the urge to stir once it starts bubbling; swirling the pan gently instead prevents crystallization and keeps it smooth.
- Add Baking Soda Last: Sounds weird, but it works: sprinkle the baking soda in after removing from heat—it’ll foam dramatically but won’t overflow your pan.
Troubleshooting Perfect Results
Too Dark or Bitter
If your honey turns black or tastes acrid, you’ve crossed into burnt territory. Pull the pan off heat immediately and transfer to a cool bowl to halt cooking. Next time, reduce heat to medium-low and stir more frequently. 🔥
Grainy Texture
Crystallization happens when honey cools too quickly. Return the mixture to low heat with 1-2 tsp water and stir until smooth. To prevent this, avoid refrigerating until completely cooled.
Separated Mixture
If butter or cream separates, remove from heat and whisk vigorously. A pinch of corn syrup (1 tsp) can help emulsify. Always temper the cream by warming it slightly before adding to hot honey.
Thin Consistency
For thicker burnt honey, simmer 1-2 minutes longer after adding cream. If it’s still too thin, mix ½ tsp cornstarch with 1 tsp water and stir in off-heat.
Weak Flavor
Underdeveloped flavor means it needed more time. Extend cooking by 2-3 minutes at the deep amber stage. Using local raw honey from farmers markets boosts natural complexity.
Storage Issues
If mold appears, discard immediately. For longer storage, process in a water bath for 10 minutes to seal. The flavor peaks after 1 week at room temperature. 💡
Nutrition Facts
Frequently Asked Questions
How long does it take to caramelize?
The process takes about 10-12 minutes total. The honey darkens gradually, with the most critical phase being the last 2-3 minutes when it turns deep copper. Stir constantly during this time.
Can I use pasteurized honey?
Technically yes, but raw unfiltered honey yields superior flavor. Pasteurized lacks the complex floral notes that deepen during caramelization. For best results, source from local farmers markets.
Why does it foam when adding baking soda?
The baking soda creates a chemical reaction that releases carbon dioxide, causing temporary foaming. This helps create a lighter texture and deeper color. The foam will subside as you continue stirring.
What if it crystallizes after cooling?
Gently reheat with 1-2 tsp water over low heat while stirring. To prevent this, let it cool completely before refrigerating. Never microwave to avoid hot spots.

Trained in classic French technique but raised on slow-cooked ribs and spicy rubs, she blends culinary skill with smoke and soul.
- Recipe for Boneless Pork Chops in Cast Iron Skillet: Sear and Baste to Juicy Perfection - October 3, 2026
- Recipe for Boneless Cross Rib Roast: Slow-Roasted Beef with Herb Crust - October 3, 2026
- Hamburgers in Sauce Recipe Crock Pot: Slow-Cooked Savory Delight - October 3, 2026