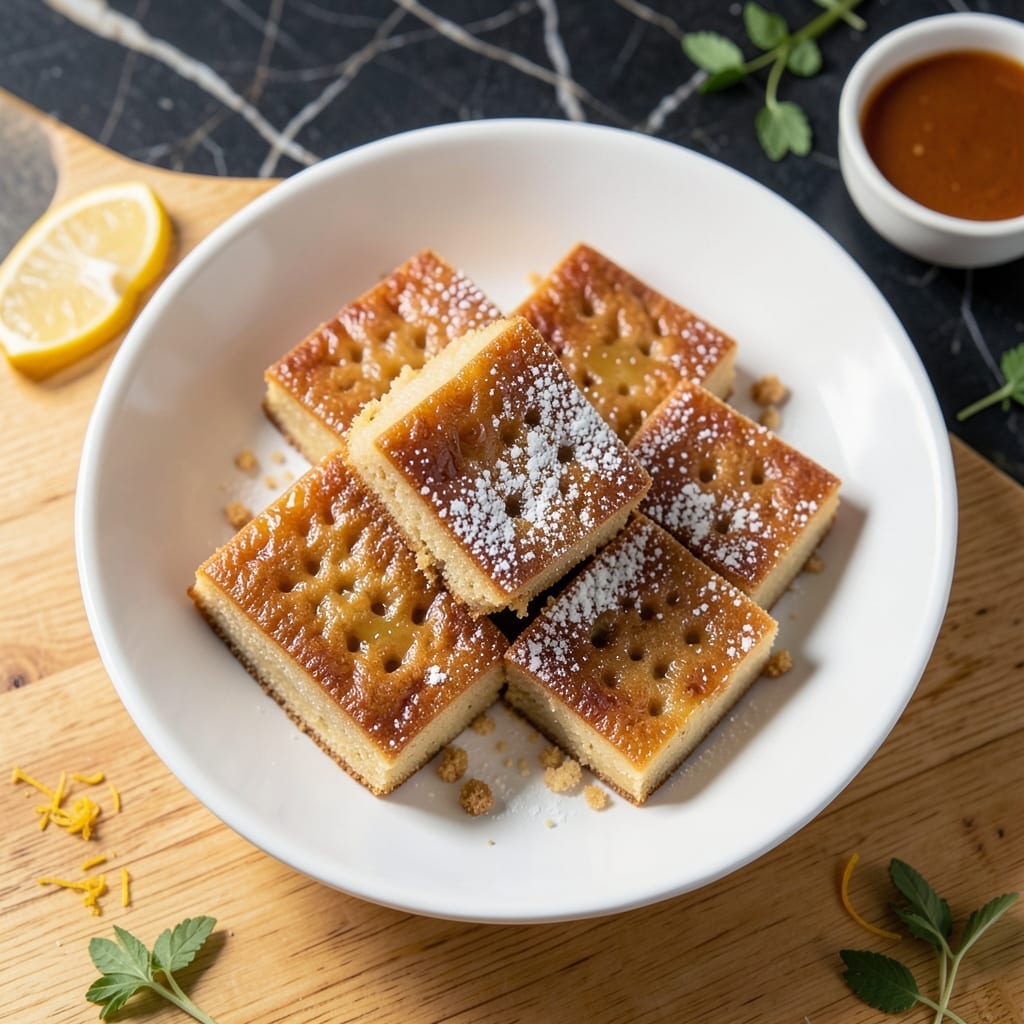
This Hawaiian-inspired treat delivers a unique texture that’s both chewy and tender, with rich coconut and butter flavors in every bite.
I’ve perfected this method to ensure a golden crust outside while keeping the inside soft and moist, using simple ingredients that come together beautifully.
Ingredients for Butter Mochi Recipe Hawaii
Simple ingredients deliver that signature chewy texture and rich coconut flavor everyone loves.
| Ingredient | Amount | Notes |
|---|---|---|
| Mochiko Sweet Rice Flour 🌾 | 1 lb | Box, sifted for smoothness |
| Granulated Sugar 🍚 | 1 ½ cups | Fine white sugar preferred |
| Unsalted Butter 🧈 | ½ cup | Melted and cooled slightly |
| Large Eggs 🥚 | 4 whole | Room temperature for even mixing |
| Coconut Milk 🥥 | 1 can | Full-fat for richness |
| Vanilla Extract 🌿 | 2 tsp | Pure vanilla for best flavor |
| Shredded Coconut 🥥 | 1 cup | Sweetened or unsweetened |
| Baking Powder 🧂 | 1 tsp | Fresh for best rise |
| Salt 🧂 | ¼ tsp | Balances sweetness |
| Almond Extract 🌰 | ¼ tsp | Optional, enhances coconut flavor |
[recipe_ingredient_scaler]
The Mochiko flour is non-negotiable—it’s what gives this its signature chewy texture. You’ll find it in the Asian aisle of Walmart or H-Mart, or order online if your local store doesn’t stock it. Use the full-fat coconut milk (like Thai Kitchen or Native Forest); the lite version just won’t cut it. Butter should be melted but not hot when you mix it in—cool it for 5 minutes first (worth the extra minute).
No Mochiko? Don’t bother—regular rice flour won’t work here. Swap the shredded coconut for macadamia nuts if you want a crunchier texture. The almond extract is optional, but it really boosts the island flavor. If you’re out of vanilla, coconut extract at half the amount works in a pinch, but the vanilla adds depth. Eggs must be room temp—cold ones can make the batter clumpy.
Store leftovers in an airtight container at room temp for 3 days, or freeze for up to 3 months. These actually taste better the next day once the flavors meld. Reheat briefly in the microwave to soften—just 10-15 seconds (don’t skip this part).
Why You’ll Love This Recipe
- I’ll be real: it tastes even better the next day. The flavors deepen, and it stays soft for days in an airtight container.
- One Bowl Wonder: I just dump everything in a single bowl, whisk, and pour—no fancy techniques, just Mochiko flour, coconut milk, and butter doing all the work.
- Coconut-Kissed Bliss: The coconut milk adds this subtle tropical sweetness that pairs ridculously well with the rich butter and chewy mochi texture.
- Feeds a Crowd: I bring this to potlucks and it’s always the first thing gone. Honestly, it’s the only dessert I trust for a big group.
Step-by-Step Instructions for Butter Mochi
This traditional Hawaiian treat comes together with simple mixing and a single bake.
Step 1: Prepare the Wet Ingredients
In a large mixing bowl, whisk together the 0.5 cup Unsalted Butter (melted and cooled slightly) with the 1.5 cups Granulated Sugar until smooth and fully combined. The mixture should have a slightly grainy texture from the sugar, which is normal at this stage.
Add the 4 whole Large Eggs one at a time, whisking well after each addition until the mixture is pale and slightly thickened. Then stir in the 1 can Coconut Milk, 2 tsp Vanilla Extract, and 0.25 tsp Almond Extract. The coconut milk adds richness, while the extracts enhance the tropical flavor profile.
Step 2: Combine Dry Ingredients
In a separate bowl, sift together the 1 lb Mochiko Sweet Rice Flour, 1 tsp Baking Powder, and 0.25 tsp Salt. Sifting the flour ensures a smooth batter without lumps, which is crucial for the signature chewy texture of this dish.
Gradually add the dry ingredients to the wet mixture, stirring just until combined. Avoid overmixing, as this can make the final product dense. The batter will be thick but pourable, similar to pancake batter.
Step 3: Fold in Shredded Coconut
Gently fold in the 1 cup Shredded Coconut using a spatula, ensuring it is evenly distributed throughout the batter. The coconut adds texture and reinforces the island-inspired flavor. If using sweetened shredded coconut, you may notice a slightly sweeter taste in the finished product.
Let the batter rest for 5 minutes to allow the flour to hydrate fully. During this time, preheat your oven to 350°F to ensure it reaches the proper temperature before baking.
Step 4: Bake Until Golden and Set
Pour the batter into a greased 9×13-inch baking pan, spreading it evenly with the spatula. Bake in the preheated oven for 50-60 minutes, or until the top is golden brown and a toothpick inserted into the center comes out clean or with a few moist crumbs.
The edges will pull away slightly from the pan when done. If the top browns too quickly, tent the pan loosely with aluminum foil to prevent over-browning while the center finishes cooking.
Step 5: Cool and Serve
Remove the pan from the oven and let the mochi cool in the pan for 10 minutes. Then, transfer it to a wire rack to cool completely. This cooling step is essential to allow the texture to set properly.
Once fully cooled, cut into squares and serve. The mochi will have a slightly crisp top with a dense, chewy interior. Store leftovers in an airtight container at room temperature for up to 3 days, or refrigerate for up to 1 week.
Pro Tips For Making Butter Mochi Recipe Hawaii
- Melt Butter Slowly: Use low heat when melting the butter to prevent it from separating—I learned this the hard way after my first batch had an oily layer.
- Whisk Eggs Thoroughly: Beat the eggs until they’re pale and frothy, about 2-3 minutes, to guarantee a lighter texture in the finished mochi.
- Skip Cold Coconut Milk: Let the coconut milk come to room temperature first, or it’ll cause the melted butter to clump up and ruin the batter.
- Bake Until Cracked: Don’t pull it out too early—wait for the top to crack and turn golden, usually around 50-55 minutes, for that classic chewy crust.
Essential Equipment for This Dish
Essential Baking Pan
A 9×13-inch baking pan is non-negotiable for this recipe—it provides the perfect thickness for that signature chewy texture. I prefer light-colored metal pans for even baking. Glass works too but may require 5-10 extra minutes of baking time. 💡
Mixing Bowls
Use two medium bowls: one for wet ingredients and one for dry. I recommend stainless steel for durability and easy cleaning. A whisk is essential for smoothing out the sugar-butter mixture before adding eggs.
Spatula Matters
A silicone spatula ensures you scrape every bit of precious batter into your pan. I like the OXO Good Grips brand—it’s heat-resistant and flexible enough to fold in the coconut without overmixing.
Toothpick Test
Don’t skip the toothpick test at 50 minutes—it’s the only reliable way to check doneness. The center should come out clean or with a few moist crumbs. If it’s wet, give it another 5-10 minutes.
Cooling Rack
Transferring to a wire cooling rack after 10 minutes prevents soggy bottoms. This step is crucial for achieving that perfect balance of crisp edges and chewy center. I learned this the hard way after my first few batches stuck. 🌟
Optional Parchment
For easy removal, line your pan with parchment paper before greasing. It’s not traditional, but I’ve found it prevents sticking, especially with glass pans. Just leave an overhang on two sides for simple lifting.
Nutrition Facts
Frequently Asked Questions
Can I use regular rice flour instead of mochiko?
No, Mochiko is essential for the signature chewy texture. Regular rice flour won’t work the same way.
Why did my mochi turn out dense?
Overmixing the batter can make it dense. Stir dry ingredients just until combined. Also, ensure your baking powder is fresh.
How do I store leftovers?
Keep in an airtight container at room temp for 3 days or freeze for up to 3 months. Reheat briefly to soften.
Can I add other mix-ins?
Yes! Try macadamia nuts or chocolate chips. Fold them in with the coconut for extra flavor and texture.

Trained in classic French technique but raised on slow-cooked ribs and spicy rubs, she blends culinary skill with smoke and soul.
- Recipe for Boneless Pork Chops in Cast Iron Skillet: Sear and Baste to Juicy Perfection - October 3, 2026
- Recipe for Boneless Cross Rib Roast: Slow-Roasted Beef with Herb Crust - October 3, 2026
- Hamburgers in Sauce Recipe Crock Pot: Slow-Cooked Savory Delight - October 3, 2026