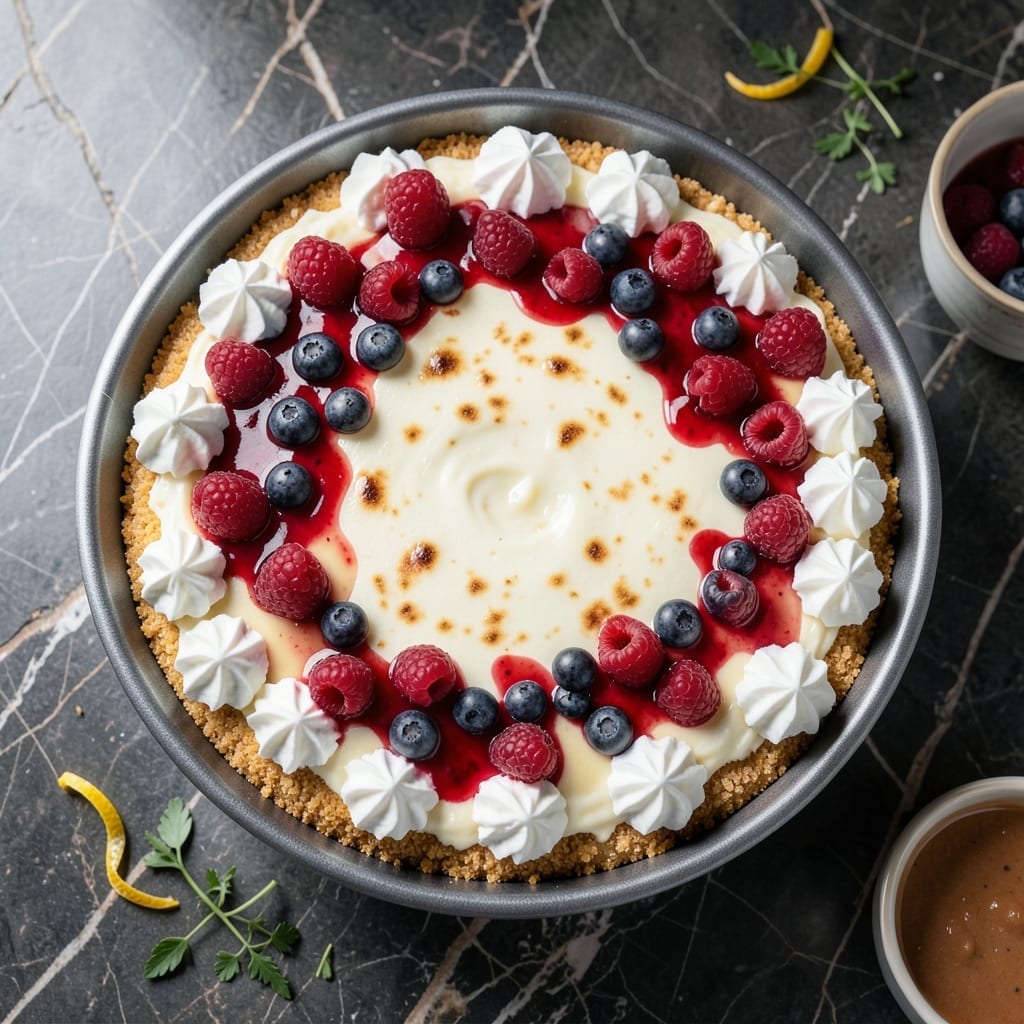
This buttermilk cheesecake delivers a velvety texture with a subtle tang that sets it apart from traditional versions. I developed this recipe after realizing that buttermilk creates a lighter, creamier filling that doesn’t overwhelm with sweetness.
The secret lies in the balance—cream cheese provides richness while buttermilk adds a gentle acidity that brightens each bite. Baking at a low temperature ensures the center stays smooth without cracks, and a water bath guarantees even cooking.
What emerges from the oven is a dessert with a delicate crumb and a flavor that lingers. The tang from the buttermilk cuts through the richness, making it satisfying without being heavy.
Serve chilled for the best consistency. Here’s how to make it.
Ingredients for Buttermilk Cheesecake
Rich cream cheese and tangy buttermilk create this luxurious dessert with a velvety finish.
| Ingredient | Amount | Notes |
|---|---|---|
| Cream Cheese 🧀 | 2 lb | Full-fat, room temperature |
| Granulated Sugar 🍚 | 1 ¼ cups | Divided for filling and crust |
| Buttermilk 🥛 | 1 cup | Full-fat for best texture |
| Large Eggs 🥚 | 4 whole | Room temperature, separated |
| Vanilla Extract 🌿 | 2 tsp | Pure, not imitation |
| All-Purpose Flour 🌾 | ¼ cup | For structural stability |
| Graham Cracker Crumbs 🍪 | 1 ½ cups | For the crust base |
| Unsalted Butter 🧈 | ½ cup | Melted for crust binding |
| Salt 🧂 | ½ tsp | Fine sea salt preferred |
| Sour Cream 🥛 | ½ cup | Full-fat for creaminess |
| Lemon Zest 🍋 | 1 tsp | Freshly grated for brightness |
[recipe_ingredient_scaler]
The cream cheese must be full-fat—Philadelphia or Organic Valley deliver the smoothest texture. Buttermilk is non-negotiable for that signature tang; Cultured buttermilk from Whole Foods has consistent quality. Room temperature ingredients blend more evenly, so pull them out an hour before starting. The graham cracker crumbs can be store-bought, but homemade from scratch gives better control over sweetness.
No buttermilk? Mix 1 cup milk with 1 tbsp lemon juice and let sit 10 minutes. For a gluten-free crust, swap graham crumbs for almond flour or gluten-free cookies. Sour cream can be replaced with Greek yogurt at the same ratio, though the texture will be slightly denser. The lemon zest is optional but highly recommended—it brightens the richness without adding sweetness.
Store the cheesecake in the fridge for up to 5 days, tightly covered. Freeze slices for 3 months (thaw overnight in the fridge). The crust stays crispest if you slice with a hot knife—dip it in hot water and wipe dry between cuts.
Why You’ll Love This Recipe
- Mix and Bake: Honestly, it’s just cream cheese, sugar, buttermilk, eggs, and vanilla—whisk and pour, no fancy steps.
- Tangy Sweetness: The buttermilk gives it that subtle tang that cuts through the rich cream cheese perfectly.
- Dinner Party Hero: I’ve served this for birthdays and potlucks, and it’s always the first thing to disappear.
- Stays Fresh: Leftovers? They taste even better the next day, and this keeps beautifully for four days in the fridge.
Step-by-Step Instructions for Buttermilk Cheesecake
Achieve that signature velvety texture and tangy depth with this precise, professional method.
Step 1: Prepare the Graham Cracker Crust
Preheat your oven to 350°F. Combine the 1.5 cups graham cracker crumbs with the 0.5 cup melted unsalted butter and 0.25 cup granulated sugar in a bowl. The mixture should resemble wet sand when pressed between your fingers.
Press this firmly into the bottom of a 9-inch springform pan, ensuring an even layer. Use the bottom of a glass to compact it tightly—this prevents crumbling when you serve it. Bake for 8-10 minutes until the edges are just lightly golden. Set aside to cool while you prepare the filling.
Step 2: Mix the Cheesecake Filling
In a stand mixer with the paddle attachment, beat the 2 lb cream cheese on medium speed until completely smooth, about 2-3 minutes. Scrape the bowl frequently to prevent lumps. Gradually add the remaining 1 cup granulated sugar and continue beating for another 2 minutes until light and fluffy.
Add the 4 whole large eggs, one at a time, mixing just until each is incorporated. Over-beating at this stage introduces too much air, which can cause cracks. Fold in the 1 cup buttermilk, 0.5 cup sour cream, 2 tsp vanilla extract, 0.25 cup all-purpose flour, 0.5 tsp salt, and 1 tsp lemon zest by hand using a spatula. The batter should be smooth but not aerated.
Step 3: Bake in a Water Bath
Wrap the springform pan tightly in heavy-duty aluminum foil to prevent water seepage. Pour the filling over the cooled crust and smooth the top with a spatula. Place the pan in a larger roasting pan and fill the outer pan with hot water until it reaches halfway up the sides of the springform pan.
Bake at 325°F for 50-60 minutes. The edges should be set, but the center should still have a slight wobble when gently shaken. Turn off the oven and crack the door open 1 inch. Let the cheesecake cool inside for 1 hour to prevent sudden temperature changes that cause cracks.
Step 4: Chill and Set
Remove the cheesecake from the oven and water bath, then run a thin knife around the edge to loosen it from the pan. This helps prevent cracking as it cools. Let it cool to room temperature on a wire rack, about 1-2 hours.
Cover loosely with plastic wrap and refrigerate for at least 6 hours, or preferably overnight. The buttermilk tang will mellow slightly as it chills, creating a balanced, creamy texture. Serve cold with your choice of toppings, or enjoy it plain to appreciate the subtle tang and rich creaminess.
Pro Tips For Making Buttermilk Cheesecake
- Room Temp Cream Cheese: Pull the cream cheese out 2 hours before baking—lumps are the enemy of smooth cheesecake. I learned this the hard way after my first three tries came out grainy.
- Low And Slow: Bake at 325°F, not hotter. After burning two cheesecakes at 350°F, I finally realized the edges cook faster than the center at higher temps.
- Skip Cold Buttermilk: Let the buttermilk sit on the counter for 10 minutes before mixing—cold liquid can make the batter curdle. Sounds weird, but it works.
- Water Bath Always: Wrap the springform pan in foil and bake in a water bath. My grandmother swore by this, and she was right: no cracks, ever.
Make-Ahead Tips for This Recipe
Overnight Prep
The filling can be mixed the night before and stored in the fridge. Just give it a quick stir before pouring into the crust. This actually improves the texture as the flavors meld. I often prep the crust and filling separately, then assemble in the morning. 💡
Crust Ahead
Bake the graham cracker crust up to 2 days ahead and store it at room temperature in the springform pan, tightly wrapped in plastic. This saves time on baking day and ensures a crisp base. The crust stays fresh and ready for the filling when you are.
Bake and Cool
If you bake the cheesecake a day early, cool it completely, then refrigerate overnight. The flavors deepen and the texture becomes even creamier. Just be sure to let it sit at room temperature for 20-30 minutes before serving for the best consistency.
Freezing Slices
Slice the chilled cheesecake and wrap individual pieces in plastic wrap, then aluminum foil. They freeze well for up to 3 months. Thaw overnight in the fridge. This is perfect for unexpected guests or portion control. ❄️
Topping Prep
Prepare fruit compotes or sauces up to 3 days ahead and store them in airtight containers in the fridge. Warm slightly before serving. Fresh berries can be washed and stored the day before, but add them just before serving to keep them vibrant.
Nutrition Facts
Frequently Asked Questions
Can I use low-fat cream cheese instead?
No, full-fat cream cheese is essential for the rich, velvety texture. Low-fat versions contain more moisture and air, which can lead to a grainy or dense result. Stick with full-fat for best results.
Why does my cheesecake crack on top?
Cracking usually happens from overmixing the batter or rapid temperature changes. Always mix just until combined and let it cool gradually in the turned-off oven with the door slightly open for 1 hour.
How do I know when it’s done baking?
The edges should be set, but the center should still have a slight wobble. It will firm up completely during the cooling process. Overbaking leads to dryness.
Can I make this without a water bath?
You can, but the water bath helps regulate the oven temperature and prevents cracks. Without it, check for doneness 10 minutes earlier and expect a slightly denser texture.

Trained in classic French technique but raised on slow-cooked ribs and spicy rubs, she blends culinary skill with smoke and soul.
- Recipe for Boneless Pork Chops in Cast Iron Skillet: Sear and Baste to Juicy Perfection - October 3, 2026
- Recipe for Boneless Cross Rib Roast: Slow-Roasted Beef with Herb Crust - October 3, 2026
- Hamburgers in Sauce Recipe Crock Pot: Slow-Cooked Savory Delight - October 3, 2026