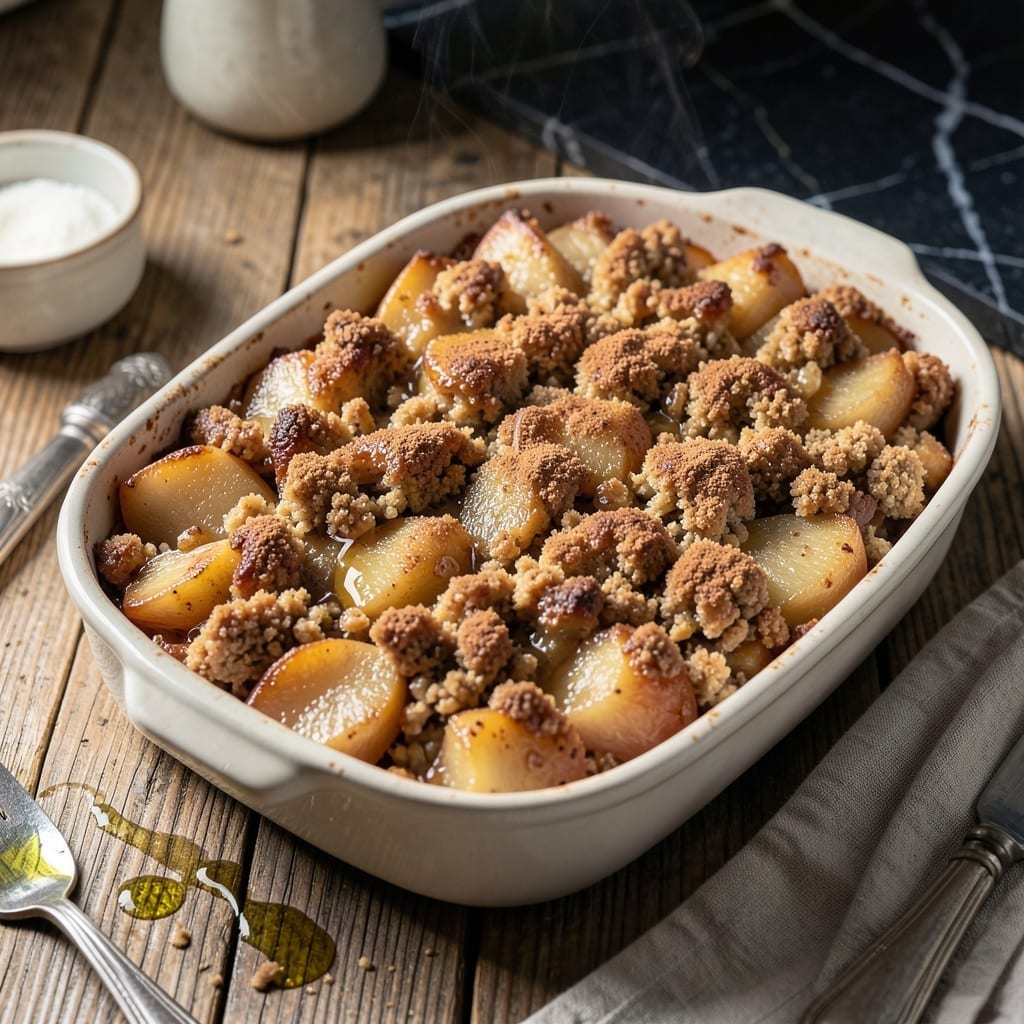
Transform those canned pears from pantry staple to star ingredient with these creative ideas. I’ve developed foolproof ways to turn them into desserts and dishes that taste anything but canned.
From quick tarts to savory pairings, these methods deliver restaurant-quality results using what you already have on hand. No special skills or equipment required.
Ingredients for Canned Pears Recipe Ideas
Pantry pears plus a few staples become restaurant-worthy desserts in no time.
| Ingredient | Amount | Notes |
|---|---|---|
| Canned Pear Halves 🍐 | 2 cans | In light syrup or juice, drained |
| All-Purpose Flour 🌾 | 1 ½ cups | Unbleached preferred for texture |
| Granulated Sugar 💧 | ½ cup | Organic or raw for depth |
| Vegan Butter 🧈 | ½ cup | Cold, cubed for flakiness |
| Rolling Oats 🌾 | ½ cup | Old-fashioned, not instant |
| Ground Cinnamon 🌿 | 1 tsp | Ceylon if available for aroma |
| Vanilla Extract 🌿 | 1 tsp | Pure vanilla, not imitation |
| Lemon Juice 🍋 | 1 tbsp | Freshly squeezed for brightness |
| Maple Syrup 🍁 | ¼ cup | Grade A or B for richness |
| Chopped Walnuts 🥜 | ½ cup | Lightly toasted for crunch |
| Coconut Milk 🥥 | ½ cup | Full-fat for creaminess |
| Cornstarch 🌾 | 1 tbsp | For thickening glaze |
| Sea Salt 🧂 | ¼ tsp | Fine grain for even distribution |
[recipe_ingredient_scaler]
The pears are the star here, so drain and pat them dry—excess syrup makes the crust soggy. I grab Del Monte or Libby’s at the grocery store (the ones in juice, not heavy syrup). For the flour, King Arthur is my go-to for consistent texture. The vegan butter needs to stay cold until you cut it into the flour, so chill your mixing bowl too (worth the extra minute).
No walnuts? Pecans or almonds work just as well—just toast them first. Swap the maple syrup for agave nectar at a one-to-one ratio if that’s what you’ve got. Fresh pears can replace canned (use 4 ripe but firm ones), but they’ll need peeling and coring. The cinnamon is non-negotiable though—Penzeys has the best if you’re feeling fancy.
The tart dough keeps in the fridge for 2 days or freezes for 1 month. Assembled tarts are best eaten the same day, but leftover pears in glaze keep 3-4 days covered in the fridge. Warm them gently before serving.
Why You’ll Love This Recipe
- No-Peel Shortcut: I love that canned pears mean zero peeling or coring—just drain and go.
- Buttery Crunch Topping: The oats and vegan butter bake into a crispy, caramelized lid over those tender pears.
- Midweek Dessert Hero: Honestly, it’s my go-to for unexpected guests or a Tuesday treat.
- Pantry Stash Saver: Between us, I always have these ingredients on hand, so dessert is never more than 30 minutes away.
Step-by-Step Instructions for Sweet Pear Crumble Bars
Simple steps transform these pantry staples into a dessert that’s ready before your oven finishes preheating.
Step 1: Prepare the Pear Filling
Drain the 2 cans Canned Pear Halves thoroughly, then chop them into ½-inch pieces. You want them small enough to distribute evenly but large enough to provide texture in every bite.
In a saucepan, combine the chopped pears with 0.25 cup Maple Syrup, 1 tbsp Lemon Juice, and 1 tbsp Cornstarch. Cook over medium heat for 5-7 minutes, stirring constantly, until the mixture thickens to a glossy, jam-like consistency.
The filling should coat the back of a spoon and hold its shape when mounded. Remove from heat and stir in 1 tsp Vanilla Extract for depth. Set aside to cool slightly while you prepare the crust.
Step 2: Make the Crumble Base and Topping
In a food processor, pulse 1.5 cups All-Purpose Flour, 0.5 cup Rolling Oats, 0.5 cup Granulated Sugar, 1 tsp Ground Cinnamon, and 0.25 tsp Sea Salt until combined. This dry mix forms the foundation of both the base and topping.
Add 0.5 cup Vegan Butter (cold and cubed) and pulse in 1-second bursts until the mixture resembles coarse crumbs with some pea-sized clumps remaining. Don’t over-process—you want texture, not a fine powder.
Press two-thirds of this mixture firmly into the bottom of a lined 8×8-inch baking pan to form an even base layer. Reserve the remaining third for the topping. Bake the base at 350°F for 10 minutes until the edges just begin to turn light golden brown.
Step 3: Assemble and Add the Topping
Spread the pear filling evenly over the pre-baked base, leaving a ¼-inch border around the edges. The filling should be thick enough that it doesn’t seep into the crust.
Sprinkle the reserved crumble mixture evenly over the filling. For extra texture, mix in 0.5 cup Chopped Walnuts just before topping—this adds a satisfying crunch. Press down lightly with your fingertips to help the topping adhere.
Step 4: Bake to Golden Perfection
Drizzle 0.5 cup Coconut Milk evenly over the topping. This adds moisture and richness, creating a subtle coconut undertone that complements the pears beautifully.
Bake at 350°F for 25-30 minutes until the topping is deep golden brown and the filling bubbles slightly at the edges. Rotate the pan halfway through for even browning.
Let the bars cool completely in the pan—this is crucial for clean slices. The filling will firm up as it cools, making it easier to cut into neat squares.
Pro Tips For Making Canned Pears Recipe Ideas
- Drain and Pat Dry: Rinse the canned pear halves and pat them thoroughly dry with a paper towel—this prevents a soggy crust in your oat-based topping.
- Chill the Dough: If making a crumble topping with flour, sugar, and vegan butter, refrigerate it for 15 minutes before baking to keep it from spreading into a dense layer.
- Skip the Overmixing: When combining your flour, oats, and vegan butter for a streusel, mix just until crumbly—I learned this the hard way after ending up with a tough, pasty texture.
- Use the Syrup: Don’t pour the canning syrup down the drain; simmer it with a tablespoon of sugar to make a quick glaze for drizzling over the finished dish.
Make-Ahead Tips for canned pears recipe ideas
Prep Ahead Dough
The crumble base mixture can be made 2 days ahead and stored in the fridge. I use King Arthur flour for best texture. Just keep it covered tightly in an airtight container to prevent drying.
Filling Storage
The pear filling keeps beautifully in the fridge for 3-4 days in a sealed container. I actually think it tastes better the next day as the flavors meld. Stir before using if it thickens too much.
Freeze for Later
Assemble the bars completely, then freeze for up to 1 month. I wrap individual portions in parchment paper first, then foil. Thaw overnight in the fridge before serving.
Reheating Tips
Warm individual bars at 300°F for 10 minutes to restore that just-baked taste. The microwave works in 20-second bursts but watch carefully to avoid sogginess. 🔥
Nut Topping
Toast the chopped walnuts up to 2 days ahead and store at room temperature. I spread them on a baking sheet at 350°F for 8-10 minutes until fragrant.
Serving Shortcut
For last-minute guests, I keep pre-made filling in the freezer. Thaw in the fridge overnight, then assemble and bake as usual. No one will know you didn’t make it fresh. 💡
Nutrition Facts
Frequently Asked Questions
Can I use pears packed in heavy syrup?
Yes, but drain and rinse them first to remove excess sugar. This prevents your dish from becoming overly sweet. Pat them dry before using.
What’s the best way to thicken the filling?
Use 1 tbsp Cornstarch mixed with the pears and cook over medium heat for 5-7 minutes. This creates a glossy, jam-like consistency that holds its shape.
Can I make this gluten-free?
Swap the all-purpose flour for a 1:1 gluten-free blend. The texture will be slightly different but just as delicious.
How do I prevent a soggy crust?
Pre-bake the base for 10 minutes at 350°F before adding the filling. Also, ensure pears are thoroughly drained to remove excess moisture.

Trained in classic French technique but raised on slow-cooked ribs and spicy rubs, she blends culinary skill with smoke and soul.
- Recipe for Boneless Pork Chops in Cast Iron Skillet: Sear and Baste to Juicy Perfection - October 3, 2026
- Recipe for Boneless Cross Rib Roast: Slow-Roasted Beef with Herb Crust - October 3, 2026
- Hamburgers in Sauce Recipe Crock Pot: Slow-Cooked Savory Delight - October 3, 2026