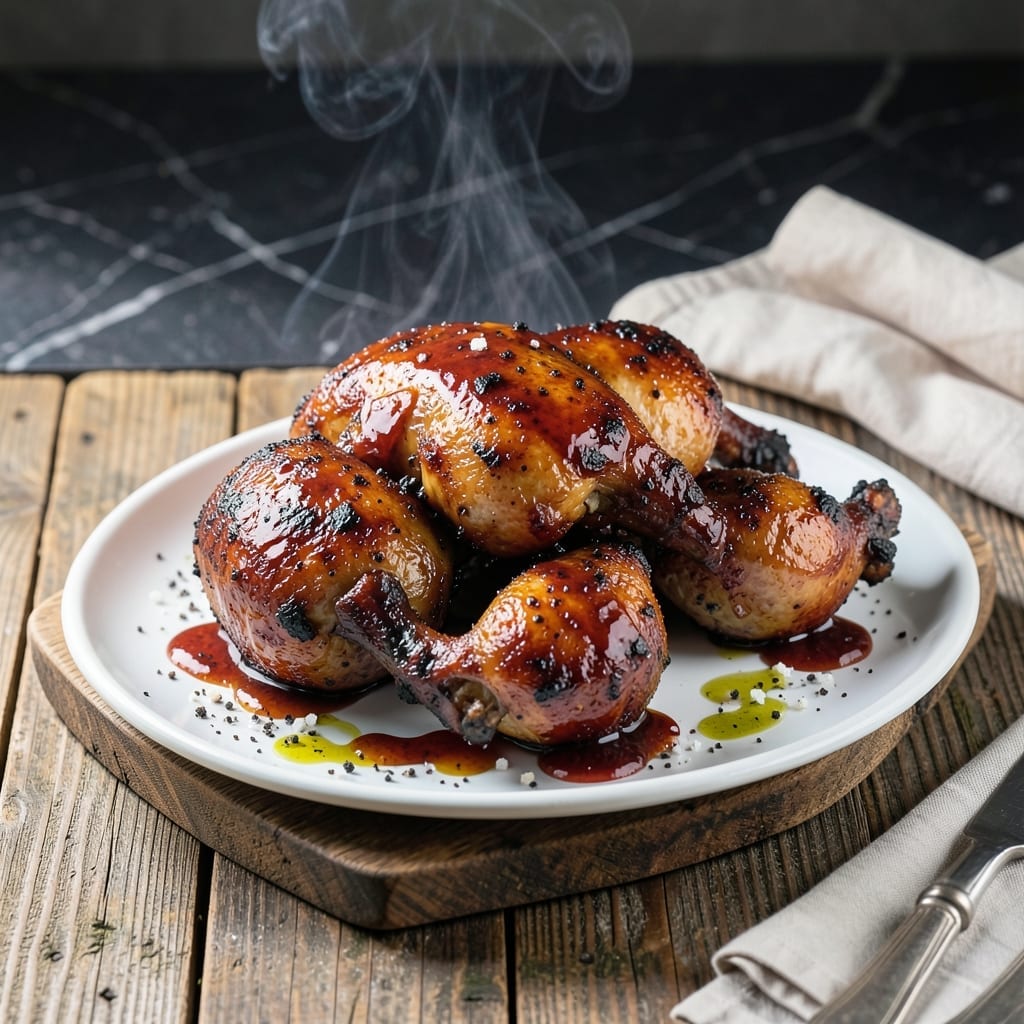
There’s nothing quite like the aroma of chicken sizzling over hot charcoal, creating that signature smoky char. This method delivers juicy meat with perfectly crisp skin every time.
I’ve spent years refining this technique, balancing heat and timing to achieve tender results. The charcoal imparts a depth of flavor that gas grills simply can’t match.
Ingredients for Charcoal Barbecue Chicken
Bone-in chicken, bold spices, and charcoal create this backyard classic with smoky depth.
| Ingredient | Amount | Notes |
|---|---|---|
| Chicken Thighs and Drumsticks 🍗 | 4 lb | Bone-in, skin-on for crispiness |
| Charcoal Briquettes 🔥 | 6 lb | Lump charcoal preferred for flavor |
| Barbecue Sauce 🍯 | 2 cups | Your preferred brand or homemade |
| Olive Oil 🫒 | 2 tbsp | For coating chicken |
| Kosher Salt 🧂 | 2 tbsp | Diamond Crystal preferred |
| Freshly Ground Black Pepper 🌶️ | 1 tbsp | Coarse grind for texture |
| Garlic Powder 🧄 | 1 tbsp | For seasoning rub |
| Onion Powder 🧅 | 1 tbsp | Balances sweet and savory |
| Smoked Paprika 🌶️ | 1 tsp | Enhances smoky flavor |
| Brown Sugar 🍚 | 2 tbsp | For caramelization |
| Apple Cider Vinegar 🍏 | 1 tbsp | Adds tangy brightness |
| Chimney Starter 🔥 | 1 whole | For even charcoal ignition |
| Grill Tongs 🍴 | 1 whole | Long-handled for safety |
[recipe_ingredient_scaler]
The chicken selection is critical for optimal results. Bone-in, skin-on thighs and drumsticks provide the juiciest meat and crispiest skin. Source from local butchers or reputable grocery chains like Whole Foods for high-quality poultry. For charcoal, lump charcoal burns hotter and cleaner than briquettes, though briquettes are more accessible and consistent. A chimney starter ensures even ignition without lighter fluid aftertaste.
Substitutions are possible but impact flavor and texture. Boneless chicken can be used (reduce cooking time by 25%), but skin is essential for that signature char. If you lack smoked paprika, regular paprika plus a pinch of cayenne approximates the depth. For barbecue sauce, Sweet Baby Ray’s or Stubb’s are reliable store-bought options. The vinegar can be replaced with lemon juice, though the tang profile will differ slightly.
Store raw chicken in the coldest part of your refrigerator for up to 2 days before cooking. Leftover cooked chicken keeps for 4 days refrigerated or 3 months frozen. For best results, bring chicken to room temperature for 30 minutes before grilling to ensure even cooking and maximum juiciness.
Why You’ll Love This Recipe
- No Fuss Grilling: I just toss the thighs and drumsticks with olive oil and salt, then let the charcoal do the work.
- Smoky Sweet Bite: That char from the briquettes with the sticky barbecue sauce? Ridiculously good.
- Backyard Star: It’s my go-to for summer potlucks—always disappears first.
- Budget Feast: A few pounds of thighs and drumsticks feed a crowd without breaking the bank.
Step-by-Step Instructions for Charcoal Barbecue Chicken
Master the art of flame-kissed chicken with this proven charcoal grilling method.
Step 1: Prepare the Charcoal for Two-Zone Heat
Fill the chimney starter completely with the 6 lb Charcoal Briquettes and light according to manufacturer instructions. I always use lump charcoal for better flavor and more consistent heat. Once the coals are covered with white ash (about 15-20 minutes), carefully pour them into the grill.
Arrange the hot coals to one side of the grill, creating a hot zone for searing and a cooler zone for indirect cooking. This two-zone setup is essential for preventing flare-ups while ensuring the chicken cooks through without burning. Replace the cooking grate and preheat for 5 minutes before adding the chicken.
Step 2: Season the Chicken for Maximum Flavor
While the charcoal heats, pat the 4 lb Chicken Thighs and Drumsticks completely dry with paper towels. This ensures the seasoning adheres properly and promotes better browning. I like to leave the skin on for crispiness and juiciness.
In a small bowl, combine the 2 tbsp Kosher Salt, 1 tbsp Freshly Ground Black Pepper, 1 tbsp Garlic Powder, 1 tbsp Onion Powder, 1 tsp Smoked Paprika, 2 tbsp Brown Sugar, and 1 tbsp Apple Cider Vinegar. Rub this mixture all over the chicken pieces, making sure to coat every surface evenly. The vinegar helps tenderize while the sugar promotes caramelization.
Step 3: Sear and Cook with Indirect Heat
Brush the cooking grate with the 2 tbsp Olive Oil to prevent sticking. Place the chicken pieces skin-side down on the hot side of the grill. Sear for 3-4 minutes until the skin develops a deep golden color and releases easily from the grate.
Using the Grill Tongs, flip the chicken and move it to the cooler side of the grill. Cover and cook for 20-25 minutes, turning occasionally, until the internal temperature reaches 165°F in the thickest part. The juices should run clear when pierced with a knife.
Step 4: Glaze with Barbecue Sauce and Finish
During the last 10 minutes of cooking, brush the chicken generously with the 2 cups Barbecue Sauce. I apply the sauce in layers, letting each coat set for a few minutes before adding more. This builds a sticky, caramelized glaze that locks in moisture.
Move the chicken back to the hot side for the final 2-3 minutes to char the sauce slightly. Watch closely to prevent burning—the sugars in the sauce can scorch quickly. Transfer the chicken to a serving platter and let it rest for 5 minutes before serving. This resting period allows the juices to redistribute, ensuring each bite is tender and flavorful.
Pro Tips For Making Charcoal Barbecue Chicken
- Bank Your Coals: After burning three batches, I finally figured out—pile the briquettes to one side for a hot zone, then spread them thin for indirect heat. This lets you sear first, then slow-cook without scorching the sauce.
- Pat the Chicken Dry: Sounds weird, but it works: dry the thighs and drumsticks thoroughly with paper towels before oiling and salting. It’s the only way to get that crisp, caramelized skin instead of a steamed exterior.
- Skip Early Saucing: I learned this the hard way—brush on the barbecue sauce only in the last 10 minutes of cooking. Any sooner and the sugars burn, leaving you with bitter, blackened spots instead of sticky-sweet glaze.
- Rest Before Serving: Give the chicken a solid 5-10 minutes under foil after pulling it off the grill. It keeps the juices from running all over the plate—yes, even if you’re starving.
Pro Cooking Tips for Perfect Results
Two-Zone Fire Mastery
Creating a proper two-zone fire is non-negotiable for perfect charcoal chicken. I pile hot coals on one side for direct searing at 400-450°F, leaving the other half empty for indirect cooking. This lets me control the heat precisely, just like I learned at those coastal BBQ competitions. 🌡️
Chimney Starter Technique
Always use a chimney starter—it lights charcoal evenly without lighter fluid aftertaste. Fill it with 6 lb lump charcoal, light newspaper underneath, and wait for a full layer of white ash, about 15-20 minutes. This method gives me consistent heat every time.
The Sear Before the Slow
Sear skin-side down over direct heat for 5-7 minutes until deeply charred. Don’t move the pieces—this builds that crispy, flavorful crust. I learned this patience from my early backyard cookouts, where rushing always led to pale, flabby skin.
Sauce Timing Matters
Only apply the barbecue glaze during the last 10 minutes of cooking. I mix 2 cups sauce with 2 tbsp brown sugar and 1 tbsp apple cider vinegar for balance. Earlier application burns the sugars, leaving bitter, acrid flavors.
Rest Like a Pro
After reaching 165°F internal temperature, let the chicken rest for 10 minutes before serving. This allows the juices to redistribute, ensuring every bite stays moist. I use this time to forage wild herbs for garnish when I’m cooking at home. 💡
Nutrition Facts
Frequently Asked Questions
How do I prevent chicken from sticking to the grill?
Clean and oil the grate thoroughly before cooking. Use 2 tbsp olive oil on a paper towel to coat the hot grate. Don’t move the chicken for 3-4 minutes during initial searing.
What’s the ideal internal temperature for safety?
Use a meat thermometer to check for 165°F in the thickest part. This ensures it’s safe to eat while staying juicy. Remove from heat immediately to avoid overcooking.
Can I use boneless chicken thighs instead?
Yes, but reduce cooking time by 25%. Boneless pieces cook faster and may dry out if left too long. Keep the skin on for best flavor and texture.
Why does my sauce burn before the chicken cooks?
You’re likely applying it too early. Wait until the last 10 minutes to add sauce. The sugars caramelize quickly over direct heat. Move to indirect heat if needed.

Trained in classic French technique but raised on slow-cooked ribs and spicy rubs, she blends culinary skill with smoke and soul.
- Recipe for Boneless Pork Chops in Cast Iron Skillet: Sear and Baste to Juicy Perfection - October 3, 2026
- Recipe for Boneless Cross Rib Roast: Slow-Roasted Beef with Herb Crust - October 3, 2026
- Hamburgers in Sauce Recipe Crock Pot: Slow-Cooked Savory Delight - October 3, 2026