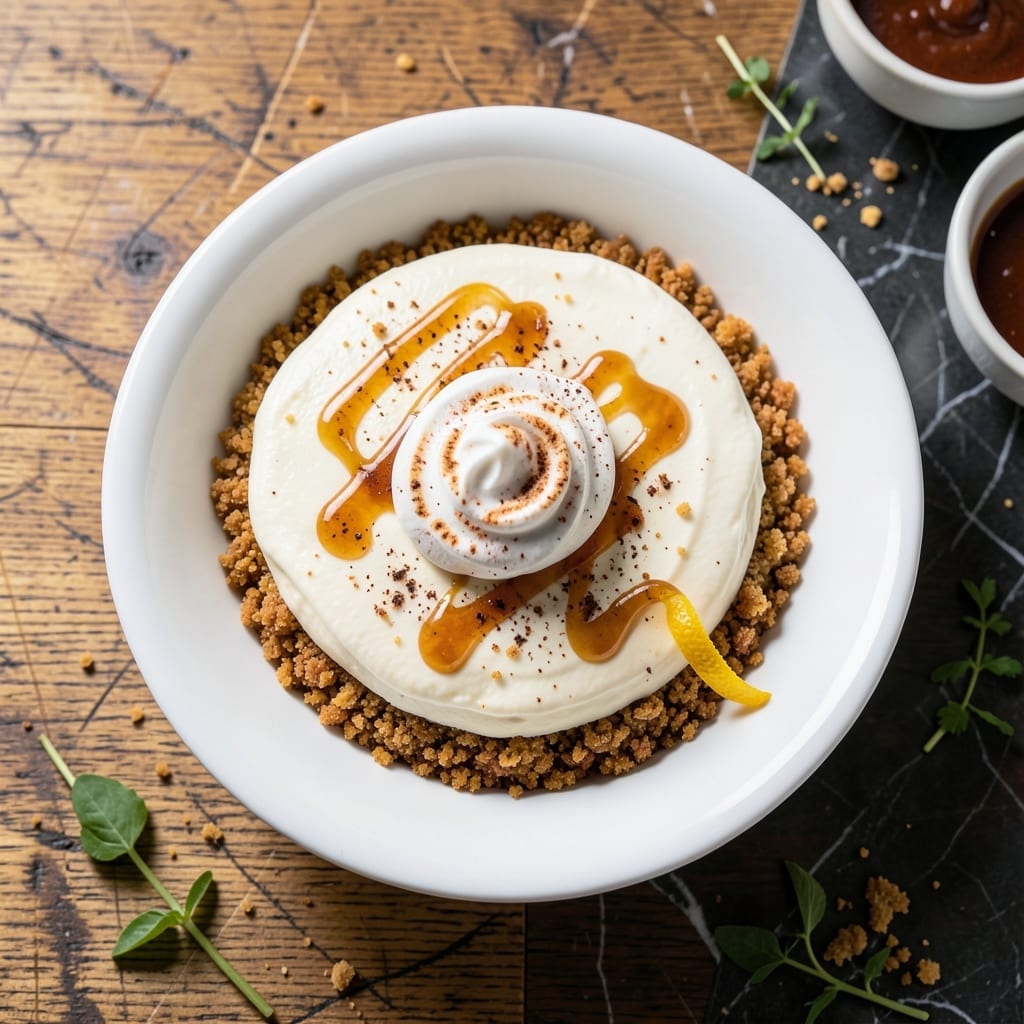
I’ve tested more cheesecake recipes than I can count, but this version delivers the velvety texture and balanced sweetness that defines a perfect dessert. The graham cracker base provides a buttery, crisp foundation that contrasts beautifully with the creamy filling.
The secret lies in the technique: room temperature ingredients, gentle mixing, and precise baking create that signature smooth consistency. I developed this through trial and error in my Boston kitchen, learning which steps truly matter.
What emerges from the oven is a golden, crack-free cheesecake with a rich, dense filling that holds its shape when sliced. The graham crust adds just the right amount of crunch to every forkful.
Serve chilled for best results. This recipe proves that patience and attention to detail create desserts worth celebrating.
Ingredients for Cheesecake #17
Pantry staples plus cream cheese deliver that velvety texture everyone loves in this dessert.
| Ingredient | Amount | Notes |
|---|---|---|
| Graham Cracker Crumbs 🍪 | 2 cups | From about 16 full crackers |
| Granulated Sugar 🍚 | ¼ cup | Divided for crust and filling |
| Unsalted Butter 🧈 | ½ cup | Melted for crust binding |
| Cream Cheese 🧀 | 4 packages | Full-fat, 8 oz each, softened |
| Sour Cream 🥛 | 1 cup | Full-fat for creaminess |
| Vanilla Extract 🌿 | 2 tsp | Pure vanilla for best flavor |
| Large Eggs 🥚 | 4 whole | Room temperature for even mixing |
| All-Purpose Flour 🌾 | 2 tbsp | For structure in filling |
| Lemon Juice 🍋 | 1 tbsp | Freshly squeezed for brightness |
| Salt 🧂 | ¼ tsp | Balances sweetness |
| Heavy Cream 🥛 | ½ cup | Optional for extra richness |
[recipe_ingredient_scaler]
The cream cheese is non-negotiable here. Philadelphia brand is my go-to for consistent texture—full-fat only (the low-fat stuff gets grainy). Most supermarkets carry it in the dairy aisle. For the graham crackers, Honey Maid or store brand both work fine. Just crush them yourself—pre-made crumbs can be stale. The butter should be unsalted so you control the saltiness.
No sour cream? Full-fat Greek yogurt works in a pinch (same tang, slightly thicker). Want a lighter texture? Swap half the sour cream for heavy cream. The flour stabilizes the filling—don’t skip it, but cornstarch at half the amount works too. Vanilla extract is worth the splurge—Nielsen-Massey is my favorite. For the crust, ginger snaps make a great graham substitute if you’re feeling fancy.
Cheesecake tastes best after chilling overnight—don’t rush it. Keeps 5 days in the fridge, or freeze slices wrapped tight for 2 months. Leftovers? Ha. As if there’ll be any. But just in case, a tight seal prevents freezer burn (worth the extra minute).
Why You’ll Love This Recipe
- No-Fuss Base: I love that the graham cracker crust comes together in minutes—just crumbs, sugar, and melted butter pressed into the pan.
- Velvety Dream: The cream cheese and sour cream blend into this rich, smooth filling that’s not too sweet, just right.
- Crowd Pleaser: Between us, I’ve served this at potlucks, birthdays, and even a Tuesday night dessert—always disappears first.
- Keeps Like a Champ: Honestly, it tastes even better the next day, and I’ve stored slices for up to five days without a hint of dryness.
Step-by-Step Instructions for Cheesecake With Graham Cracker Base
This method delivers that signature creamy texture with a buttery, crisp graham cracker foundation.
Step 1: Prepare the Graham Cracker Crust
Preheat your oven to 325°F. In a medium bowl, combine the 2 cups Graham Cracker Crumbs, 0.25 cup Granulated Sugar, and the 0.5 cup Unsalted Butter melted. Stir until the mixture resembles wet sand and the crumbs are evenly coated.
Press the mixture firmly into the bottom of a 9-inch springform pan. I use the bottom of a measuring cup to really pack it down—this prevents crumbling when you slice the finished cheesecake. Bake for 10 minutes, then set aside to cool while you prepare the filling.
Step 2: Beat the Cream Cheese Until Smooth
In a large bowl using an electric mixer, beat the 4 packages Cream Cheese on medium speed until completely smooth, about 2-3 minutes. Make sure there are no lumps—this is crucial for that velvety texture this dish is known for.
Scrape down the sides of the bowl occasionally to ensure even mixing. The cream cheese should be soft enough to beat easily (I always take it out of the fridge 1 hour before starting). If it’s too cold, it won’t blend smoothly.
Step 3: Incorporate Remaining Filling Ingredients
Add the 1 cup Sour Cream, 2 tsp Vanilla Extract, and 0.25 cup Granulated Sugar to the cream cheese, mixing until just combined. Then, add the 4 whole Large Eggs one at a time, beating well after each addition.
Next, mix in the 2 tbsp All-Purpose Flour, 1 tbsp Lemon Juice, 0.25 tsp Salt, and 0.5 cup Heavy Cream. Beat until the batter is smooth and creamy but don’t overmix—just until everything is fully incorporated.
Pour the filling over the cooled crust. The surface should be level—tap the pan gently on the counter to remove any air bubbles.
Step 4: Bake Low and Slow for Perfect Texture
Place the springform pan in a large roasting pan and fill the roasting pan with hot water until it reaches halfway up the sides of the springform pan. This water bath helps regulate the temperature and prevents cracking.
Bake at 325°F for 50-60 minutes. The edges should be set, but the center should still have a slight wobble when you gently shake the pan. Turn off the oven, crack the door open, and let the cheesecake cool inside for 1 hour.
Step 5: Chill Thoroughly Before Serving
After cooling in the oven, transfer the cheesecake to the refrigerator and chill for at least 4 hours, preferably overnight. This step is non-negotiable—the filling needs time to set completely for clean slices.
Once fully chilled, run a thin knife around the edge of the pan to loosen the cheesecake before releasing the springform ring. Slice with a hot, wet knife for the smoothest cuts. Serve with your favorite toppings or enjoy it plain for that pure, creamy experience.
Pro Tips For Making Cheesecake #17
- Room Temp Cream Cheese: Pull your cream cheese out 2 hours before baking—cold blocks leave lumps no matter how hard you beat them.
- Press Crust Hard: Pack those graham cracker crumbs into the pan with a measuring cup, then press again with your fingers to make sure it’s dense enough to hold up to the filling.
- Skip Overmixing: Once the sour cream and sugar are just combined with the cream cheese, stop the mixer—overworking it adds air that can crack the top later.
- Water Bath Works: Wrap the springform pan in foil and bake it in a water bath; I learned this the hard way after three cracked cheesecakes from uneven heat.
Storing and Reheating cheesecake #17
Refrigerator Storage
Let your cheesecake cool completely before refrigerating. Store in an airtight container or wrapped tightly in plastic wrap for up to 5 days. The flavors deepen over time, making leftovers taste even better. ❄️
Freezing for Longer Storage
Slice the cheesecake before freezing for easy single servings. Wrap individual slices in plastic wrap, then place in a freezer bag. It keeps well for up to 2 months. I always label mine with the date to track freshness.
Thawing Properly
Transfer frozen slices to the refrigerator and let thaw overnight. Avoid microwaving, as it can make the texture uneven. For the whole cheesecake, thaw in the fridge for 12-24 hours before serving.
Room Temperature Serving
For the best texture, let chilled cheesecake sit at room temperature for 20-30 minutes before serving. This softens the filling slightly, enhancing that velvety mouthfeel we all love.
Avoiding Common Pitfalls
Never freeze a whole cheesecake with toppings—they can get soggy. Add fresh fruit or sauces after thawing. Also, avoid aluminum foil for wrapping; it can stick to the surface. 💡
Nutrition Facts
Frequently Asked Questions
Why use a water bath when baking?
It regulates temperature and prevents cracks by creating gentle, even heat. Without it, the edges cook too fast while the center stays underdone.
Can I make this without a springform pan?
Use a 9-inch pie dish lined with parchment paper for easy removal. The texture may be slightly denser, but it’ll still taste delicious.
How do I prevent a soggy crust?
Bake the crust for 10 minutes before adding filling, and let it cool completely. This creates a barrier against moisture.
What if my cheesecake cracks on top?
Don’t worry—it’s still tasty! Cover with toppings like fruit or whipped cream. Overmixing or high oven temps often cause cracks.

Trained in classic French technique but raised on slow-cooked ribs and spicy rubs, she blends culinary skill with smoke and soul.
- Recipe for Boneless Pork Chops in Cast Iron Skillet: Sear and Baste to Juicy Perfection - October 3, 2026
- Recipe for Boneless Cross Rib Roast: Slow-Roasted Beef with Herb Crust - October 3, 2026
- Hamburgers in Sauce Recipe Crock Pot: Slow-Cooked Savory Delight - October 3, 2026