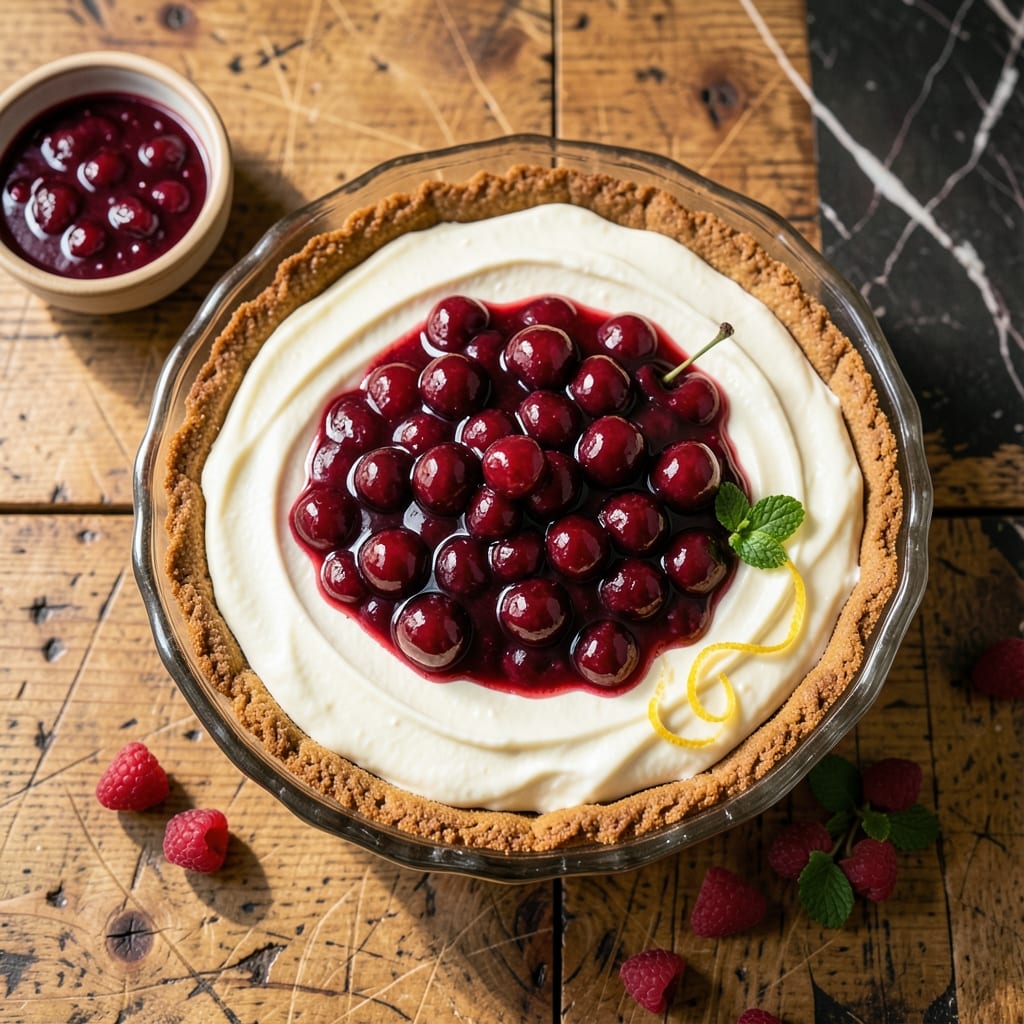
This no-bake cherry cream cheese pie delivers a perfect balance of creamy and fruity in every slice. The layers come together effortlessly, with no oven required.
Eagle Brand sweetened condensed milk creates a velvety filling that pairs beautifully with the tang of cream cheese. The cherry topping adds a bright, sweet finish that ties everything together.
You’ll love how simple this dessert is to assemble. Just mix, layer, and chill—ideal for warm weather or when you need a fuss-free treat.
Serve it chilled for a refreshing, crowd-pleasing dessert that looks as impressive as it tastes.
Ingredients for Cherry Cream Cheese Pie Recipe Eagle Brand
Nine simple ingredients create layers of creamy, fruity perfection in this effortless dessert.
| Ingredient | Amount | Notes |
|---|---|---|
| Graham Cracker Crust 🍪 | 1 package | Pre-made 9-inch crust |
| Cream Cheese 🧀 | 8 oz | Full-fat, softened to room temperature |
| Eagle Brand Sweetened Condensed Milk 🥛 | 1 can | 14 oz can, undiluted |
| Lemon Juice 🍋 | ¼ cup | Freshly squeezed preferred |
| Vanilla Extract 🌿 | 1 tsp | Pure vanilla for best flavor |
| Cherry Pie Filling 🍒 | 1 can | 21 oz can, any variety |
| Whipped Topping 🥣 | 1 cup | Thawed if frozen, or fresh |
| Granulated Sugar 🧂 | ¼ cup | Optional, adjust to taste |
| Unsalted Butter 🧈 | 2 tbsp | Melted for crust sealing |
| Salt 🧂 | 0.125 tsp | Pinch for balance |
[recipe_ingredient_scaler]
The cream cheese needs to be full-fat and softened—Philadelphia brand is my go-to for consistent texture. Eagle Brand sweetened condensed milk is non-negotiable here (it’s in the name!). Grab it from any major grocery store, but check the label—some store brands can be thinner. For the crust, Keebler’s ready-made graham cracker crust saves time and holds up perfectly to the filling.
No graham cracker crust? Crush 1.5 cups graham crackers mixed with 6 tbsp melted butter and press into the pan. Out of cherry pie filling? Fresh or frozen cherries simmered with sugar and a touch of cornstarch work too. Want it richer? Swap the whipped topping for homemade whipped cream (heavy cream + powdered sugar). The lemon juice can be bottled if fresh isn’t handy.
Assemble and chill at least 4 hours (overnight is ideal). Keeps covered in the fridge for 3-4 days—though it never lasts that long in my house. Freezing isn’t recommended (the texture separates), but you can prep components ahead and assemble the day of serving.
Why You’ll Love This Recipe
- I’ll be real: I’ve prepped this the night before and it tastes even better the next day.
- No-Bake Magic: I just mix the cream cheese, Eagle Brand, and a splash of lemon—no oven, no stress.
- Sweet-Tart Heaven: That creamy filling with the bright pop of cherry topping? Ridiculously good.
- Potluck MVP: Honestly, it’s the first thing to disappear at family gatherings.
Step-by-Step Instructions for Cherry Cream Cheese Pie
This no-bake method delivers creamy, dreamy layers with minimal effort and maximum flavor.
Step 1: Prepare and Seal the Graham Cracker Crust
Begin with the 1 package Graham Cracker Crust in your pie dish. I always brush the inside with 2 tbsp melted Unsalted Butter—this creates a moisture barrier that prevents the crust from turning soggy when layered with wet ingredients.
Use a pastry brush to coat the crust evenly, including the sides. Then, place it in the freezer for 10 minutes to set completely. This step is crucial for maintaining that perfect crunch in every bite of your finished pie.
Step 2: Whip the Cream Cheese Filling Base
In a large bowl, beat the 8 oz Cream Cheese until completely smooth—no lumps allowed. I use an electric mixer on medium speed for 2-3 minutes to ensure it’s fluffy and free of any cold spots.
Gradually add the 1 can Eagle Brand Sweetened Condensed Milk, beating until fully incorporated. Then mix in the 0.25 cup Lemon Juice and 1 tsp Vanilla Extract. The mixture will thicken noticeably as the acid from the lemon works its magic with the condensed milk.
Step 3: Layer the Filling and Cherry Pie Topping
Pour the cream cheese mixture into your prepared crust, spreading it evenly with a spatula. I like to create a slight well in the center to help contain the next layer. The filling should be smooth and level—this ensures every slice looks as good as it tastes.
Open the 1 can Cherry Pie Filling and spread it evenly over the cream cheese layer. I use the back of a spoon to gently press it down, allowing the filling to slightly mix with the cream cheese at the edges for a marbled effect.
Step 4: Chill and Top with Whipped Cream
Cover the pie loosely with plastic wrap and refrigerate for at least 4 hours, but overnight is ideal. This chilling time allows the layers to set properly and the flavors to meld together. You’ll know it’s ready when the filling is firm to the touch.
Just before serving, spread the 1 cup Whipped Topping over the cherry layer. I like to create decorative swirls with the back of a spoon for a bakery-worthy presentation. For a finishing touch, you can sprinkle with a pinch of the 0.25 cup Granulated Sugar if you prefer it sweeter.
Pro Tips For Making Cherry Cream Cheese Pie Recipe Eagle Brand
- Soften the Cream Cheese: Pull the cream cheese out at least 2 hours before mixing—cold blocks leave lumps no amount of stirring will fix. I learned this the hard way after too many speckled fillings.
- Chill the Crust First: Pop that graham cracker crust in the freezer for 10 minutes before filling. Sounds weird, but it keeps the bottom crisp instead of soggy under the creamy layer.
- Use Fresh Lemon Juice: Bottled juice works in a pinch, but fresh lemon juice cuts through the sweetness of the Eagle Brand milk way better. About 2 tablespoons does the trick.
- Fold in Cherries Last: Mix the cream cheese filling completely smooth before folding in the cherries—this prevents purple streaks and guarantees every bite has that swirl instead of a muddy mess.
Essential Equipment for This Dish
Mixing Essentials
An electric mixer is my top pick for the cream cheese filling—I use my KitchenAid stand mixer on medium speed for 2-3 minutes to get it perfectly smooth. A hand mixer works too, but expect to put in a bit more elbow grease. 💪
Perfect Pie Dish
A 9-inch glass pie dish is ideal for this recipe. It conducts cold evenly for uniform chilling. I love my Pyrex because it’s durable and lets me check the layers as they set.
Crust Tools
Use a pastry brush to coat the graham cracker crust with melted butter. This ensures even coverage for that moisture barrier. A small offset spatula also helps spread the filling smoothly without disturbing the crust.
Chilling Setup
Your refrigerator needs enough space for the pie to chill undisturbed. I clear a shelf ahead of time to fit my 9-inch pie flat. A loose cover of plastic wrap prevents fridge odors from seeping in.
Serving Extras
For presentation, a pie server with a thin edge slices cleanly through the layers. I also keep a whipped cream dispenser on hand for fresh topping if I’m skipping the store-bought version.
Cleanup Helpers
Since this is a no-bake recipe, cleanup is minimal. I always keep damp cloths nearby for quick wipe-ups and use a rubber spatula to scrape out every bit of filling from the bowl. ✨
Nutrition Facts
Frequently Asked Questions
Can I use a different crust instead of graham cracker?
A shortbread or vanilla wafer crust works beautifully. For a nutty twist, try an Oreo cookie crust. Just ensure it’s pre-baked if the recipe requires it.
Why does the cream cheese need to be room temperature?
Room temperature cream cheese blends smoothly without lumps. Cold cream cheese creates a grainy texture and can leave streaks in your filling. Let it sit out for 30-60 minutes before mixing.
How long can I store this pie in the fridge?
It stays fresh for 3-4 days when covered. For best texture, add the whipped topping just before serving. The flavors actually improve after 24 hours in the fridge!

Trained in classic French technique but raised on slow-cooked ribs and spicy rubs, she blends culinary skill with smoke and soul.
- Recipe For Leftover Fried Fish: Crunchy Leftovers Transformed - October 3, 2026
- Recipe for Crock Pot Swiss Steak: Slow-Cooked Beef With Mushroom Gravy - October 3, 2026
- Recipe for Kabsa Rice: Spiced Middle Eastern Feast in One Pot - October 3, 2026