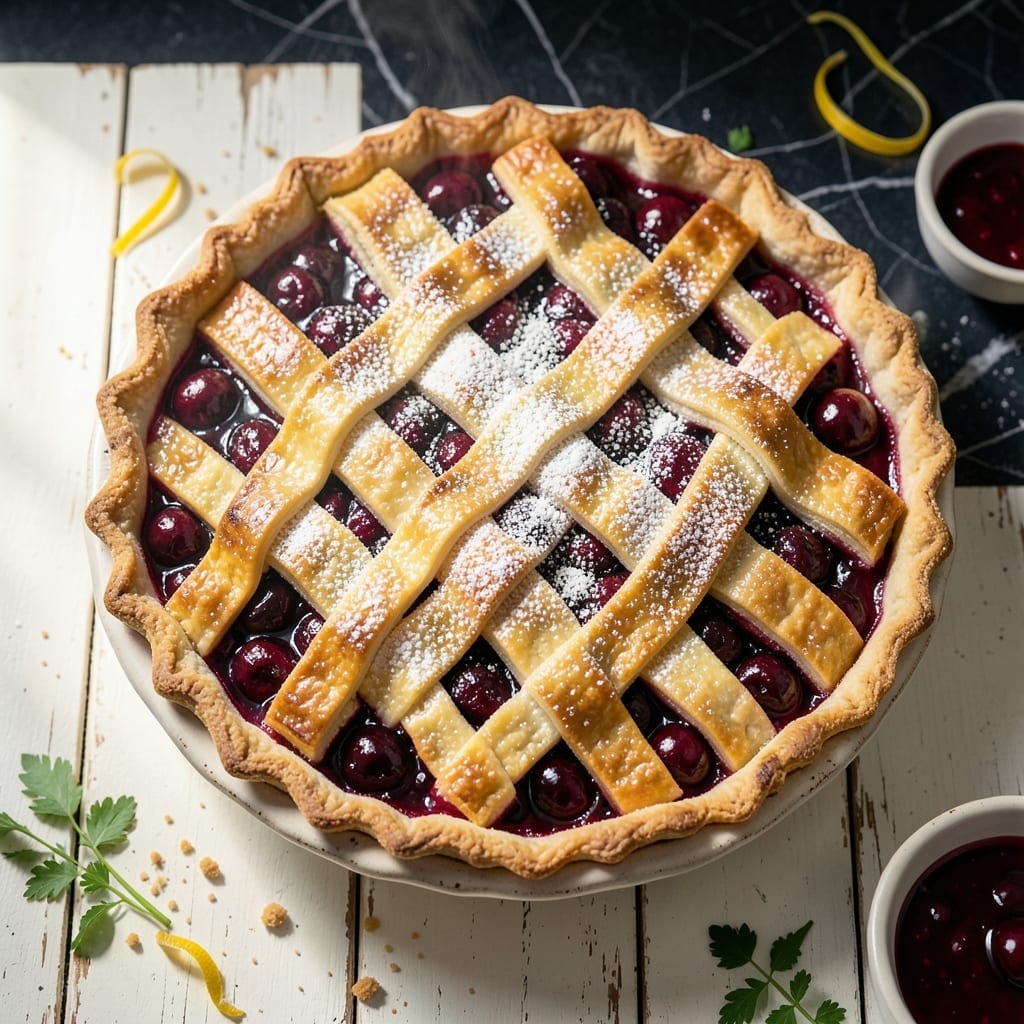
There’s a secret to achieving flaky pie crust with canned cherries that rivals homemade filling. This method delivers consistent results without the fuss of pitting fresh fruit.
The filling thickens perfectly using canned cherries, while the crust stays golden and tender. I’ve tested this approach for years, and it never fails to impress.
Ingredients for Cherry Pie Recipe with Canned Cherries
Flaky crust and thick cherry filling start with these carefully selected baking essentials.
| Ingredient | Amount | Notes |
|---|---|---|
| All-Purpose Flour 🌾 | 2 ½ cups | Plus extra for dusting |
| Granulated Sugar 🍚 | ¾ cup | Divided for filling and topping |
| Salt 🧂 | 1 tsp | Fine sea salt preferred |
| Unsalted Butter 🧈 | 1 cup | Cold, cut into cubes |
| Ice Water 💧 | ½ cup | Plus more as needed |
| Canned Tart Cherries 🍒 | 2 cans | 21 oz cans, drained |
| Cornstarch 🌽 | ¼ cup | For thickening filling |
| Lemon Juice 🍋 | 1 tbsp | Freshly squeezed preferred |
| Vanilla Extract 🌿 | 1 tsp | Pure extract for best flavor |
| Ground Cinnamon 🌶️ | ¼ tsp | Optional for warmth |
| Large Egg 🥚 | 1 whole | For egg wash |
| Turbinado Sugar 🍯 | 1 tbsp | For sprinkling on crust |
[recipe_ingredient_scaler]
The crust demands precision. King Arthur Flour delivers consistent protein content for reliable flakiness, while European-style butter (like Plugrá or Land O’Lakes European Style) has higher fat content for superior texture. Keep ingredients ice-cold throughout—this prevents gluten development and ensures those coveted flaky layers. The cherries should be tart, not sweet; Oregon Fruit Products or Morello brands are ideal.
No tart cherries? Sweet cherries work at half the sugar quantity, but the filling will be less vibrant. For cornstarch, arrowroot powder at equal amount can substitute, though it may create a slightly different texture. The vanilla can be omitted, but it adds depth to the filling. If avoiding eggs, milk or cream brushed on the crust provides a similar sheen without the protein binding.
Assembled pie keeps 3-4 days at room temperature, though it’s best served within 24 hours. Freeze baked pie for up to 3 months—thaw overnight before serving. The dough can be made ahead and refrigerated for 2 days or frozen for 1 month.
Why You’ll Love This Recipe
- No Fuss Filling: I skip pitting fresh cherries—canned ones are already prepped and ready to go.
- Buttery Crust: The flaky layers from butter and ice water make every bite melt-in-your-mouth good.
- Holiday or Tuesday: This pie feels fancy enough for dessert but I’ve made it on a random Tuesday just because.
- Leftovers? Doubt it: Honestly, the only leftovers I’ve had were the tiny sliver I saved for breakfast the next day.
Step-by-Step Instructions for Cherry Pie With Canned Cherries
Master the technique for a flaky crust and thick filling that rivals any bakery creation.
Step 1: Prepare the Pie Crust Dough
In a large bowl, combine the 2.5 cups all-purpose flour, 1 tsp salt, and 0.75 cup granulated sugar divided for later use. Cut in the 1 cup cold unsalted butter cubes using a pastry blender or your fingers until the mixture resembles coarse crumbs with pea-sized butter pieces visible.
Gradually add the 0.5 cup ice water, mixing just until the dough comes together. Overworking develops gluten, which makes the crust tough instead of flaky. Divide the dough into two equal portions, flatten into discs, wrap in plastic, and refrigerate for 1 hour to relax the gluten and firm the butter.
Step 2: Make the Thick Cherry Filling
In a saucepan, combine the drained 2 cans canned tart cherries with the 0.25 cup cornstarch, remaining granulated sugar, 1 tbsp lemon juice, 1 tsp vanilla extract, and 0.25 tsp ground cinnamon.
Cook over medium heat, stirring constantly, until the mixture thickens and becomes glossy—this should take about 5-7 minutes. The filling should coat the back of a spoon with a thick, jam-like consistency. Remove from heat and let cool completely before assembling the pie.
Step 3: Assemble and Crimp the Pie
On a lightly floured surface, roll out one dough disc to a 12-inch circle. Transfer to a 9-inch pie dish, pressing gently into the bottom and up the sides. Trim the edges, leaving a ½-inch overhang.
Pour the cooled cherry filling into the crust, spreading it evenly. Roll out the second dough disc to the same size and place it over the filling. Trim and crimp the edges, then cut several 1-inch slits in the top crust to allow steam to escape.
Step 4: Bake to Golden Perfection
Preheat the oven to 375°F. Lightly beat the 1 whole large egg and brush it evenly over the top crust. Sprinkle with 1 tbsp turbinado sugar for added crunch and shine.
Place the pie on a baking sheet to catch any drips and bake for 45-50 minutes, or until the crust is deep golden brown and the filling is bubbling through the vents. If the edges brown too quickly, cover them with aluminum foil.
Cool on a wire rack for at least 2 hours before slicing. This resting time allows the filling to set properly, ensuring clean slices with every serving.
Pro Tips For Making Cherry Pie Recipe With Canned Cherries
- Chill the Dough: After mixing the flour, butter, and ice water, wrap the dough and refrigerate for at least 1 hour—I learned this the hard way after my crust shrank in the oven.
- Drain the Cherries: Rinse and drain the canned cherries thoroughly, then pat them dry to prevent a soggy pie filling.
- Blind Bake the Crust: Pre-bake the bottom crust for 10 minutes at 375°F before adding the filling to avoid a gummy, undercooked base.
- Use Cold Butter: Cut the unsalted butter into small cubes and keep it ice-cold until mixing—this guarantees a flaky, tender crust every time.
Perfect Pairings for These Flavors
Beverage Pairings
Nothing complements this pie better than a cold glass of milk—the creamy texture balances the tartness beautifully. I always serve mine with 2% milk for the perfect contrast. For a grown-up twist, vanilla chai tea brings warm spices that enhance the cinnamon notes. 🥛
Ice Cream Toppings
Vanilla ice cream is the classic pairing, and I recommend Ben & Jerry’s for its rich, creamy texture. The cold temperature contrasts perfectly with the warm pie. For a lighter option, Greek yogurt adds a tangy element that cuts through the sweetness.
Coffee and Tea
A bold dark roast coffee like Starbucks French Roast stands up to the rich filling. The bitterness complements the sweet-tart cherries wonderfully. Iced coffee works too—just add a splash of half-and-half for creaminess. ☕
Wine Options
For wine lovers, a Moscato d’Asti offers light bubbles and honeyed notes that pair beautifully. The low alcohol content lets the pie flavors shine. Riesling is another excellent choice—its acidity balances the sweetness perfectly.
Savory Balance
To contrast the sweetness, serve with a small wedge of sharp cheddar cheese. The salty, tangy flavor creates an unexpected but delightful pairing. I use Cabot Extra Sharp for maximum impact.
Nutrition Facts
Frequently Asked Questions
Do I need to drain the canned cherries?
Yes, always drain and rinse canned cherries to remove excess syrup. This prevents a runny filling and ensures proper thickening with the cornstarch.
Can I use sweet cherries instead of tart?
You can, but reduce the sugar by half. Sweet cherries lack the tangy balance of tart varieties, so the flavor profile will differ.
Why did my filling turn out watery?
This usually happens if the filling wasn’t cooled before baking or the cornstarch didn’t fully activate. Always cook the filling until thick and glossy, then let it cool completely.
How do I prevent a soggy bottom crust?
Blind-bake the bottom crust for 10 minutes before adding filling, or sprinkle 1 tablespoon of breadcrumbs in the crust first to absorb moisture.

Trained in classic French technique but raised on slow-cooked ribs and spicy rubs, she blends culinary skill with smoke and soul.
- Recipe for Boneless Pork Chops in Cast Iron Skillet: Sear and Baste to Juicy Perfection - October 3, 2026
- Recipe for Boneless Cross Rib Roast: Slow-Roasted Beef with Herb Crust - October 3, 2026
- Hamburgers in Sauce Recipe Crock Pot: Slow-Cooked Savory Delight - October 3, 2026