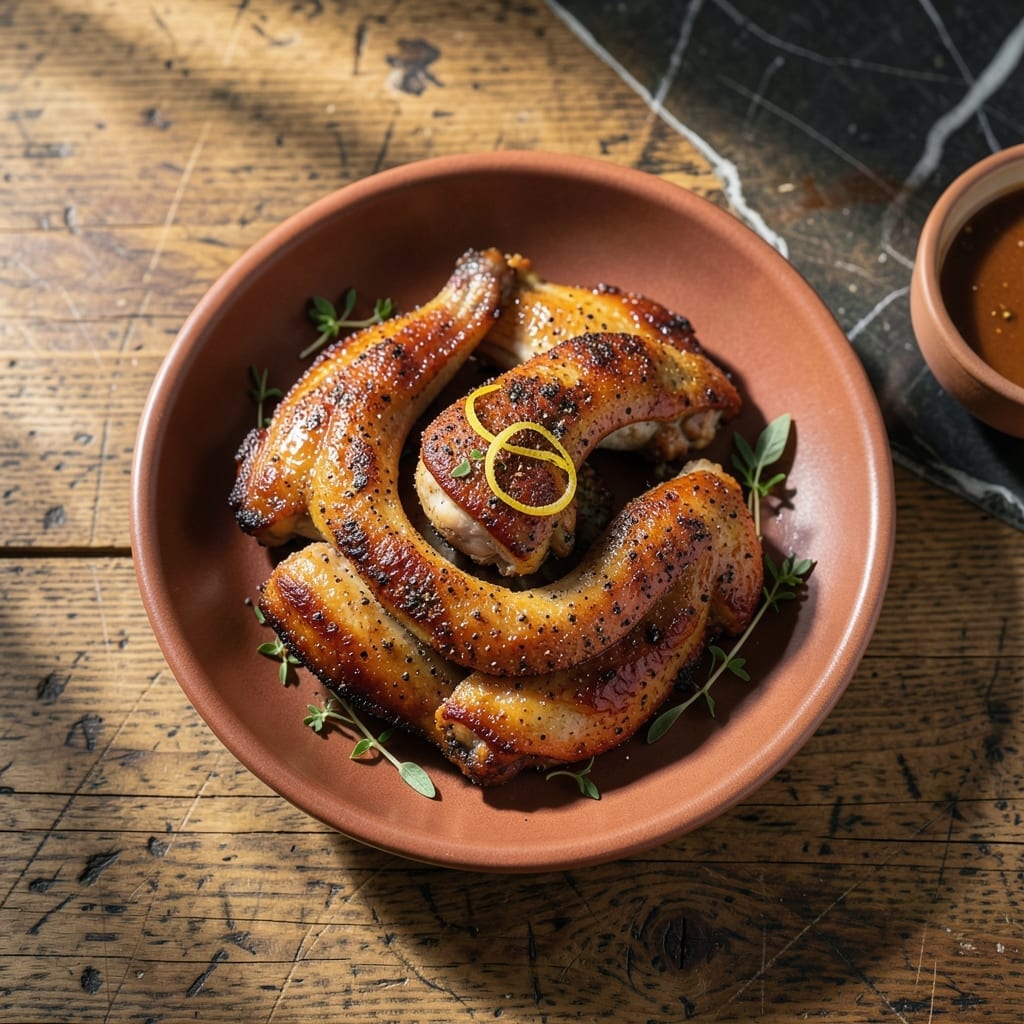
I first discovered the potential of chicken backs at a local BBQ competition where the smell of slow-cooked meat filled the air. This recipe transforms overlooked cuts into crispy, flavorful bites that rival any premium piece.
The secret lies in a high-heat oven method that renders the skin perfectly while keeping the meat tender and juicy. A simple dry rub enhances the natural richness without overpowering the dish’s character.
What emerges is golden, crispy chicken with deep, savory notes from the rendered fat and seasoning. These bites work as a main course or hearty appetizer for gatherings.
Pair with tangy dipping sauces or serve alongside roasted vegetables for a complete meal. The technique ensures consistent results every time.
Ingredients for Chicken Backs
Transform humble chicken backs into crispy, golden bites with this simple dry rub blend.
| Ingredient | Amount | Notes |
|---|---|---|
| Chicken Backs 🍗 | 2 lb | Pat dry thoroughly before seasoning |
| Kosher Salt 🧂 | 1 ½ tbsp | Diamond Crystal preferred for texture |
| Black Pepper 🌶️ | 1 tbsp | Freshly ground for best flavor |
| Paprika 🌶️ | 2 tsp | Sweet or smoked variety |
| Garlic Powder 🧄 | 1 ½ tsp | Not garlic salt substitute |
| Onion Powder 🧅 | 1 ½ tsp | Fine grind preferred |
| Dried Thyme 🌿 | 1 tsp | Crushed between fingers to release oils |
| Cayenne Pepper 🔥 | ¼ tsp | Adjust for heat preference |
| Olive Oil 🫒 | 2 tbsp | For tossing with seasoning |
| Brown Sugar 🥣 | 1 tbsp | Light or dark variety |
| Baking Powder 🧂 | ½ tsp | For extra crispiness |
[recipe_ingredient_scaler]
The chicken backs are the foundation—opt for fresh, not previously frozen for the best texture. Most butchers or Whole Foods will have these inexpensive cuts. Look for pieces with some fat still attached; this renders down beautifully in the oven. The dry rub clings best when the skin is completely dry, so pat them thoroughly with paper towels before seasoning.
No paprika? An equal amount of chili powder works in a pinch. Out of brown sugar? White sugar with a pinch of molasses mimics the caramelized depth. Cayenne can be omitted for a milder flavor, or doubled if you love heat. The baking powder is key for that extra-crispy skin, but cornstarch at half the amount can substitute if needed.
Store raw chicken backs in the fridge for up to 2 days. Once cooked, leftovers keep in an airtight container for 4 days. Reheat in the oven or air fryer to maintain crispiness—microwaving will make them soggy.
Why You’ll Love This Recipe
- 5-Minute Seasoning: Honestly, it’s just a shake of salt, pepper, paprika, and garlic powder—no marinade, no waiting.
- Crispy, Smoky Bite: That paprika crust gives every piece a bold, smoky kick I can’t get enough of.
- Feeds My Crew: I throw a big batch in the oven and suddenly Sunday dinner is covered.
- Pocket-Friendly Protein: Chicken backs cost pennies compared to thighs or breasts, yet taste just as good.
Step-by-Step Instructions for Oven-Baked Chicken Backs
This method ensures maximum crispiness and deep flavor development with minimal effort.
Step 1: Prep and Thoroughly Dry the Chicken Backs
Begin by patting the 2 lb Chicken Backs completely dry with paper towels, both inside and out. Moisture is the enemy of crispiness, so take your time with this step. I press firmly between the skin and meat to absorb all liquid pockets.
This drying process creates the foundation for that perfect crunch. Even a small amount of residual moisture can steam the skin instead of allowing it to crisp properly during baking.
Step 2: Create the Dry Rub with All Seasonings
In a small bowl, combine 1.5 tbsp Kosher Salt, 1 tbsp Black Pepper, 2 tsp Paprika, 1.5 tsp Garlic Powder, 1.5 tsp Onion Powder, 1 tsp Dried Thyme, 0.25 tsp Cayenne Pepper, 1 tbsp Brown Sugar, and 0.5 tsp Baking Powder. I crush the dried thyme between my fingers as I add it to release its aromatic oils.
The baking powder is the secret weapon here—it raises the pH of the skin’s surface, allowing it to brown more deeply and develop that enviable crispness. The brown sugar adds subtle caramelization.
Step 3: Coat and Rest the Seasoned Chicken
Drizzle the 2 tbsp Olive Oil over the chicken backs and toss to coat evenly. Then generously apply the seasoning mixture, pressing it into all surfaces. I find it helps to work the rub under the skin as well for maximum flavor penetration.
Arrange the pieces on a wire rack set over a baking sheet. Let them rest at room temperature for 30 minutes while your oven preheats. This waiting period allows the salt to begin penetrating the meat and the seasoning to adhere properly.
Step 4: Bake at High Temperature for Optimal Crispiness
Preheat your oven to 425°F. When fully heated, place the chicken backs in the oven and bake for 45-50 minutes, flipping halfway through. Position the rack in the upper third of the oven for best browning results.
You’ll know they’re done when the skin is deep golden brown and crispy to the touch, and the meat reaches an internal temperature of 165°F. The baking powder will have worked its magic, creating an incredibly crisp exterior that shatters with each bite.
Step 5: Rest and Serve Immediately
Transfer the chicken backs to a serving platter and let them rest for 5 minutes. This brief pause allows the juices to redistribute throughout the meat while maintaining that coveted crispiness.
Serve immediately while hot. The contrast between the shatteringly crisp skin and the tender, flavorful meat underneath is what makes this preparation so satisfying. Each piece should have an even, deep color with no pale spots.
Pro Tips For Making Chicken Backs
- Pat Them Dry: Chicken backs release a ton of moisture, so pat them thoroughly with paper towels before seasoning—this guarantees a better sear and crispier skin.
- Season Twice: Hit them with salt, pepper, paprika, and garlic powder before cooking, then dust with a little more paprika halfway through for deeper flavor.
- Don’t Rush the Sear: I learned this the hard way—give them 4-5 minutes per side on medium-high heat to get that golden crust before lowering the temp to finish cooking.
- Use a Meat Thermometer: Sounds obvious, but chicken backs are done at 165°F at the thickest part—guessing led to dry meat more times than I care to admit.
Dietary Considerations for This Recipe
Keto-Friendly Option
This dish fits perfectly into a keto diet with zero modifications. The 2 lb Chicken Backs contain virtually no carbs, and our dry rub adds only about 3g net carbs per serving. I often serve these with a side of roasted Brussels sprouts for a complete keto meal. 💪
Gluten-Free Naturally
All ingredients in this recipe are inherently gluten-free. Just ensure your spices are certified gluten-free—some brands add anti-caking agents with wheat. I always check labels at my local butcher shop to be safe.
Low-Sodium Adaptation
To reduce sodium, cut the Kosher Salt to ½ tbsp and omit the baking powder. Boost flavor with extra Dried Thyme or fresh rosemary. The crispiness won’t be as pronounced, but the taste remains excellent.
Dairy-Free and Nut-Free
This creation is naturally free of dairy and nuts. The only potential concern is cross-contamination in spice blends. I prefer Penzeys for their dedicated allergen-free processing.
High-Protein Benefits
A 4-oz serving provides about 25g of protein with minimal fat. Perfect for muscle maintenance or weight management. I find these especially satisfying after my coastal motorcycle rides.
Paleo-Compatible
For strict paleo, replace the Brown Sugar with coconut sugar. The Baking Powder can be omitted or replaced with cream of tartar. The flavor profile remains rich and satisfying.
Nutrition Facts
Frequently Asked Questions
Can I use frozen chicken backs?
Thaw them completely in the fridge overnight first. Pat them extra dry to compensate for moisture from freezing. Never cook from frozen—it leads to uneven cooking and soggy skin.
Why use baking powder in the rub?
It raises the skin’s pH, allowing it to brown deeply and crisp more effectively. Think of it as a chemical boost for that perfect crunch without changing flavor.
How do I store leftovers?
Keep in an airtight container in the fridge for up to 4 days. Reheat in the oven at 375°F for 10 minutes to restore crispiness.
Can I grill instead of baking?
Use medium-high heat and cook for 6-8 minutes per side. Watch closely—grill flares can char the skin quickly.

Trained in classic French technique but raised on slow-cooked ribs and spicy rubs, she blends culinary skill with smoke and soul.
- Recipe for Boneless Pork Chops in Cast Iron Skillet: Sear and Baste to Juicy Perfection - October 3, 2026
- Recipe for Boneless Cross Rib Roast: Slow-Roasted Beef with Herb Crust - October 3, 2026
- Hamburgers in Sauce Recipe Crock Pot: Slow-Cooked Savory Delight - October 3, 2026