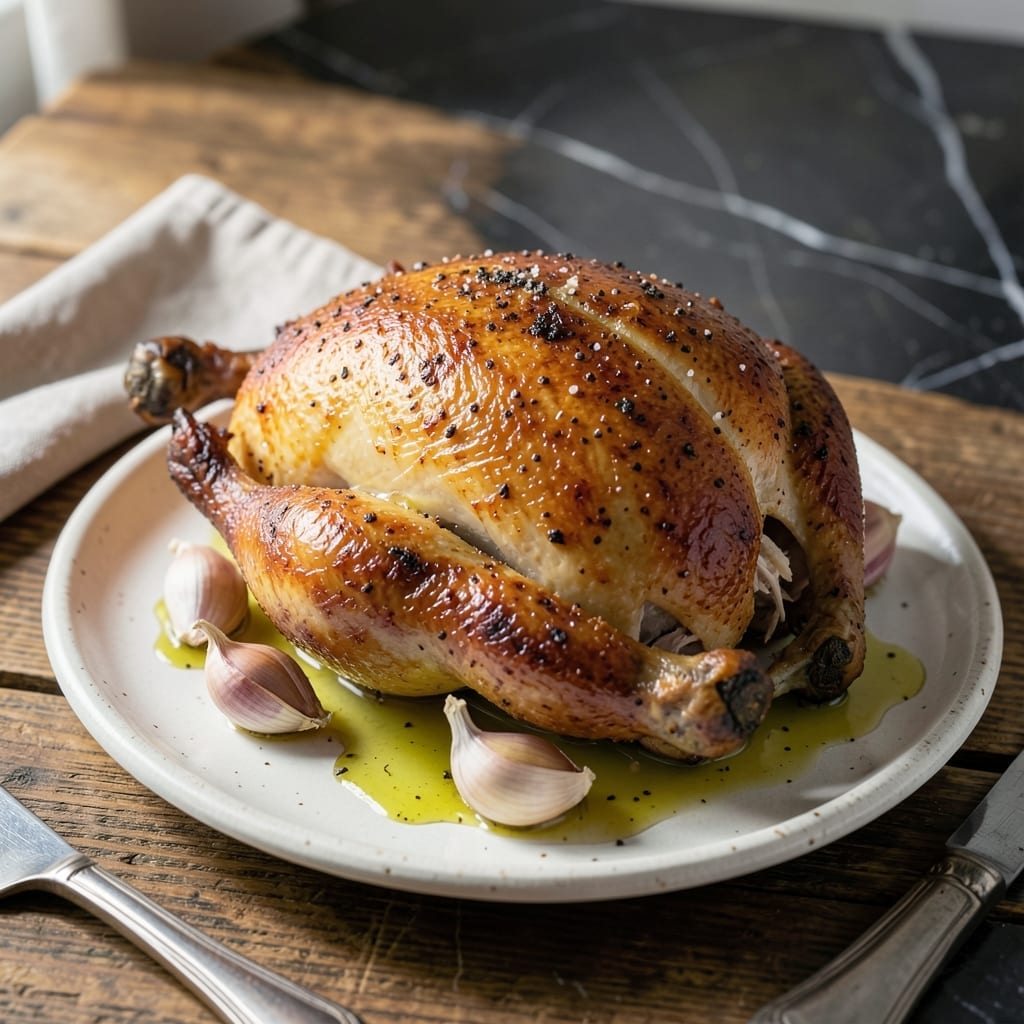
This oven-bag method delivers juicy, tender chicken with minimal effort and maximum flavor. The sealed environment traps steam, ensuring the meat stays moist while developing rich, concentrated taste.
No special equipment is needed—just a standard oven bag and simple seasonings. The result is restaurant-quality roasted chicken with golden skin and perfectly cooked meat every time.
Ingredients for Chicken in the Bag
Simple ingredients create restaurant-quality roasted chicken with minimal effort and maximum flavor.
| Ingredient | Amount | Notes |
|---|---|---|
| Whole Chicken 🍗 | 1 whole | 3 to 4 lb, patted dry inside and out |
| Oven Bag 🛍️ | 1 piece | Large enough for chicken |
| Unsalted Butter 🧈 | 4 tbsp | Melted for basting |
| Kosher Salt 🧂 | 1 ½ tsp | Diamond Crystal preferred |
| Black Pepper 🌶️ | 1 tsp | Freshly ground coarse |
| Garlic Cloves 🧄 | 4 cloves | Smashed, not minced |
| Fresh Rosemary Sprigs 🌿 | 2 whole | Woody stems removed |
| Fresh Thyme Sprigs 🍃 | 4 whole | Stems intact for easy removal |
| Lemon 🍋 | 1 whole | Sliced for cavity infusion |
| Yellow Onion 🧅 | 1 whole | Quartered for aromatic base |
| Carrots 🥕 | 2 whole | Cut into large chunks |
| Celery Stalks 🥬 | 2 whole | Cut into 2-inch pieces |
| All-Purpose Flour 🌾 | 1 tsp | For oven bag dusting |
[recipe_ingredient_scaler]
The chicken quality is paramount. Air-chilled birds from Whole Foods or local butchers yield superior texture and flavor compared to water-chilled supermarket options. Aim for 3.5-4 lb specimens—large enough for even cooking but small enough to fit comfortably in a standard oven bag. The skin should be dry to the touch (patting thoroughly with paper towels is essential) to ensure proper browning and steam trapping.
No fresh herbs? Dried rosemary and thyme at one-third the quantity work in a pinch, though the flavor profile will be more concentrated. Out of lemons? Orange slices with a touch of zest provide similar brightness. For the butter, ghee or olive oil can substitute, but you’ll lose some of that rich, buttery baste. The onion and celery are flexible—use what you have, but maintain the aromatic volume.
This method keeps the chicken exceptionally moist, so leftovers are rare. If storing, carve and refrigerate in airtight containers for up to 4 days. The oven bags are single-use, but the seasoning approach works with chicken pieces too. Always bring the bird to room temperature before cooking for even doneness.
Why You’ll Love This Recipe
- Set and Forget: I just pop the chicken in the bag with butter, salt, and pepper, then let the oven do all the work.
- Juicy Every Time: The butter keeps the meat so tender it falls off the bone.
- Feeds the Whole Table: One whole chicken means I’ve got dinner for the family plus leftovers for sandwiches.
- Low Mess High Reward: No splatters, no scrubbing—just toss the bag when it’s done.
Step-by-Step Instructions for Chicken in the Bag
This hands-off method delivers tender, flavorful chicken with minimal effort and maximum results.
Step 1: Prepare and Season the Chicken
Pat the whole chicken completely dry inside and out with paper towels—this ensures the skin crisps properly during roasting. Season the cavity and exterior generously with the 1.5 tsp kosher salt and 1 tsp black pepper, making sure to rub it into all the crevices for even flavor distribution.
Stuff the cavity with the sliced lemon, 4 cloves garlic cloves, 2 whole fresh rosemary sprigs, and 4 whole fresh thyme sprigs. These aromatics will infuse the meat with bright, herbal notes as it cooks. Tie the legs together with kitchen twine to maintain an even shape during roasting.
Step 2: Prepare the Oven Bag
Shake the 1 tsp all-purpose flour inside the oven bag until it’s evenly coated. This light dusting prevents the bag from sticking to the chicken and encourages browning. Place the bag in a 9×13-inch roasting pan or similar baking dish to provide stability.
Place the seasoned whole chicken inside the bag, breast-side up. Add the quartered yellow onion, 2 whole carrots, and 2 whole celery stalks around the chicken. These vegetables will create a flavorful base and help elevate the chicken for even cooking.
Step 3: Seal and Roast
Drizzle the 4 tbsp unsalted butter over the chicken, ensuring it’s evenly distributed. Close the bag with the provided tie or a secure knot, then cut 6 small slits in the top to allow steam to escape—this prevents the bag from bursting and ensures proper browning.
Bake in a preheated 375°F oven for 1 hour and 20 minutes to 1 hour and 40 minutes, or until the internal temperature reaches 165°F in the thickest part of the thigh. The chicken is done when the juices run clear and the skin is golden brown.
Step 4: Rest and Serve
Carefully remove the bag from the oven—use oven mitts, as steam will escape when you open it. Transfer the chicken to a cutting board and let it rest for 15 minutes before carving. This resting period allows the juices to redistribute, ensuring moist, flavorful meat.
Carve the chicken and serve with the roasted vegetables from the bag. The vegetables will have absorbed the rich, buttery juices, making them a delicious accompaniment to the tender, aromatic chicken.
Pro Tips For Making Chicken In The Bag
- Preheat the Bag: Shake 1 tablespoon of flour in the oven bag before adding the chicken—this prevents sticking and helps the skin crisp up, even in the steamy environment.
- Butter Under Skin: Slip a few pats of unsalted butter between the chicken skin and meat before bagging it. I learned this the hard way—it keeps the breast juicy when the dark meat finishes cooking.
- Don’t Overfill Bag: Leave at least 2 inches of space at the top when sealing the bag, or it’ll burst open mid-cook and leave you scrubbing grease off the oven floor.
- Rest Before Carving: Let the chicken sit in the bag for 10–15 minutes after baking—it reabsorbs the juices and makes carving way easier, even if you’re starving and tempted to dig in.
Pro Cooking Tips for Perfect Results
Bag Selection Matters
I always use Reynolds Oven Bags—they’re heat-safe up to 400°F and come with ties. Avoid generic brands, as their heat resistance can vary. For a 3-4 lb bird, the large size gives just enough room for steam circulation. 🔥
Seal It Tight
After adding the chicken and aromatics, gather the bag’s opening and secure it with the provided tie or a double knot. Press out excess air before sealing to prevent ballooning. Leave about 2 inches of space at the top for steam to expand without bursting the bag.
Slit Strategy
Cut 6 small slits (about ½ inch each) in the top of the bag with kitchen shears. Space them evenly to allow steam to escape while retaining moisture. This also lets the skin brown beautifully. I learned this trick at a BBQ competition—it makes all the difference.
Temperature Precision
Use an instant-read thermometer (I love ThermoWorks) to check the thickest part of the thigh. Pull the chicken at 160°F—it’ll coast to 165°F while resting. A 375°F oven ensures even cooking without drying the meat. 🌡️
Resting Ritual
Let the chicken rest 15 minutes before carving. This lets juices redistribute for maximum tenderness. Tent it loosely with foil to keep it warm. I often use this time to set the table or whip up a quick pan sauce with the bag’s juices.
Crispy Skin Hack
For extra-crispy skin, open the bag for the final 10 minutes of cooking. This exposes the chicken to direct heat, creating a golden, crackling finish. Just watch closely to prevent over-browning.
Nutrition Facts
Frequently Asked Questions
Do I need to use fresh herbs?
Fresh herbs are ideal, but dried work in a pinch. Use 1/3 the amount since dried are more concentrated. Rosemary and thyme hold up well to the long cooking time.
Can I cook this at a higher temperature?
Stick with 375°F for even cooking. Higher heat risks bursting the bag and drying the meat. The slow, steady temperature ensures juicy results.
What if my bag doesn’t have ties?
Secure the opening with a double knot. Press out excess air first to prevent ballooning during cooking. Leave 2 inches of space for steam.
How do I get crispier skin?
Open the bag for the last 10 minutes. Direct heat will create a golden, crackling finish. Watch closely to avoid over-browning.

Trained in classic French technique but raised on slow-cooked ribs and spicy rubs, she blends culinary skill with smoke and soul.
- Recipe for Boneless Pork Chops in Cast Iron Skillet: Sear and Baste to Juicy Perfection - October 3, 2026
- Recipe for Boneless Cross Rib Roast: Slow-Roasted Beef with Herb Crust - October 3, 2026
- Hamburgers in Sauce Recipe Crock Pot: Slow-Cooked Savory Delight - October 3, 2026