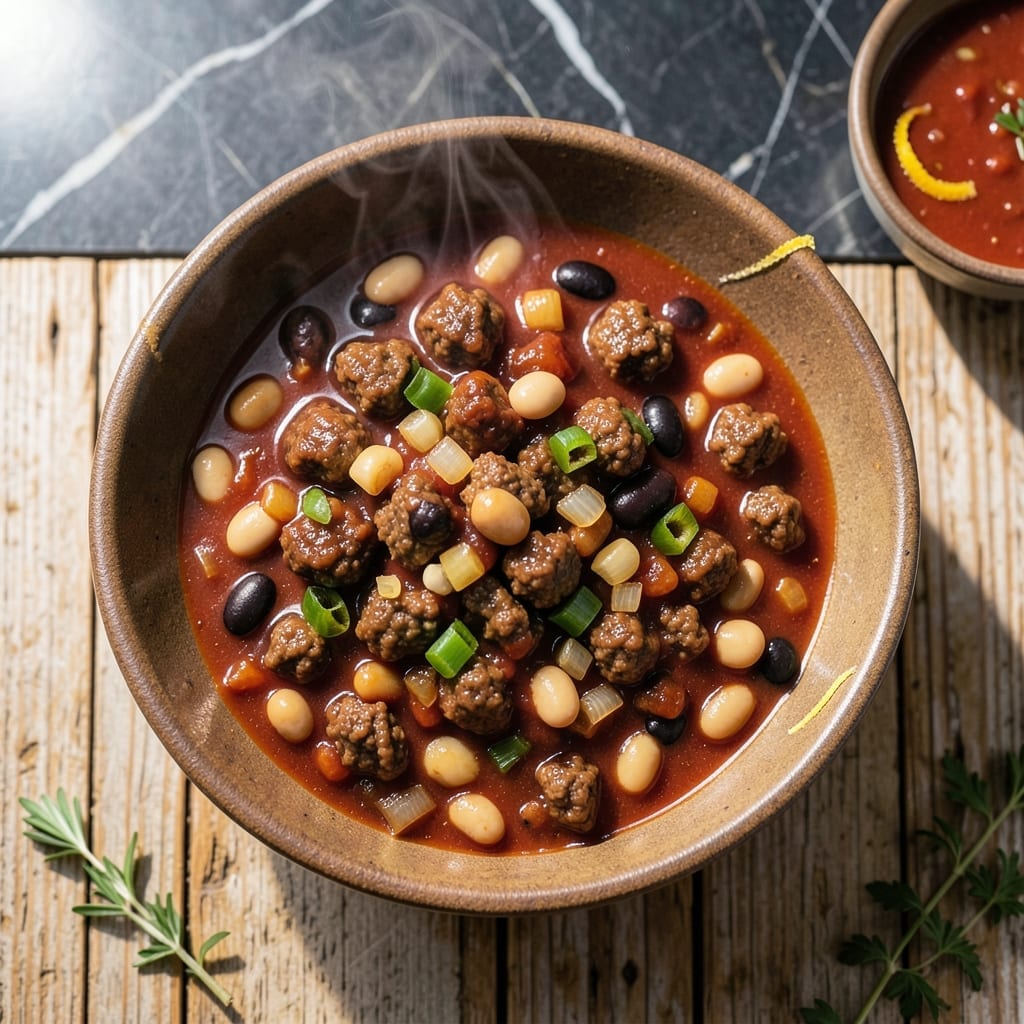
This chili delivers deep, robust flavor with a secret ingredient that sets it apart. Tomato juice creates the perfect base, balancing rich meat and spices while adding natural sweetness.
Slow simmering builds layers of taste, resulting in a hearty bowl that satisfies every time. The texture is thick and comforting, with every bite packed with savory depth.
Ingredients for Chili Recipe with Tomato Juice
Hearty chili requires quality ingredients for deep, robust flavor in every bite.
| Ingredient | Amount | Notes |
|---|---|---|
| Ground Beef 🥩 | 1 ½ lb | 80/20 lean-to-fat ratio preferred |
| Tomato Juice 🍅 | 4 cups | Low-sodium variety recommended |
| Kidney Beans 🌰 | 2 cans | Drained and rinsed thoroughly |
| Black Beans 🌰 | 1 can | Drained and rinsed thoroughly |
| Yellow Onion 🧅 | 1 whole | Medium-sized, finely diced |
| Garlic Cloves 🧄 | 4 cloves | Minced for maximum flavor |
| Green Bell Pepper 🌶️ | 1 whole | Medium-sized, finely diced |
| Chili Powder 🌶️ | 2 tbsp | Adjust spice level to taste |
| Ground Cumin 🌿 | 1 tbsp | Toasted for enhanced aroma |
| Dried Oregano 🍃 | 1 tsp | Crushed between fingers |
| Salt 🧂 | 1 ½ tsp | Diamond Crystal kosher preferred |
| Black Pepper 🌶️ | 1 tsp | Freshly ground for best results |
| Beef Stock 🥩 | 1 cup | Low-sodium for controlled seasoning |
| Tomato Paste 🍅 | 2 tbsp | For concentrated tomato flavor |
| Olive Oil 🫒 | 2 tbsp | Extra-virgin for sautéing |
[recipe_ingredient_scaler]
The ground beef forms the foundation of this dish. Optimal quality requires 80/20 lean-to-fat ratio for ideal texture and flavor. Butcher shop ground chuck delivers superior results, though well-stocked supermarkets carry suitable alternatives. The tomato juice base benefits from low-sodium varieties to allow precise seasoning control throughout the cooking process.
Substitutions can adapt to pantry constraints without sacrificing depth. Ground turkey or pork may replace beef at a one-to-one ratio. For bean varieties, pinto or red kidney beans work equally well. If fresh peppers are unavailable, frozen diced bell peppers (thawed and drained) maintain structural integrity. The spice blend allows flexibility—add cayenne for heat or smoked paprika for complexity.
Prepared chili stores exceptionally well, with flavors intensifying over 24-48 hours. Refrigerate in airtight containers for up to 5 days, or freeze for 3 months with minimal quality degradation. The tomato juice base prevents separation during storage, maintaining that signature thick, comforting texture.
Why You’ll Love This Recipe
- I’ll be real: it tastes even better the next day, and it freezes like a dream for lazy future me.
- One Pot Wonder: I just brown the beef, dump in the tomato juice and beans, and let it simmer—minimal cleanup, maximum flavor.
- Rich and Hearty: The tomato juice soaks into the beef and beans, creating a deep, savory taste that’s way better than watered-down chili.
- Feeds a Crowd: Between us, this stretches to six bowls easily, and it’s just as good for a weeknight dinner as it is for game day.
Step-by-Step Instructions for Chili With Tomato Juice
Master this method for a rich, deeply flavored chili that delivers consistent results every time.
Step 1: Brown the Ground Beef
Heat the 2 tbsp Olive Oil in a large Dutch oven or heavy pot over medium-high heat. Add the 1.5 lb Ground Beef and cook, breaking it apart with a wooden spoon, for 6-8 minutes until fully browned and no longer pink.
I prefer an 80/20 lean-to-fat ratio for ground beef in chili—the fat renders out, creating a richer base flavor. Drain excess fat if needed, but leave about 1 tbsp in the pot to sauté the vegetables. This ensures your chili has a robust, meaty depth.
Step 2: Sauté the Aromatics
Add the finely diced 1 whole Yellow Onion, 1 whole Green Bell Pepper, and minced 4 cloves Garlic Cloves to the pot. Cook for 4-5 minutes until the vegetables soften and the onion becomes translucent.
Stir in the 2 tbsp Chili Powder, 1 tbsp Ground Cumin, 1 tsp Dried Oregano, 1.5 tsp Salt, and 1 tsp Black Pepper. Toast the spices for 1-2 minutes until fragrant—this step enhances their aroma and deepens the flavor profile.
Step 3: Build the Chili Base
Add the 2 tbsp Tomato Paste and stir it into the beef and aromatics, cooking for 1-2 minutes to caramelize slightly. This step intensifies the tomato flavor and helps thicken the chili.
Pour in the 4 cups Tomato Juice and 1 cup Beef Stock, scraping the bottom of the pot to deglaze and lift any browned bits. These bits, known as fond, are packed with flavor and will dissolve into your chili, adding complexity.
Step 4: Simmer for Depth of Flavor
Add the drained and rinsed 2 cans Kidney Beans and 1 can Black Beans to the pot. Stir well to combine all ingredients. Bring the mixture to a boil, then reduce the heat to low and let it simmer uncovered for 45-60 minutes.
Simmering uncovered allows the chili to thicken naturally. Stir occasionally to prevent sticking, and taste after 30 minutes to adjust seasoning if needed. The flavors will meld beautifully, and the chili will develop a rich, hearty consistency.
You’ll know it’s ready when the liquid has reduced slightly and the chili coats the back of a spoon. Serve hot, and enjoy the deep, robust flavor that makes this dish a standout.
Pro Tips For Making Chili Recipe With Tomato Juice
- Brown the Beef Well: I learned this the hard way—don’t rush browning the ground beef. Let it develop a deep color in the pan (about 5-7 minutes) to build rich flavor before adding liquids.
- Drain the Beans: After burning a few pots, I finally figured out that rinsing and draining the kidney and black beans removes excess starch, keeping the chili from turning into a thick, gummy mess.
- Bloom the Spices: Sounds weird, but it works: cook your spices (like cumin or chili powder) in the hot pan with the onions for 30 seconds before adding tomato juice—it wakes up their aroma.
- Use Cold Tomato Juice: My grandmother swore by this, and she was right: adding cold tomato juice to the hot beef and onions helps deglaze the pan and lifts all those browned bits right into the chili.
Storing and Reheating Leftovers
Refrigerator Storage
Let your chili cool for no more than 2 hours before transferring to airtight containers. Store at 40°F or below for up to 5 days. The tomato juice base actually improves overnight as flavors meld together. ❄️
Freezer Storage
This chili freezes beautifully for up to 3 months without losing quality. I use flat freezer bags (quart or gallon size) because they stack efficiently. Leave 1 inch headspace for expansion and squeeze out excess air to prevent freezer burn.
Stovetop Reheating
Pour chili into a heavy pot, add ¼ cup water or beef stock to prevent sticking, and heat over medium-low for 10-15 minutes. Stir occasionally. Taste and adjust seasoning—it often needs a pinch of salt after reheating. 🔥
Microwave Reheating
For quick meals, microwave individual portions covered with a damp paper towel. Use 70% power for 2-3 minutes, stir, then continue in 1-minute intervals until reaching 165°F. Add a splash of water if it looks dry.
Thawing Frozen Chili
Transfer frozen chili to the refrigerator 24 hours before reheating for best results. For faster thawing, place the sealed bag in cold water, changing the water every 30 minutes. Never thaw at room temperature.
Nutrition Facts
Frequently Asked Questions
Can I use V8 juice instead of tomato juice?
Yes, V8 juice works as a substitute and adds extra vegetable depth. Use the same 4 cups measurement, but reduce added salt since V8 contains more sodium.
How do I thicken chili that’s too thin?
Simmer uncovered for 10-15 minutes to reduce the liquid. For faster results, mix 1 tbsp cornstarch with 2 tbsp cold water and stir into the pot. Cook for 2-3 minutes until thickened.
Can I make this in a slow cooker?
Brown the beef first, then transfer everything to your slow cooker. Cook on low for 6-8 hours or high for 3-4 hours. The flavors will develop beautifully.
What if my chili tastes too acidic?
Balance the acidity by adding 1 tsp brown sugar or 1 tbsp honey. Stir well and taste after 5 minutes of simmering. This neutralizes the acid without altering the flavor profile.

Trained in classic French technique but raised on slow-cooked ribs and spicy rubs, she blends culinary skill with smoke and soul.
- Recipe for Boneless Pork Chops in Cast Iron Skillet: Sear and Baste to Juicy Perfection - October 3, 2026
- Recipe for Boneless Cross Rib Roast: Slow-Roasted Beef with Herb Crust - October 3, 2026
- Hamburgers in Sauce Recipe Crock Pot: Slow-Cooked Savory Delight - October 3, 2026