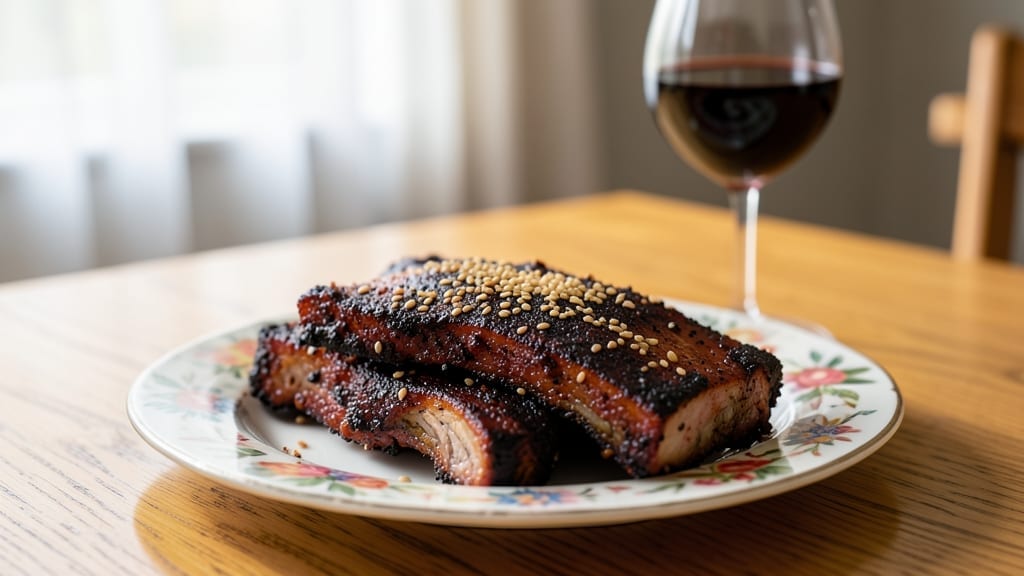
This Chili’s dry rub ribs recipe unlocks the secret to that iconic smoky-spiced crust you crave without leaving your kitchen. The blend of precise spices creates a bark so flavorful it rivals the chain’s signature taste—no shortcuts, just professional-level results.
I developed this mix after years of testing, ensuring every tablespoon delivers deep, complex flavor that transforms tough ribs into tender, fall-off-the-bone perfection.
The magic lies in the balance: smoky paprika for that signature aroma, brown sugar for caramelization, and earthy spices like cumin and garlic powder that build layers of flavor. This isn’t just another generic rub—it’s a foolproof seasoning blend that works whether you’re smoking, grilling, or baking.
The spices are measured in exact proportions, so you can mix them ahead and store them for months in an airtight container.
What makes this dry rub truly special is how it transforms ribs during cooking. The spices form a deep, crackling crust that seals in moisture while delivering bold, smoky flavor in every bite.
Unlike pre-packaged mixes, this recipe gives you control over the intensity—adjust the heat level to your preference by tweaking the cayenne or black pepper. The result? Ribs that taste like they came straight from your favorite restaurant.
Use this dry rub on pork ribs, beef ribs, or even chicken thighs for restaurant-quality flavor. The instructions are simple: apply the rub generously before cooking, and let the spices work their magic.
Whether you’re hosting a BBQ or craving ribs on a weeknight, this blend delivers professional results every time. Let’s get started with the ingredients you’ll need.
Ingredients for chili’s dry rub ribs
A perfect blend of smoky, sweet, and spicy ingredients that transforms ribs into restaurant-quality perfection.
| Ingredient | Amount | Notes |
|---|---|---|
| Pork Baby Back Ribs 🥓 | 4 lb | Bone-in, cut into individual ribs |
| Smoked Paprika 🌶️ | ¼ cup | High-quality for authentic smokiness |
| Brown Sugar 🍯 | ¼ cup | Light or dark, packed |
| Ground Cumin 🌿 | 2 tbsp | Toasted for deeper flavor |
| Garlic Powder 🧄 | 2 tbsp | Freshly ground preferred |
| Onion Powder 🧅 | 1 tbsp | Fine grind for even distribution |
| Black Pepper 🌶️ | 1 tbsp | Freshly cracked for intensity |
| Cayenne Pepper 🔥 | 1 tbsp | Adjust for heat preference |
| Salt 🧂 | 1 tbsp | Diamond Crystal kosher |
| Mustard Powder 🍯 | 1 tsp | For subtle tang |
| Apple Cider Vinegar 🍎 | 1 tbsp | For tenderizing and tang |
| Yellow Mustard 🍯 | 2 tbsp | For initial coating |
| Olive Oil 🫒 | 2 tbsp | For rib coating |
[recipe_ingredient_scaler]
The smoked paprika is non-negotiable here—it carries that signature Chili’s aroma. Grab the Penzeys brand if you’re splurging, but the McCormick or Simply Organic from grocery stores work fine too. Look for deep red color and a strong, smoky scent. The brown sugar should be packed into the measuring cup for accurate caramelization. I always toast the ground cumin in a dry pan for 30 seconds before mixing—it adds a nutty depth that pre-ground spices miss. For the ribs, bone-in baby backs are ideal (they’re pre-cut at most butchers), but St. Louis-style slabs work too if you prefer a meatier bite.
No smoked paprika? Half a tablespoon of liquid smoke (like La Choy) plus 1 extra tablespoon of regular paprika gets you close, but it won’t be identical. Short on mustard powder? Dijon mustard at double the amount works in a pinch, though it’ll add moisture. The apple cider vinegar is key for tenderizing—white vinegar works too, but it’s harsher. For heat control, reduce the cayenne to half a teaspoon if your family isn’t into spice. The yellow mustard and olive oil create the perfect base coat before the dry rub—don’t skip this step, or the spices won’t stick. If you’re cooking beef ribs instead of pork, reduce the cayenne by half to avoid overpowering the meat.
This dry rub keeps indefinitely in an airtight container in a cool, dark place—just like the spices themselves. I make double batches and store them in amber glass jars to preserve freshness. For best results, apply the rub 12-24 hours ahead of cooking and refrigerate the ribs on a wire rack. The ribs themselves will last 3-4 days in the fridge after cooking, though they’re best enjoyed fresh. Freeze cooked ribs for up to 3 months—just thaw overnight in the fridge before reheating. The leftovers? Perfect for tacos or sandwiches—just chop the meat off the bones.
Why You’ll Love This Recipe
- No-Fuss Ribs: Honestly, the prep is that simple—just dry the ribs, slap on the mustard-vinegar mix, and press that rub in. No fancy prep, no stress. The real magic happens in the oven, but honestly? That’s where it should.
- Crispy Bark, Creamy Center: That final 15 minutes at 450°F turns the rub into a crackling crust while keeping the meat fall-apart tender. The smoked paprika and brown sugar caramelize into something dangerously addictive—like a smoky, slightly sweet hug for your taste buds.
- Feed a Crowd, No Guilt: Four pounds of ribs? Perfect for game day, potlucks, or even just feeding my husband and me twice. And because the rub can sit on the ribs for a day ahead, you’re not stuck slaving over the stove. Just toss them in the oven and forget about it—until the aroma hits.
- Budget Ribs, Big Flavor: Pork baby backs are cheaper than beef ribs but pack the same punch—especially with this rub. The toasted cumin and cayenne add depth without breaking the bank, and leftovers reheat beautifully (if you can wait that long). My secret weapon for when I want flavor without the price tag.
Step-by-step instructions for Chili’s dry rub ribs recipe
Here’s how to create that signature smoky-spiced crust that makes these ribs unforgettable.
Prepare the Ribs for Maximum Flavor
Start by removing the membrane from the back of each rib bone. This thin layer can prevent proper seasoning penetration and crisp crust formation. To remove it, slide your thumb or a butter knife under the membrane at the bone end and gently peel it away from one end to the other. You’ll hear a soft popping sound as it releases.
Next, pat the ribs dry with paper towels—this is absolutely critical for developing that crispy bark. Any moisture left on the surface will prevent the rub from sticking properly and create steam instead of a crust. I like to work in batches, drying each rack thoroughly before moving to the next.
Create the Signature Dry Rub
In a medium bowl, combine the ¼ cup smoked paprika, ¼ cup brown sugar, 2 tablespoons ground cumin, 2 tablespoons garlic powder, 1 tablespoon onion powder, 1 tablespoon black pepper, 1 tablespoon cayenne pepper, 1 tablespoon salt, and 1 teaspoon mustard powder. Use your hands to thoroughly mix all the spices together until you have a completely homogeneous blend with no visible streaks of individual spices.
Here’s the thing—don’t skip the hand-mixing. The friction helps activate the spices and creates a more cohesive rub that will cling better to the ribs. The mustard powder might seem like an odd addition, but it adds that subtle tang that makes this rub so distinctive. Once fully mixed, transfer the rub to a small plate or shallow dish for easy application.
Coat the Ribs with Mustard and Rub
In a separate bowl, whisk together the 2 tablespoons yellow mustard and 1 tablespoon apple cider vinegar. This mixture serves two purposes: it creates a sticky base for the dry rub to adhere to, and the vinegar helps tenderize the meat slightly. Using your fingers, coat each rib rack evenly with this mustard mixture, making sure to get into all the crevices between the bones.
Now comes the fun part—generously coat each rib with the dry rub mixture. Press the rub firmly into the meat, especially focusing on the meaty portions between the bones. The ribs should look completely covered in the spice blend with no bare spots showing. I find it helps to work in sections, applying the rub to one rack at a time before moving to the next. This ensures you don’t miss any spots.
Rest and Preheat for Perfect Crisp
Once all the ribs are coated, let them rest at room temperature for 30 minutes. This allows the rub to adhere more thoroughly and ensures even cooking. Don’t skip this step—cold meat will cook unevenly and might not develop that perfect crust. While the ribs rest, preheat your oven to 275°F. This lower temperature might seem counterintuitive, but it’s key for achieving tender, fall-off-the-bone ribs with that signature bark.
Place the ribs on a wire rack set inside a rimmed baking sheet. The rack allows air to circulate around all sides, which is crucial for even cooking and crisping. If you don’t have a wire rack, use foil to create a makeshift rack by poking holes in it. This prevents the ribs from sitting in any juices that might accumulate during cooking.
Cook Low and Slow for Tender Perfection
Place the ribs in the preheated oven and cook for 2 hours. You’ll want to flip them halfway through cooking—around the 1-hour mark. This ensures even browning and helps develop that beautiful crust on both sides. The ribs are done when they reach an internal temperature of 195-203°F at the thickest part of the meat, and the bones should be wobbling slightly when you shake them.
During the last 15 minutes of cooking, increase the oven temperature to 450°F. This broil-like finish helps caramelize the rub and creates that signature crispy bark that makes these ribs so irresistible. Watch them closely during this final stage—they can go from perfect to burnt in minutes. When the crust is deep mahogany brown and the ribs are fork-tender, remove them from the oven and let them rest for 10 minutes before serving.
Pro Tips For Making Chili’S Dry Rub Ribs
- Toast the Cumin First: I learned this the hard way—using store-bought cumin straight from the jar means missing that deep, toasty aroma that makes this rub sing. Heat the 2 tbsp ground cumin in a dry skillet over medium for 30 seconds until fragrant, then cool before mixing. The extra effort makes a real difference in the final crust.
- Don’t Skip the Mustard Coat: The 2 tbsp yellow mustard + 1 tbsp apple cider vinegar mix isn’t just flavor—it’s the glue that keeps the rub from falling off during cooking. Slather it on thickly, especially between the bones, or you’ll end up with patchy seasoning. (Yes, even if you’re impatient like me.)
- Flip at the 1-Hour Mark: I used to forget to flip the ribs at the 1-hour mark, and one side always ended up bland while the other burned. Set a timer—this ensures even browning and that perfect crust on both sides. The 275°F low-and-slow phase is where the magic happens, but consistency matters.
- Broil with a Lid: The 450°F broil finish is non-negotiable for that caramelized bark, but watch like a hawk—ribs can go from golden to charred in minutes. If your oven runs hot, tent them loosely with foil the last few minutes. (Your future self will thank you.)
Creative variations of this recipe
Spicy Southwest Style
Transform these ribs into a fiery Southwest sensation by adding 1 tbsp chili powder and 1 tsp smoked paprika to the dry rub. I also toss in ½ cup chopped cilantro and ¼ cup diced jalapeños after cooking for fresh heat.
Serve with a side of lime crema—just blend ½ cup sour cream with juice of 1 lime and ½ tsp cumin. This variation becomes a crowd-pleaser at summer cookouts. 🌶️
Sweet and Smoky BBQ Glaze
For a sticky-sweet twist, brush the ribs with ¼ cup BBQ sauce (like Sweet Baby Ray’s) mixed with 1 tbsp honey after the initial rub application. I apply this glaze during the last 30 minutes of cooking at 450°F to let it caramelize beautifully.
This creates a perfect balance of smoky rub and tangy sweetness. 🍯
Herb-Infused Mediterranean
Swap out the cayenne for 1 tbsp dried oregano and 1 tsp dried thyme to create a Mediterranean-inspired rub. Add 2 tbsp olive oil to the mustard mixture and finish with fresh lemon zest and chopped kalamata olives after cooking.
This variation pairs perfectly with a Greek salad and tzatziki sauce. 🌿
Spicy Honey Mustard Glaze
Create a double-spice effect by mixing 2 tbsp honey with 1 tbsp Dijon mustard and 1 tsp hot sauce (like Frank’s RedHot) for a final glaze. Apply this mixture during the last 10 minutes of the high-heat finish.
The sweet, tangy, and spicy layers create a complex flavor profile that keeps everyone coming back for seconds. 🔥
Beef Ribs Adaptation
For beef ribs, reduce the cayenne pepper to ½ tbsp and increase the brown sugar to ⅓ cup to complement the richer meat. Cook at 250°F for 3 hours before the final 450°F broil.
The longer cook time ensures the beef absorbs the rub deeply without drying out. I recommend using St. Louis-style beef ribs for this variation. 🥩
Nutrition facts
Frequently asked questions
Why does the recipe call for removing the membrane from the ribs?
The membrane acts like a barrier, preventing the dry rub from sticking properly and creating that signature crispy bark. Removing it ensures even seasoning penetration and helps develop the perfect texture. Use your thumb or a butter knife to gently peel it away—you’ll hear a soft popping sound when it releases!
Can I make the dry rub ahead of time?
The dry rub keeps indefinitely in an airtight container. Mix it up to 2 weeks ahead and store it at room temperature. For best results with the ribs, apply the rub 12-24 hours before cooking to let the flavors meld. Just make sure to refrigerate the coated ribs on a wire rack.
What if I don’t have a wire rack for cooking?
No problem! Create a makeshift rack by poking holes in a sheet of foil. This allows air to circulate around the ribs, preventing them from sitting in their own juices. If you’re in a pinch, place the ribs on a baking sheet lined with foil, but flip them frequently for even cooking.
How do I know when the ribs are fully cooked?
Check for an internal temperature of 195-203°F at the thickest part of the meat, and the bones should wobble slightly when you shake them. The crust should also be deep mahogany brown. Use a meat thermometer for accuracy—this ensures tender, fall-off-the-bone perfection!
Can I use this dry rub on other meats besides ribs?
Yes! This versatile rub works beautifully on chicken thighs, beef brisket, or even pork chops. For beef, reduce the cayenne slightly and increase the brown sugar to complement the richer meat. The key is to apply it generously and cook low and slow for best results.

Trained in classic French technique but raised on slow-cooked ribs and spicy rubs, she blends culinary skill with smoke and soul.
- Smoked Beef Ribs Recipe: Fall-Apart Tenderness with Smoky Depth - November 4, 2026
- Dry Rub Wings Recipe: Smoky-Spiced Crunch Without the Mess - November 4, 2026
- Corned Brisket Slow Cooker Recipe: Fall-Apart Tender With Smoky Depth - November 4, 2026