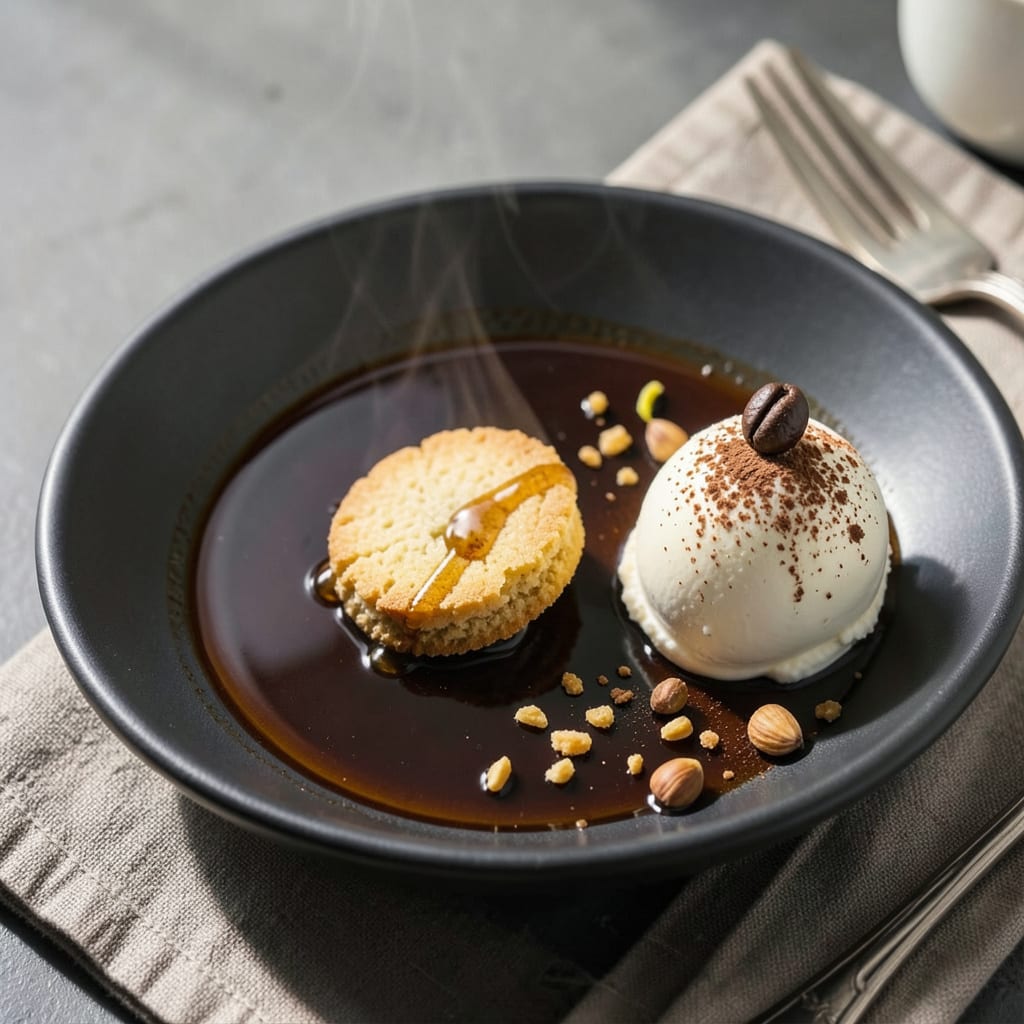
I’ll be real with you: this coffee reduction is the secret weapon your kitchen’s been missing. It’s not just syrup—it’s concentrated coffee magic that transforms everything from desserts to cocktails. I stumbled onto this while trying to salvage leftover cold brew, and now I make it intentionally every week.
The process is simple but powerful. You take strong brewed coffee (or espresso if you’re fancy) and simmer it down until it becomes thick and glossy—like liquid gold for your taste buds. I’ve found the sweet spot is reducing it by half, which gives you that intense coffee flavor without bitterness. Add a touch of sugar or honey if you want, but honestly, the pure version is where the real magic happens.
What you end up with is a versatile glaze that works in ways you wouldn’t expect. Drizzle it over vanilla ice cream, stir it into cocktails, or even use it to glaze meats—it adds depth everywhere. The first time I brushed it on grilled pork chops, my dinner guests thought I’d spent hours in the kitchen. Little did they know it took 15 minutes of mostly hands-off simmering.
Best part? It keeps for weeks in the fridge, so you can always have that coffee boost ready. Whether you’re making tiramisu, spiking your morning latte, or experimenting with coffee-rubbed steaks, this reduction elevates everything. Let’s get that pot simmering.
📚 In This Guide
- What You’ll Need
- Instructions
- Tips and Common Mistakes
What Youll Need
- ● 1 cup (240ml) freshly brewed strong coffee (dark roast preferred for depth 🌱)
- ○ 1-2 tbsp (15-30ml) granulated sugar, honey, or maple syrup (adjust to taste—optional for sweetness 🍯)
- ○ 1 tsp (5ml) vanilla extract or 1 cinnamon stick (optional, for warmth 🌿)
- ● 1 small saucepan (non-stick or stainless steel, 1-2 quart capacity)
- ● Wooden spoon or silicone spatula (for gentle stirring)
- ● Fine-mesh strainer (if using spices like cinnamon or star anise)
- ● Glass jar or airtight container (for storage, 8-12 oz capacity)
- ● 1 tbsp (15g) unsalted butter (for a velvety finish 🧈)
- ● Pinch of salt (enhances flavor balance)
- ● 1-2 drops orange or almond extract (for creative twists 🍊)
- ● Candy thermometer (for precision—target 220°F/104°C for syrupy consistency)
Instructions
Creating this intense coffee concentrate is simpler than you think—just patience and attention to detail.
Brew Strong Coffee Base
Start by brewing 4 cups of strong coffee using your preferred method. I recommend a French press or drip coffee maker with a dark roast blend for maximum flavor extraction. The coffee should be noticeably stronger than what you’d normally drink—this concentration is essential since we’ll be reducing it significantly.
Use freshly ground beans if possible, as pre-ground coffee loses its aromatic oils quickly. The water should be just off the boil (around 200°F) when it hits the grounds. Let it steep for 4-5 minutes before pressing or filtering—this ensures full flavor extraction without bitterness.
Strain and Prepare for Reduction
Once brewed, strain the coffee through a fine-mesh sieve or coffee filter to remove any sediment. This step creates a clean base for reduction, preventing any gritty texture in your final product. Pour the strained coffee into a wide, heavy-bottomed saucepan—this shape allows for faster, more even reduction.
I always use a light-colored pan for this process so I can monitor the color change as it reduces. The coffee should fill the pan no more than halfway to prevent boiling over. At this point, you’re ready to begin the transformation from liquid coffee to rich, syrupy reduction.
Reduce Over Gentle Heat
Place the saucepan over medium-low heat and bring to a gentle simmer. You’ll want to maintain a steady but not vigorous simmer—small bubbles breaking the surface consistently, but not a rolling boil. The reduction process will take 45-60 minutes, so be patient and resist the urge to increase the heat.
As the liquid reduces, you’ll notice the color deepening and the aroma becoming more concentrated. Stir occasionally with a silicone spatula, scraping the sides of the pan to prevent any sugar from crystallizing. The volume will decrease by about two-thirds during this process.
Monitor and Finish the Reduction
After about 45 minutes, start checking the consistency more frequently. The reduction is done when it coats the back of a spoon and leaves a clear path when you run your finger through it. At this stage, it should have reduced to about ½ cup of thick, glossy syrup with an intense coffee flavor.
Remove from heat immediately once it reaches this consistency—the reduction will continue to thicken slightly as it cools. Let it cool completely in the pan before transferring to a glass jar or bottle. The finished reduction should be viscous but still pourable, with a deep mahogany color and powerful coffee aroma.
Store and Use Your Coffee Reduction
Transfer the cooled reduction to an airtight container. It will keep in the refrigerator for up to 3 weeks, though I’ve found the flavor remains most vibrant in the first 10 days. The reduction may thicken further when chilled—this is normal and you can gently warm it to return to its original consistency.
Use this concentrated coffee glaze to elevate desserts like ice cream, cheesecake, or tiramisu. It also makes an excellent addition to cocktails or as a sophisticated drizzle for breakfast pastries. A little goes a long way—start with 1 teaspoon and adjust to taste in your recipes.
Tips and Common Mistakes
Patience and attention to detail make all the difference when creating this intense coffee concentrate. Here’s what I’ve learned from making countless batches.
Brewing for Maximum Flavor: In Step 1, using water at exactly 200°F is crucial—boiling water can scorch the grounds and create bitterness. I always use a thermometer to check, especially with dark roast blends that are more sensitive to overheating. The 4-5 minute steep time might seem short, but it’s perfect for extracting bold flavor without over-extracting tannins that would make the reduction harsh.
The Reduction Process: When you reach Step 3, maintaining that medium-low heat is non-negotiable. I’ve ruined batches by getting impatient and turning up the heat—this causes the sugars to burn rather than caramelize gently. During the 45-60 minute reduction, stir more frequently as it thickens to prevent hot spots from forming. The color transformation from dark brown to deep mahogany is your visual cue that you’re on track.
Knowing When It’s Done: At the 45-minute mark in Step 4, start testing the consistency every 2-3 minutes. The spoon test is foolproof: when it coats the back smoothly and your finger leaves a clean trail, it’s ready. Don’t wait for it to reach molasses thickness in the pan—it will continue to thicken as it cools. I aim for about ½ cup of finished reduction, which gives the perfect balance between intensity and pourability.
Storage Wisdom: While the reduction keeps for 3 weeks refrigerated, I’ve noticed the flavor peaks within the first 10 days. If it thickens too much in storage, warm it gently with a teaspoon of water rather than reheating aggressively. For long-term storage, portion into ice cube trays—each cube becomes a perfect single-serving addition to drinks or desserts.
Pro Tips for Coffee Reduction
- Patience and attention to detail make all the difference when creating this intense coffee concentrate. Here’s what I…
- Brewing for Maximum Flavor: In Step 1, using water at exactly 200°F is crucial—boiling water can scorch the grounds a…
- The Reduction Process: When you reach Step 3, maintaining that medium-low heat is non-negotiable. I’ve ruined batches…
Frequently Asked Questions
Got questions about making the perfect coffee reduction? You’re not alone! Here are the most common ones—answered simply and clearly.
How long does it take to reduce coffee for a glaze?
Typically, 15–25 minutes on medium-low heat. Stir occasionally to prevent burning. The time depends on your desired thickness—aim for a syrupy consistency that coats the back of a spoon. Patience is key!
Can I use instant coffee instead of brewed?
Yes, but with a twist! Dissolve 2 tbsp instant coffee in ½ cup hot water first. The flavor won’t be as deep as brewed coffee, so add a pinch of cocoa powder or vanilla to boost richness.
My reduction turned bitter—how do I fix it?
Bitterness often comes from over-reducing or high heat. Balance it by stirring in ½ tsp brown sugar, a pinch of salt, or a splash of cream. Start with small amounts and adjust to taste.
What are the best alternatives to sugar in coffee reduction?
Try honey, maple syrup, or agave for natural sweetness. For sugar-free options, a few drops of vanilla stevia or monk fruit sweetener work well—just add gradually to avoid overpowering.
How long can I store coffee reduction, and how?
Keep it in an airtight container in the fridge for up to 2 weeks. For longer storage, freeze in ice cube trays (thaw as needed). Reheat gently with a splash of water if it thickens too much.
Cutting back on coffee doesn’t mean cutting back on flavor! With a simple coffee reduction, you can turn a humble brew into a bold, versatile glaze that elevates desserts, cocktails, and even savory dishes. 🍮☕ Whether you drizzle it over ice cream or stir it into a cocktail, this concentrated magic adds depth without the extra liquid.
Ready to experiment? Start with a small batch—adjust the sweetness or spice to match your taste, and let your creativity flow! For more inspiration, try pairing it with chocolate ganache or whipped cream next. Happy reducing! ✨

Trained in classic French technique but raised on slow-cooked ribs and spicy rubs, she blends culinary skill with smoke and soul.
- Recipe for Boneless Pork Chops in Cast Iron Skillet: Sear and Baste to Juicy Perfection - October 3, 2026
- Recipe for Boneless Cross Rib Roast: Slow-Roasted Beef with Herb Crust - October 3, 2026
- Hamburgers in Sauce Recipe Crock Pot: Slow-Cooked Savory Delight - October 3, 2026