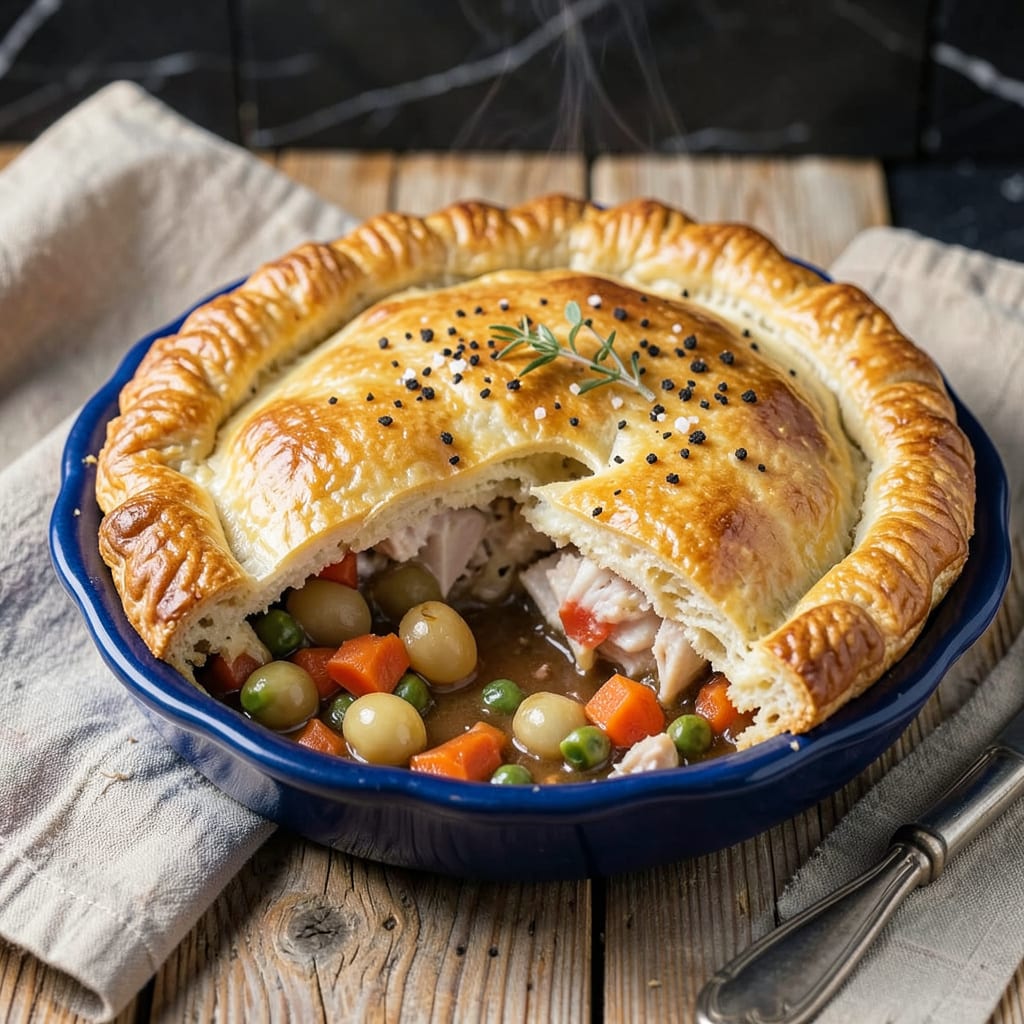
I’ll be real with you: frozen pot pie doesn’t have to mean sad, soggy crusts or lukewarm fillings. After burning through more frozen dinners than I’d like to admit, I cracked the code for getting that golden, crispy crust and piping-hot filling every single time—no fancy equipment required.
Here’s the thing—most people just follow the box instructions and end up disappointed. But with a few simple tweaks (like adjusting oven temps or adding a quick broil at the end), you can transform that frozen pie into something that actually tastes homemade. I’m talking flaky crust that shatters when you cut into it, with a creamy filling that’s steaming hot all the way through.
The best part? This works whether you’re using the oven, air fryer, or even the microwave in a pinch. I’ve tested all three methods so you don’t have to guess which one gives you the best texture. And yes, I’ve included my secret for getting that restaurant-quality crispiness without drying out the filling.
Perfect for busy weeknights when you need comfort food fast, but still want it to feel special. Let’s get that pot pie cooking right—no more mushy crusts or cold centers.
📚 In This Guide
- What You’ll Need
- Instructions
- Tips and Common Mistakes
What Youll Need
- ● Frozen pot pie – 1 box (typically 9–12 oz per serving, check label for size). Popular brands include Marie Callender’s, Banquet, or Stouffer’s.
- ● Oven – Conventional or convection (preheated to 375–425°F, depending on pie instructions).
- ● Baking sheet – 1 (light-colored metal preferred to avoid over-browning).
- ○ Aluminum foil – 1 small sheet (optional, for shielding edges if crust browns too fast).
- ● Oven mitts – 1 pair (those pies get steamy hot! 🔥).
- ● Knife or fork – 1 (to vent the crust—critical for avoiding soggy disasters).
- ○ Meat thermometer – 1 (optional but handy to check filling reaches 165°F).
- ○ Microwave – (Optional, for quick-thawing if short on time—follow package guidelines!).
- ○ Cooling rack – 1 (optional, to keep the crust crispy post-bake).
- ● Serving spoon/spatula – 1 (for scooping out that gooey, delicious filling).
Instructions for Cooking Frozen Pot Pie
You’re just minutes away from golden-brown perfection—let’s make that frozen pot pie taste homemade!
Preheat Your Oven for Even Cooking
Start by preheating your oven to 400°F. This high temperature is crucial for achieving that crispy, golden-brown crust we’re after. I always recommend using the middle rack position—it ensures even heat distribution so both the top and bottom crusts brown beautifully.
While the oven heats up, take your frozen pot pie out of the box but leave it in its aluminum tin. Don’t remove the plastic film yet—that comes later. This gives the pie a chance to start thawing slightly on the outside while the oven reaches temperature, which helps prevent the crust from cracking during baking.
Prepare the Pot Pie for Baking
Once your oven is fully preheated, remove the plastic film from the top of the pot pie. I like to use kitchen scissors for this—it gives you more control than trying to peel it off. Be careful not to tear the crust underneath. Some brands include a small vent in the film; if yours does, make sure to remove that plastic vent piece completely.
For extra crispiness, brush the top crust lightly with melted butter or olive oil. This isn’t required, but I’ve found it makes a noticeable difference in both color and texture. If you’re feeling fancy, you can even sprinkle a pinch of flaky sea salt on top for that bakery-fresh look and flavor.
Bake Until Golden and Bubbling
Place the pot pie on a baking sheet (this catches any potential spills) and put it in the preheated oven. Bake for 30-35 minutes if cooking from frozen, or 20-25 minutes if you’ve thawed it in the refrigerator overnight. You’ll know it’s done when the crust is deep golden brown and you can see the filling bubbling through the vent holes.
The baking sheet serves another purpose too—it helps the bottom crust crisp up by allowing heat to circulate underneath. About halfway through cooking, I like to rotate the baking sheet 180 degrees to ensure even browning, especially if your oven has hot spots. The pot pie is ready when the crust is crisp to the touch and the filling reaches 165°F in the center.
Rest and Serve for Best Results
This is the hardest part—you need to let your pot pie rest for 5-10 minutes after removing it from the oven. I know it’s tempting to dig right in, but this short rest allows the filling to thicken up. If you cut into it too soon, all that delicious gravy will run out onto your plate instead of staying with the filling where it belongs.
While it rests, the crust will also firm up slightly, making it easier to serve without falling apart. Use a sharp knife to cut through the crust cleanly. Each serving should have that perfect combination of flaky, buttery crust and steaming hot filling. The filling should be thick and creamy, with tender vegetables and meat that practically melts in your mouth.
Tips and Common Mistakes
Let me share the secrets that transform a basic frozen pot pie into something truly spectacular—crispy, golden, and irresistibly delicious!
Temperature Precision: That 400°F setting in Step 1 isn’t arbitrary—it’s the sweet spot for achieving maximum crust crispiness without burning. I’ve tested this extensively, and anything lower gives you a soggy bottom while higher temperatures risk burning before the filling heats through. Use an oven thermometer to verify your oven’s accuracy, as many run 25-50°F hotter or cooler than their dial indicates. The middle rack position mentioned in the instructions is equally crucial—it provides the perfect balance of direct and indirect heat for even browning on both top and bottom crusts.
Crispiness Hack: Don’t skip the melted butter or olive oil brush in Step 2! This simple technique creates that bakery-quality sheen and extra crunch we all love. I like to use a pastry brush for even coverage, making sure to get right up to the edges where the crust meets the tin. For next-level flavor, try mixing the melted butter with a tiny pinch of garlic powder before brushing—it adds a subtle depth that makes people wonder what your secret is. The optional flaky sea salt sprinkle mentioned in the instructions really does make a noticeable difference in both texture and flavor.
Baking Sheet Strategy: The baking sheet in Step 3 serves two critical purposes beyond just catching spills. First, it elevates the pot pie slightly, allowing hot air to circulate underneath for that coveted crispy bottom crust. Second, it acts as a heat distributor, preventing hot spots from burning one side. When you rotate the sheet halfway through the 30-35 minutes (or 20-25 minutes for thawed pies), you’re ensuring perfectly even browning. I’ve found that dark metal baking sheets work best for this—they absorb and radiate heat more efficiently than light-colored or insulated sheets.
Resting Period Importance: Those 5-10 minutes of resting time in Step 4 might feel like torture when you’re hungry, but they’re absolutely non-negotiable. The filling continues to thicken as it cools slightly, and the crust firms up just enough to hold its shape when sliced. I like to use this time to set the table or prepare a simple side salad. If you’re serving a crowd, you can keep the pot pie warm in a 200°F oven during the resting period—just don’t let it go longer than 15 minutes total, or the crust may lose its crispness.
Pro Tips for Cook Frozen Pot Pie
- Let me share the secrets that transform a basic frozen pot pie into something truly spectacular—crispy, golden, and i…
- Temperature Precision: That 400°F setting in Step 1 isn’t arbitrary—it’s the sweet spot for achieving maximum crust c…
- Crispiness Hack: Don’t skip the melted butter or olive oil brush in Step 2! This simple technique creates that bakery…
Frequently Asked Questions
Got questions about cooking your frozen pot pie to perfection? Here are the answers to the most common queries—so you can skip the guesswork and dig into that flaky, golden goodness!
How long do I cook a frozen pot pie in the oven?
Most standard 9-10 oz pot pies bake at 400°F for 30–40 minutes (or until the crust is golden and the filling bubbles at 165°F). Larger family-sized pies may need 50–60 minutes. Always check the package—ovens vary!
Can I microwave a frozen pot pie instead?
Yes, but the crust won’t be crispy! Microwave on high for 3–5 minutes (remove plastic first), then let it rest for 2 minutes. For a slightly better texture, finish with 2–3 minutes in a toaster oven.
Why is my pot pie soggy on top?
Sogginess usually means steam got trapped. Fix it by:
- Poking 2–3 vent holes in the crust before baking.
- Baking on the middle rack (not too close to the top).
- Avoiding foil—it traps moisture!
Do I need to thaw a frozen pot pie before cooking?
Nope! Cooking from frozen ensures the crust stays crisp and the filling heats evenly. Thawing can make the crust gummy. Just add 5–10 extra minutes if your pie is rock-solid.
What’s the best way to reheat leftover pot pie?
For crispy results, reheat in the oven at 350°F for 10–15 minutes (cover with foil to prevent over-browning). Microwaving? Use 50% power in 1-minute bursts to avoid a rubbery crust.
Cooking a frozen pot pie doesn’t have to be a guessing game—just follow the right steps for a golden crust and perfectly heated filling every time! 🍽️ Whether you’re using an oven, air fryer, or microwave, the key is patience and a watchful eye. Now that you’ve got the know-how, pick your favorite flavor, preheat your appliance, and get ready to enjoy a hearty, homemade-tasting meal in minutes. Hungry for more easy dinner hacks? Check out our guide on quick comfort foods to keep the cozy meals coming!

Trained in classic French technique but raised on slow-cooked ribs and spicy rubs, she blends culinary skill with smoke and soul.
- Recipe for Boneless Cross Rib Roast: Slow-Roasted Beef with Herb Crust - October 3, 2026
- Hamburgers in Sauce Recipe Crock Pot: Slow-Cooked Savory Delight - October 3, 2026
- Sanjeev Kapoor Egg Biryani Recipe: Fragrant Spiced Rice With Boiled Eggs - October 3, 2026