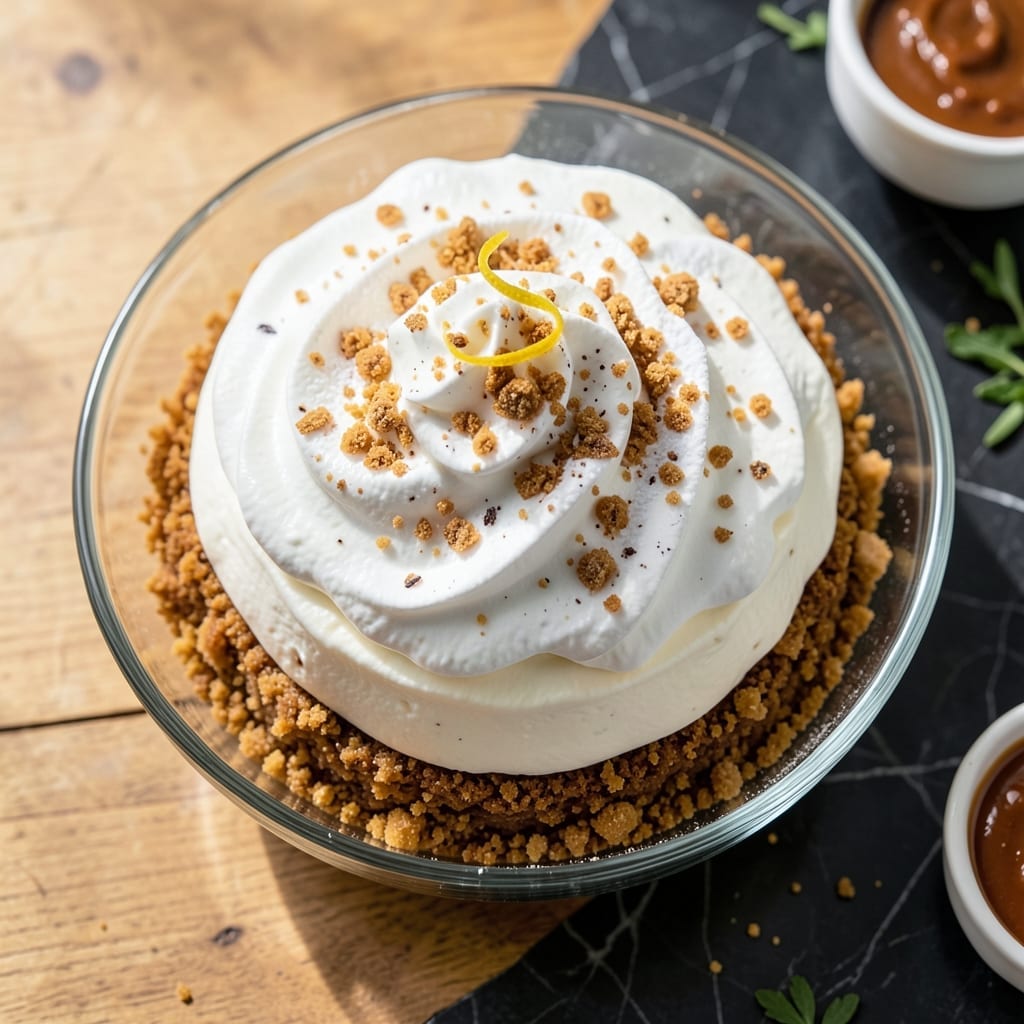
This no-bake cheesecake delivers light and fluffy perfection without turning on your oven. I developed this recipe after one too many failed attempts at traditional cheesecake in my tiny Boston kitchen.
The secret lies in the Cool Whip, which creates an airy texture that’s impossible to achieve with cream cheese alone. It comes together in 20 minutes, then sets in the fridge while you handle the rest of your day.
You’ll end up with a dessert that’s creamy yet stable, with a graham cracker crust that stays crisp. It slices cleanly and serves beautifully for gatherings or quiet nights in.
Perfect for summer or when you need a stress-free treat. The chilling time is the hardest part.
Ingredients for Cool Whip No Bake Cheesecake
Simple ingredients, no oven required. Light, fluffy, and totally foolproof dessert.
| Ingredient | Amount | Notes |
|---|---|---|
| Graham Cracker Crumbs 🍪 | 1 ½ cups | Fine crumbs preferred |
| Granulated Sugar 🍚 | ¼ cup | For sweetening crust |
| Unsalted Butter 🧈 | ½ cup | Melted for binding |
| Cream Cheese 🧀 | 16 oz | Full-fat, softened to room temperature |
| Powdered Sugar 🍚 | 1 cup | Sifted for smoothness |
| Vanilla Extract 💧 | 1 tsp | Pure extract preferred |
| Cool Whip 🥣 | 8 oz | Thawed frozen topping |
| Lemon Juice 🍋 | 1 tbsp | Freshly squeezed for brightness |
| Salt 🧂 | ¼ tsp | Fine sea salt |
| Fresh Strawberries 🍓 | 1 lb | Hulled and sliced for topping |
[recipe_ingredient_scaler]
The cream cheese is non-negotiable—Philadelphia brand is my go-to for consistency. Don’t skimp on the full-fat version here (trust me on this one). Grahams should be fresh, not stale—check the date on the box. I grab mine from Trader Joe’s or the baking aisle at Stop & Shop. Butter? Any unsalted works, but I always keep Cabot on hand.
No Cool Whip? Homemade whipped cream works, but it won’t hold as well. Swap graham crackers for Digestive biscuits or vanilla wafers—same amount, different flavor. Powdered sugar can be tricky to measure, so spoon and level for accuracy. If you hate strawberries, any berry or even cherries will do (or skip the topping entirely).
This keeps beautifully in the fridge for 4-5 days. Freezing? Not ideal—the texture gets grainy. But it’s so quick to make, you’ll probably eat it all before that’s an issue. Cover with plastic wrap pressed right on the surface to prevent a skin from forming.
Why You’ll Love This Recipe
- No Oven Needed: I just mix, chill, and serve—no baking required, which is a lifesaver in summer.
- Creamy Dreamy Texture: The cream cheese and Cool Whip blend into this light, airy filling that melts in your mouth.
- Potluck Hero: Honestly, I bring this to every gathering and it’s always the first thing gone.
- Budget Friendly: Between us, graham cracker crumbs and Cool Whip keep costs low while tasting like a million bucks.
Step-by-Step Instructions for No Bake Cheesecake
Here’s the method. Simple, tested, and it works every time without turning on your oven.
Step 1: Prepare the Graham Cracker Crust
Combine the 1.5 cups Graham Cracker Crumbs with the 0.25 cup Granulated Sugar in a medium bowl. Pour in the 0.5 cup Unsalted Butter (melted) and stir until the mixture resembles wet sand and holds together when pressed.
Press the crust mixture firmly into the bottom of a 9-inch springform pan or pie dish using a measuring cup or the bottom of a glass. I like to press it up the sides slightly for a more traditional cheesecake look. Chill in the refrigerator while you prepare the filling—this helps set the crust and prevents it from crumbling when you add the filling.
Step 2: Whip the Cream Cheese Filling
In a large mixing bowl, beat the 16 oz Cream Cheese until completely smooth and free of lumps. This step is crucial—lumps in the cream cheese will carry through to your final dessert, so take your time here.
Add the 1 cup Powdered Sugar, 1 tsp Vanilla Extract, 1 tbsp Lemon Juice, and 0.25 tsp Salt. Beat on medium speed for 2-3 minutes until light and fluffy. The mixture should be pale and have a silky texture. This is where the magic happens—the air incorporated here gives your cheesecake that light, cloud-like consistency.
Step 3: Fold in the Cool Whip
Gently fold the 8 oz Cool Whip (thawed) into the cream cheese mixture using a spatula. Make sure to scrape the bottom and sides of the bowl to incorporate all the filling. The key here is to be gentle—you don’t want to deflate the Cool Whip, which gives the dessert its airy texture.
The filling should be smooth, creamy, and spreadable. If it looks slightly lumpy, don’t worry—just keep folding gently until it comes together. This mixture will be lighter in color and have a mousse-like consistency, which is exactly what you want for that perfect no-bake cheesecake texture.
Step 4: Chill and Set
Spoon the filling over the chilled crust and spread it evenly with the back of a spoon or an offset spatula. Tap the pan gently on the counter a few times to remove any air bubbles and ensure a smooth surface.
Refrigerate for at least 4 hours, but overnight is even better. This chilling time is non-negotiable—it allows the filling to set properly and the flavors to meld together. When it’s ready, the cheesecake should hold its shape when sliced and have a firm yet creamy texture.
Step 5: Top with Fresh Strawberries
Just before serving, hull and slice the 1 lb Fresh Strawberries. Arrange them over the top of the chilled cheesecake in a single layer or create a decorative pattern. The strawberries add a fresh, fruity contrast to the rich creaminess of the cheesecake.
For best results, add the strawberries right before serving to keep them from releasing too much juice into the filling. Slice and serve immediately. Each slice should have a perfect balance of buttery crust, creamy filling, and juicy strawberries.
Pro Tips For Making Cool Whip No Bake Cheesecake
- Room Temp Cream Cheese: Pull your cream cheese out 2-3 hours before starting—cold blocks blend into lumps, and nobody wants chunky cheesecake filling.
- Press Crust Hard: Use a glass to compact the graham cracker crust into the pan, and refrigerate it for 15 minutes before adding filling. I learned this the hard way after my first crust turned to crumbs.
- Skip the Overmixing: Fold the Cool Whip in by hand with a spatula, just until combined. Overbeating deflates the air and leaves you with a dense, sad cheesecake.
- Chill Overnight: Sounds tedious, but a full 8 hours in the fridge sets the texture perfectly—cutting into it early just makes a gooey mess.
Make-Ahead Tips for This Recipe
Overnight Prep
Mix the crust and filling the night before, then refrigerate. The 4-hour minimum chill becomes effortless when you prep after dinner. I often assemble this at 10 PM and wake up to a ready dessert. The crust stays crisp, and flavors deepen overnight. 💡
Crust First Strategy
Make the graham cracker crust in the morning and refrigerate it while you work. When you’re ready to finish, just whip the filling and combine. This splits the 20-minute active prep into two manageable chunks.
Individual Servings
Press crust into mason jars or small ramekins for grab-and-go treats. Layer with filling and chill. Perfect for potlucks or portion control. Each 4-oz jar serves one neatly.
Topping Prep
Wash and slice strawberries up to 8 hours ahead. Store in an airtight container with a paper towel to absorb moisture. Add to the cheesecake just before serving to keep them fresh and vibrant.
Equipment Hack
Use a springform pan for easy release, but a pie dish works too. Line with parchment for no-stick removal. I always keep 9-inch pans on hand for desserts like this.
Make-Ahead Confidence
This recipe holds beautifully for 2 days in the fridge. The texture stays light, and the crust doesn’t soften. Cover tightly with plastic wrap pressed directly on the surface. ❄️
Nutrition Facts
Frequently Asked Questions
Can I use a different crust?
Swap graham crackers for vanilla wafers or Digestive biscuits using the same measurements. For a nutty twist, try crushed pecans or almonds mixed with melted butter.
How far ahead can I make this?
It keeps well for 2 days in the fridge. For best texture, add toppings just before serving. The crust stays crisp if covered tightly with plastic wrap.
Why is my filling runny?
This usually means it needs more chilling time. Ensure you’ve refrigerated for at least 4 hours. If it’s still soft, your cream cheese might not have been fully softened before mixing.
Can I make this dairy-free?
Yes! Use dairy-free cream cheese and Cool Whip alternatives. For the crust, substitute vegan butter. Check labels to ensure all ingredients are plant-based.

Trained in classic French technique but raised on slow-cooked ribs and spicy rubs, she blends culinary skill with smoke and soul.
- Recipe for Oven Baked Halibut: Buttery White Fish with Zesty Lemon Topping - October 3, 2026
- Meatball Curry Recipe Kerala Style: Coconut-Spiced Gravy With Tender Bites - October 3, 2026
- Recipe for Curried Tofu: Aromatic Spices With Crispy Edges - October 3, 2026